background image

EN

DIGITAL  

VOICE RECORDER

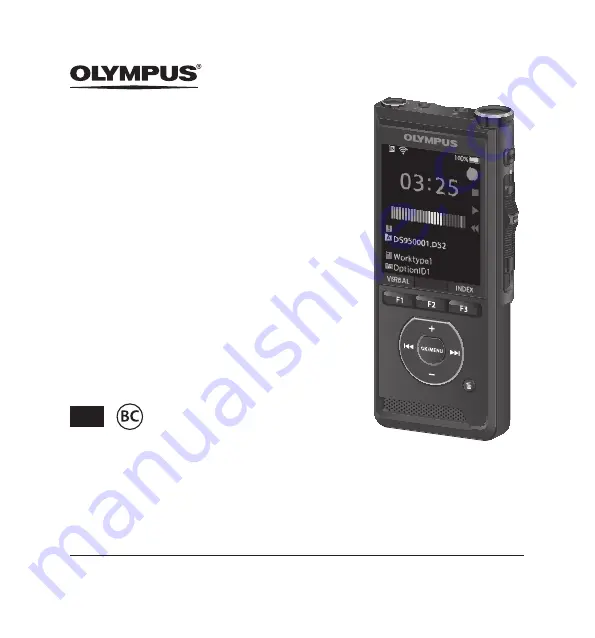
DS-9500

DS-9000

INSTRUCTIONS

Thank you for purchasing an Olympus digital voice recorder.
Please read these instructions for information about using the product correctly and safely.
Keep the instructions handy for future reference.

To ensure successful recording, we recommend that you test the record function and volume before use.

Содержание DS-9500

Страница 1: ...ng an Olympus digital voice recorder Please read these instructions for information about using the product correctly and safely Keep the instructions handy for future reference To ensure successful r...

Страница 2: ...1 Hands free recording 22 Recording monitor 22 Playback 23 Erasing 25 Erasing files 25 Partially erasing a file 27 3 Advanced operations Displaying file information 28 Device lock function 29 Setting...

Страница 3: ...manual NOTE Describes precautions and operations that should be absolutely avoided in using the voice recorder TIP Describes useful information and hints that will help you getting the most out of you...

Страница 4: ...29 P 46 Authentication system via password Getting started s Large color LCD display s Index mark function which is useful to search particular points in the dictation files P 35 s Verbal comment fun...

Страница 5: ...R NEW button LED indicator light Slide sREC 4STOP PLAY 7REV switch Docking station A docking station is included with only the DS 9500 OK MENU button 9 fast forward button k erase button POWER ON OFF...

Страница 6: ...1 EN Names of parts Names of parts 7 6 5 3 4 3 4 3 1 2 1 2 1 2 7 8 0 9 3 1 2 Display in the file list Display in the recording mode Display in the playback mode Display in the device information Displ...

Страница 7: ...le information area File lock Speech recognition Worktype Option item Author 8 Current playback time 9 File length 0 Current position Playback position bar Device information area etc Recording mode M...

Страница 8: ...has been left unattended for a long time P 9 Battery indicator The battery indicator on the display will decrease as the battery loses power 100 20 White 19 1 Red 0 When the battery indicator turns re...

Страница 9: ...e 1 Connect the AC adapter to the docking station 2 Firmly press the recorder all the way into the docking station as shown in the illustration 2 1 CHARGE indicator light The CHARGE indicator light tu...

Страница 10: ...rging the battery via the USB cable connection may not be successful depending on the power capacity of the USB port in your PC Use the AC adapter instead Do not set or remove the recorder from the do...

Страница 11: ...e recorder via the docking station Always turn off the recorder before you connect power Detecting abnormal voltage If the recorder detects a DC power voltage outside the allowed voltage range 4 4 5 5...

Страница 12: ...mory card confirm that no necessary data is stored on the memory card beforehand Initialization completely erases the existing data on the memory card Memory cards formatted initialized by another dev...

Страница 13: ...or at an angle could damage the contact area or cause the memory card to jam If the memory card is not inserted all the way into the slot data may not be written properly When an unformatted memory ca...

Страница 14: ...ss the or button to set You can select the order of the Month Day and Year by pressing the F2 M D Y button while setting them 3 Press the OK MENU button to complete the setting The clock will start fr...

Страница 15: ...NU button while the voice recorder is in stop mode 2 Press the or button to select Device menu tab Device menu tab You can change the menu display by moving the settings tab cursor 3 Press the OK MENU...

Страница 16: ...ton to select the desired file 6 Press the OK MENU or 9 button Select a file using the filter function 1 When the file list display screen appears press the F2 FILTER button 2 Press the or button to s...

Страница 17: ...ER button to select the folder 3 Press the OK MENU or 9 button 4 While the file is being displayed press the 9 or 0 button Current folder and file name NOTE There is no file list display function for...

Страница 18: ...n the middle of the previously recorded file starting from the chosen recording position The original file will be kept P 21 By default the RECORD function is configured to record using the overwrite...

Страница 19: ...top recording If you want to append additional recordings to the same file move the slide switch to the REC s position again NOTE During recording a beep will sound whenever the remaining recording ti...

Страница 20: ...point you want to start overwriting NOTE A file s creation time and date will be updated to the time and date the file was last edited You cannot select a recording mode different from the one set on...

Страница 21: ...inserting the additional recording Insert rec will appear on the display The LED indicator lights in blue aElapsed time during insert recording 4 Move the slide switch to the STOP 4 position to stop...

Страница 22: ...osition before connecting it to the docking station for hands free recording To record with better quality using the hands free recording function set the microphone sensitivity to High P 38 or use an...

Страница 23: ...de switch to the PLAY position to start playback The LED indicator lights in green aElapsed playback time 2 Press the or button to adjust the volume The volume can be adjusted within a range from 00 t...

Страница 24: ...yback Playback at normal speed Slow play slow playback Playback speed slows down 50 and Slow play will be displayed Fast play fast playback Playback speed becomes faster 50 and Fast play will be displ...

Страница 25: ...will start Erased is displayed when the file is erased Erasing a file from the file list display screen 1 When the file list display screen appears press the k erase button 2 Select the file you want...

Страница 26: ...ase all All files in a folder can be erased simultaneously Erase one file Erase one file 4 Press the OK MENU button 5 Press the button to select Start then press the OK MENU button The display changes...

Страница 27: ...d the ending point of the partial erase 4 Press the k erase button to confirm the erasure The display changes to Partial erasing and erasing will start When Partial erase completed appears on the disp...

Страница 28: ...splay INFO The F3 button becomes INFO when in stop mode in the case of the DS 9000 and when the New file screen is displayed in the case of the DS 9500 Displaying file information Advanced operations...

Страница 29: ...2 to enter all four digits Pressing the k erase button at any time will erase the last entry and move the cursor to the previous entry to the left Authentication halt mode If the password does not ma...

Страница 30: ...Worktypes can be registered and uploaded to the recorder using the ODMS software Each Worktype can have up to 10 optional items associated with it Worktypes and Optional Items can be used on the reco...

Страница 31: ...ent Locating a Verbal Comment 2 When playing back a file press and hold the 9 or 0 button The recorder stops for 1 second when it reaches the Verbal Comment The verbal comment part has a different col...

Страница 32: ...folder on your own PC Wireless Access Point ODMS Dictation Module ODMS Transcription Module When you are traveling outside of your office you can connect to your smartphone via tethering and send your...

Страница 33: ...e OK MENU or 9 button 4 Press the or button to select Select a network then press the OK MENU or 9 button Access points configured in ODMS and detected access points available for connection are displ...

Страница 34: ...l to Folder The dictation file will be sent to the folder specified in ODMS by E mail Addresses which had been previously registered will be displayed Select the address which you wish to send to E ma...

Страница 35: ...recorder stops for 1 second when it reaches the index mark Clearing an index mark 1 Select a file in which index marks you want to erase are contained 2 Press the 9 or 0 button to select the index mar...

Страница 36: ...rs press the OK MENU button while the voice recorder is in stop mode The menu will appear on the display 2 Press the or button to select the tab containing the item you want to set You can change the...

Страница 37: ...skip Power save Time date USB class Reset settings Format 5 Press the OK MENU or 9 button Move to the setting of the selected item 6 Press the or button to change the setting 7 Press the OK MENU butt...

Страница 38: ...ing erased will appear on the display Unlock Unlocks the file and allows it to be erased Menu items Worktype The Worktype information of the recorded or uploaded files can be edited with the menu sett...

Страница 39: ...the slide switch to the REC s position to start recording When the sound volume is lower than the preset actuation sound level recording automatically stops after 1 second approximately and Standby f...

Страница 40: ...language for the recorder s user interface e tina Dansk Deutsch English Espa ol Fran ais Italiano Nederlands Polski Svenska The languages available may vary depending on the country region where the p...

Страница 41: ...including locked files For details see Formatting the memory card Format P 44 Cue Rev The playback sound of Cue and Review operation and Cue and Review speed can be set 1 Select Sound or Speed Sound...

Страница 42: ...e Worktype information that has been registered for the file Select from Worktype list You can re select Worktype from the Worktype list 1 Press the or button to select the Worktype 2 Press the OK MEN...

Страница 43: ...oard window and makes character selection available Entry is performed by insert entry When the character in the Input position has already been finalized the character after the cursor will move one...

Страница 44: ...ed by the recorder must be formatted before they can be used with the recorder 1 Select Format at the Device menu screen 2 Press the OK MENU or 9 button 3 Press the or button to select SD card option...

Страница 45: ...amage the data or the memory card Remove the memory card Remove the battery Formatting the memory card will erase all the stored data including locked files When an unformatted memory card is inserted...

Страница 46: ...recording and for when playback to any of off red green blue orange and yellow Customizing the recorder Device Security You can customize adjust set configure various settings related to the recorder...

Страница 47: ...ll files Finished files Programmable Buttons You can change the allocated functions for the Programmable Smart Buttons F1 F2 F3 buttons the NEW button and the Slide Switch New and Slide Switch functio...

Страница 48: ...convert files from DSS to WAV when downloading E mail Profile DS 9500 only You can customize adjust set configure various settings related to the recorder s E mail E mail Profile List You can configu...

Страница 49: ...er turnaround Identify your dictations throughout the workflow with Author ID Worktypes and Option Item 2 Efficient Document Creation Various playback functionality for efficient transcription Support...

Страница 50: ...compatible machines will not be covered under the operational warranty Macintosh version does not support voice recognition software For information on the latest OS upgrades compatibility visit the O...

Страница 51: ...me PC s may not supply sufficient power and the recorder fails to connect Refer to your PC user s manual regarding the USB port on your PC Do not connect the recorder to a PC by using a USB hub Make s...

Страница 52: ...rder s drive icon for this recorder displayed on the desktop to the Recycle Bin icon 2 Confirm that the record indicator light turns off before disconnecting the USB cable NOTE NEVER remove the memory...

Страница 53: ...l for disinfection 70 v v The docking station cannot be cleaned with alcohol disinfectant solution 1 Soak a soft cloth in the disinfectant solution and then wring the cloth to prevent dripping 2 Wipe...

Страница 54: ...ining memory Erase unnecessary files or insert another memory card P 13 P 25 Folder full The maximum number of files has been reached max 200 files per folder Erase unnecessary files P 25 Erasing erro...

Страница 55: ...nlock the file from the file menu P 38 The memory card is locked Unlock the memory card No playback tone heard The earphone is connected Unplug the earphones to use the internal speaker The volume lev...

Страница 56: ...ed file Wrong recording media or folder Switch to the correct recording media or folder P 16 P 18 P 40 Cannot connect to a PC Sometimes a connection cannot be made with some PCs running Windows XP Vis...

Страница 57: ...optional s Foot switch RS31H Connect to the USB docking station with DS 9500 DS 9000 for hands free transcription s Telephone pickup TP8 Earphone type microphone can be plugged into your ear while pho...

Страница 58: ...or any other reason is excluded Trademarks and registered trademarks SD and SDHC are trademarks of SD Card Association Wi Fi is a registered trademark of the Wi Fi Alliance The Wi Fi CERTIFIED logo i...

Страница 59: ...to the Olympus Dictation Management System in Windows environment The word DSS Player is used to refer to the DSS Player for Mac in Apple Macintosh environment This manual shows the English on screen...

Страница 60: ...order Do not disassemble repair or modify the unit yourself Use SD and SDHC memory cards only Never use other types of memory cards If you accidentally insert another type of memory card into the reco...

Страница 61: ...t time or if it has not been used for a long period Rechargeable batteries have limited lifetime When the operating time becomes shorter even if the rechargeable battery is fully charged replace it wi...

Страница 62: ...fire may occur The docking station CR21 is designed specifically for Olympus DS 9500 DS 9000 Do not use with other products AC adapter f Danger The supplied power cord is specific for the AC adapter...

Страница 63: ...caution is not followed fire overheating or electric shock may occur Make sure to hold the plug when removing the power plug from the outlet Do not bend the cord excessively or put heavy objects on it...

Страница 64: ...for the use of this technology Communication may be affected if there are reinforced structures metal or concrete between the device and the Wi Fi access point Communication performance may be affect...

Страница 65: ...put 320 mW 8 speaker 4 Maximum headphone output 150 mV conforms to EN 50332 2 4 Wireless standards DS 9500 only IEEE802 11 b g n a ac 56 mW or less Firmware Ver 1 0 or later The communication speed an...

Страница 66: ...Hz to 15000 Hz 64kbps Mono 50 Hz to 13000 Hz 4 When recording with built in microphone 50 Hz to 15000 Hz The upper and lower limit values of the frequency response depend on each recording format and...

Страница 67: ...8 GB 23 5 h 47 h MP3 format Recording media 128kbps Stereo 64kbps Mono Internal memory 2 GB 36 h 72 h SD card 32 GB 520 h 1040 h 16 GB 260 h 520 h 8 GB 130 h 260 h The above are the standard times and...

Страница 68: ...e equipment into an outlet on a circuit different from that to which the receiver is connected Consult the dealer or an experienced radio TV technician for help Use only Olympus supplied cable or AC a...

Страница 69: ...customers in USA Declaration of Conformity Model Number DS 9500 DS 9000 Trade Name OLYMPUS Responsible Party OLYMPUS AMERICA INC Address 3500 Corporate Parkway P O Box 610 Center Valley PA 18034 0610...

Страница 70: ...ce Italy Denmark Switzerland Portugal Norway Sweden Finland Spain Czech Republic Hungary Poland Iceland Bulgaria Israel Latvia Lithuania Estonia Russia South Africa Some phone service providers do not...

Страница 71: ...ith Directive 2014 53 EU The full text of the EU declaration of conformity is available at the following internet address http www olympus europa com SAR testing has been done at a distance of 0 cm fr...

Страница 72: ...olympus com http www olympusamerica com OLYMPUS AMERICA INC Premises Wendenstrasse 14 18 20097 Hamburg Germany Tel 49 40 23 77 3 0 Goods delivery Modul H Willi Bleicher Str 36 52353 D ren Germany Let...

Отзывы: