background image

27

2

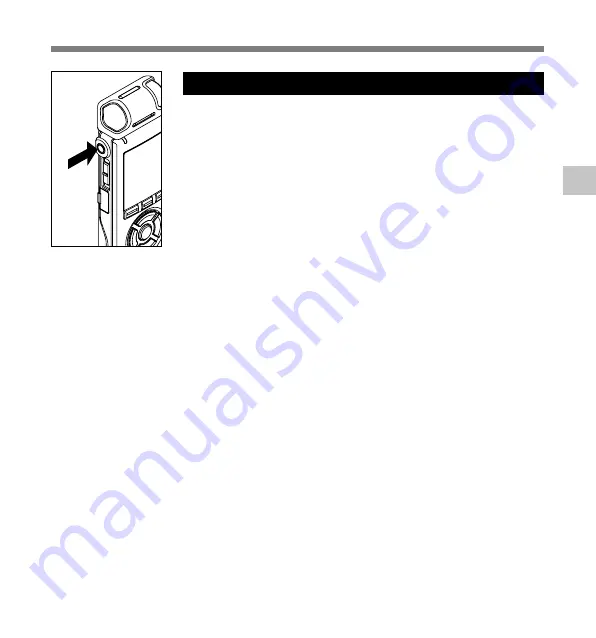
To EAR
(earphone)
jack

Recor

ding

Recording

Listening While Audio is Recorded

If you start recording after inserting the earphone into the EAR jack
on the recorder, you can hear the sound being recorded. The sound
volume on the recording monitor can be adjusted by pressing the
VOLUME (+) or VOLUME (–) button.

Connect the earphone to the EAR jack on the recorder.

After recording has started, you can hear the sound being

recorded through the earphone. If the earphone is connected,
no sound will come from the speaker.

..........................................................................................................

Notes

• Recording level cannot be controlled using the volume button.
• When using the earphones, do NOT set the volume too high. Listening at

very high volume may lead to hearing loss.

• Do not place earphones near a microphone as this may cause feedback.

Содержание DS-61

Страница 1: ...an Olympus Digital Voice Recorder Please read these instructions for information about using the product correctly and safely Keep the instructions handy for future reference To ensure successful rec...

Страница 2: ...d service station or any other reasons is excluded from the Olympus s liability Trademarks IBM and PC AT are the trademarks or registered trademarks of International Business Machines Corporation Micr...

Страница 3: ...play and Sound Functions Menu Setting Using the Recorder onYour PC Managing Files on Your PC DSS Player Expanded Functions Importing content for listening on the recorder Enjoy Audible Content Other P...

Страница 4: ...layback Playing 46 Set Skip Space Skip Space 50 Changing the Playback Speed Play Speed 52 Select Play Mode Play Mode 55 How to begin segment repeat playback 57 Noise Cancel Function Noise Cancel 59 Se...

Страница 5: ...S Player Expanded Functions Upgrade Function 125 Using Voice Recognition Software 127 Joining Files 135 Splitting Files 137 Menu Setting of this Recorder 139 10 Importing Content for Listening on the...

Страница 6: ...such as inside a closed automobile under direct sunlight or on the beach in the summer Do not store the recorder in places exposed to excessive moisture or dust Do not use organic solvents such as alc...

Страница 7: ...the product repair performed by the third party other than Olympus or an Olympus authorized service station or any other reasons is excluded from the Olympus s liability Batteries Warning Batteries sh...

Страница 8: ...en dropped or otherwise damaged the AC adapter is dropped in water or if water metal flammable substances or other foreign objects get inside it you notice anything unusual when using the AC adapter s...

Страница 9: ...ecording or ST SP Stereo Standard Recording and three types of monaural recording modes including HQ High Quality SP Standard Recording and LP Long tern Recording P32 1 Getting Started The recording l...

Страница 10: ...produce a natural realistic experience without degrading sound quality P63 Fast forward and rewind are possible at set intervals P48 Comes with DSS Player software P102 If you transfer voice files rec...

Страница 11: ...Earphone jack MIC SENSE Microphone Sensitivity switch PC USB terminal q Battery cover w Power jack e Built in speaker 1 Exclusive stereo microphone ME55S 2 MIC Microphone REMOTE jack 3 Built in monau...

Страница 12: ...ndicator VCVA Variable Control Voice Actuator indicator Microphone sensitivity indicator Battery indicator Timer indicator Alarm indicator Low Cut Filter indicator Play Mode indicator 1 2 4 7 8 9 0 3...

Страница 13: ...he direction indicated by the arrow and turn the power on If the hour indicator flashes in the display see Setting Time Date Time Date P17 Replacing batteries The battery indicator on the display chan...

Страница 14: ...echargeable batteries from Olympus can be used in the recorder P167 Ni MH Rechargeable Battery Inserting Batteries Using the AC Adapter Inserting Batteries Warning Always stop recording before connect...

Страница 15: ...ume function will bring the recorder back to the stop position in memory before power was turned off Turning Off the Power Slide the POWER HOLD switch in the direction indicated by the arrow for 0 5 s...

Страница 16: ...tches will be disabled This feature is useful when the recorder has to be carried in a bag or pocket Notes If you press any button in HOLD mode the clock display flashes for 2 seconds but it will not...

Страница 17: ...the or button to set You can choose between 12 and 24 hour display by pressing the DISPLAY button while setting the hour and minute Example 5 45 P M 5 45 PM 17 45 You can choose the order of the year...

Страница 18: ...will start from the set date and time Press the OK button according to the time signal Notes If you press the OK button during the setup operation the recorder will save the items that were set to th...

Страница 19: ...ased from an Audible web site P155 by using the Audible Manager and files transferred to the recorder P156 are saved in this folder in ACELP MP3 format A Podcast folder for saving files distributed P1...

Страница 20: ...Press the FOLDER button to switch folders Press the FOLDER button while the recorder is stopped Every time the Folder button is pressed it cycles through Folder A through Folder E and the Audible Mus...

Страница 21: ...ntents folder Selecting Chapter 1 folder Selecting Contents01 file 9 or OK button Opens the selected folder file 0 button Returnstotheupperfolder LIST button Returns to the upper folderwhileinthelistd...

Страница 22: ...File number A serial number automatically assigned by a Digital Voice Recorder User ID The name that has been set on the Digital Voice Recorder The default name on the Digital Voice Recorder is DS71 o...

Страница 23: ...ect the exclusive stereo microphone to the recorder s MIC REMOTE jack Monaural recording with the built in microphone Even if the exclusive stereo microphone is unplugged recordings can be still made...

Страница 24: ...ecorder is pressed the recorder starts recording with the microphone that has been connected to the exclusive remote control Recording will not be made if a microphone is not connected to the exclusiv...

Страница 25: ...dicator E F bar The bar indicates remaining memory d Level meter varies according to the sound volume being recorded Every time the DISPLAY button is pressed while recording Recording elapsed time and...

Страница 26: ...d press the REC button an Illegal Folder message will flash Select a folder from A through E and start recording again To ensure recording from the beginning start speaking after you see the red recor...

Страница 27: ...e VOLUME or VOLUME button Connect the earphone to the EAR jack on the recorder After recording has started you can hear the sound being recorded through the earphone If the earphone is connected no so...

Страница 28: ...screen a VCVA Variable Control Voice Actuator indicator 7Press the OK button to complete the setup screen If the 0 button is pressed the setting will be canceled and it will return to the menu Using...

Страница 29: ...ay The record play indicator light glows red when recording starts and flashes when recording pauses Using theVariable ControlVoice Actuator VCVA 9 8 3 5 4 1 2 Adjust the initial VCVA level DS 71 1Whi...

Страница 30: ...surrounding noise is loud the starting sensitivity of the VCVA can be adjusted according to the recording situation To ensure successful recordings prior testing and adjustment of the start stop actua...

Страница 31: ...n to complete the setup screen If the 0 button is pressed the setting will be canceled and it will return to the menu 8Press the STOP button to close the menu If it returns to the menu screen during r...

Страница 32: ...pressed the setting will be canceled and it will return to the menu 5Press the STOP button to close the menu a Record mode indicator Press the STOP button while the recorder is stopped to check Remai...

Страница 33: ...ual Recording is performed by manually adjusting the recording level Auto Recording is performed by automatically adjusting the recording level This is useful for when you will be recording right away...

Страница 34: ...orded during OVER is displayed Adjust the recording level so that OVER is not displayed OVER may be displayed even when the indicator of the recording level meter does not reach or is over to the righ...

Страница 35: ...you either set the directional microphone P36 to Zoom or Narrow or use an ME12 dictation microphone sold separately P167 While the recorder is stopped or during recording slide the Mic Sense switch an...

Страница 36: ...Recording by an expansive stereo sound Off Disables this function 5Press the OK button to complete the setup screen If the 0 button is pressed the setting will be canceled and it will return to the me...

Страница 37: ...arrow or Wide the setting will remain active until it is switched to Off The directional microphone feature is designed to only function when used with the included microphone ME55S Please take note t...

Страница 38: ...be cancelled If it goes to the menu screen during recording move the cursor and the Low Cut Filter will be turned On Off according to the movement so you can check the effect with the recording monito...

Страница 39: ...he menu 6Press the STOP button to close the menu If it returns to the menu screen during recording press the 0 button to close the menu screen Set the Low Cut Filter LowCut Filter Set the Low Cut Filt...

Страница 40: ...ne enables sensitive stereo recording Stereo recording is available only in PCM DS 71only STXQ STHQ or STSP modes Highly sensitive noise cancellation monaural microphone ME52 This microphone is used t...

Страница 41: ...ld microphone VOLUME EAR ME EAR To MIC microphone jack To audio output terminal of other devices Recording from External Microphone or Other Devices Recording from External Microphone or Other Devices...

Страница 42: ...n 6Press the or button to select the item to set Select items you want to set from among On Off Day Time Rec Mode Folder and Mic Sense Select Finish to complete the setting and return to the preset nu...

Страница 43: ...erydayatthespecifiedtime Every week Make a recording at a set time on a specified day of the week Select Every week and press the OK or 9 button to move to the selection of Day Press the or button to...

Страница 44: ...the or button to select the folder in which the recording will be saved 2 Press the OK button to exit Folder selection Mic Sense setting Regardless of the recorder s microphone sensitivity setting P35...

Страница 45: ...time the timer recording will start directly after stopping the recorder Even if the power if turned off or the recorder is put on Hold timer recording will start at a specified time If three timer re...

Страница 46: ...to select a file If you want to return from the File display to the List display or go back from the List display to a higher level List display press the LIST button Playing Playing List display File...

Страница 47: ...on at any point you want to stop the playback Stop a file play back at any point Press the PLAY or OK button to start playing back from where it was stopped You can change the display patterns P88 The...

Страница 48: ...e next file Rewinding Press and hold the 0 button while the recorder is stopped If you release the button it will stop Press the PLAY or OK button to start playing back from where it was stopped a Fil...

Страница 49: ...e 9 button during playback slow playback or fast playback The next file is cued and playback starts at the previously set speed Press the 0 button during playback slow playback or fast playback The fi...

Страница 50: ...ip F Skip forward skip The recorder forwards a set space and starts playing back R Skip reverse skip The recorder rewinds a set space and starts playing back 5Press the OK or 9 button Start setting th...

Страница 51: ...ec Skip 30sec Skip 1min Skip 5min Skip 10min Skip 7Press the OK button to complete the setup screen If the 0 button is pressed the setting will be canceled and it will return to the menu Press the OK...

Страница 52: ...be retained The next playback will be at that speed Change playback speed setting You can change the playback speed setting for S Play and F Play 1 1 Changing the Playback Speed 1While the recorder is...

Страница 53: ...S Play x0 5 x0 625 x0 75 x0 875 F Play x1 125 x1 25 x1 375 x1 5 x2 0 If the recorder goes to the menu screen during playback move the cursor to change the playback speed accordingly 7Press the OK but...

Страница 54: ...STOP button to close the menu If the recorder goes to the menu screen during playback press the 0 button to close the menu screen As in Regular Play mode you can stop playback cue a file or insert an...

Страница 55: ...o select a desired play mode File Stop after playing back the current file File Repeat Play the current file repeatedly Folder Play files continuously in the current folder until the last file and sto...

Страница 56: ...e folder the recorder will start playing from the first file in the next folder When it comes to the end of the last file in the recorder End flashes for two seconds on the display and the recorder st...

Страница 57: ...he end position and repeat playback will start 3Press the button again at the position where you want to end segment repeat playback The Play message appears and repeat playback will start The recorde...

Страница 58: ...the 9 button Pressing the 9 button will release segment repeat playback and fast forward and cue to the beginning of the next file Press the 0 button Pressing the 0 button will release segment repeat...

Страница 59: ...in the following rotation High Low Off If the recorder goes to the menu screen during playback move the cursor to change playback sound accordingly 5Press the OK button to complete the setup screen I...

Страница 60: ...appear on the display a Noise Cancel indicator Noise Cancel Function 6 Noise Cancel Function Noise Cancel Notes If you set Noise Cancel to Low or High the setting remains valid until it s set to Off...

Страница 61: ...e turned on Off Voice Filter will be canceled If the recorder goes to the menu screen during playback move the cursor to change playback sound accordingly 5Press the OK button to complete the setup sc...

Страница 62: ...he 0 button to close the menu screen If it is set to On will appear on the display a Voice Filter indicator Set the Voice Filter 6 Notes Voice Filter is not available while Noise Cancel is set P59 The...

Страница 63: ...the cursor to change playback sound accordingly 5Press the OK button to complete the setup screen If the 0 button is pressed the setting will be canceled and it will return to the menu This recorder...

Страница 64: ...o On will appear on the display a EUPHONY indicator Increase the realistic sensation EUPHONY Notes The EUPHONY feature is not available while using fast playback slow playback P52 The EUPHONY feature...

Страница 65: ...or 9 button The Alarm setup process begins 4Press the or button to select a preset number Press the DISPLAY button to show the Day and the Start Time set for the preset number the cursor is pointing a...

Страница 66: ...ed only once at the specified time Everyday AlarmPlaybackwillbeperformedatthe specified time every day Every week Make aAlarm Playback at a set time on a specified day of the week Select Everyweek and...

Страница 67: ...nd Playback File setting 1 Press the or button to choose from No File Play File Select No File Play Sounds alarm only File Select Plays back a selected file after the alarm If File Select is chosen an...

Страница 68: ...lected for Alarm Playback it will not be automatically played when the alarm sounds If three alarm playback have the same starting times Preset 1 has the highest priority and Preset 3 has the lowest I...

Страница 69: ...3sec The first 3 seconds of a file will be played 5sec The first 5 seconds of a file will be played 10sec The first 10 seconds of a file will be played Off Disables this function 5Press the OK button...

Страница 70: ...ant to erase 3Press the ERASE button The Cancel indicator flashes 4Press the button to choose Erase 5Press the OK button The display changes to File Erase and erasing will start Erase Done is displaye...

Страница 71: ...FOLDER button to select the folder in which you want to erase all files 2Press the ERASE button twice The Cancel indicator flashes 3Press the button to choose All Erase 4Press the OK button The displ...

Страница 72: ...o read only will not be erased P75 If an action is not selected within eight seconds on the Cancel Erase or All Erase screens the recorder will return to stop status It may take over 10 seconds to com...

Страница 73: ...Temp Mark Index Marks and Temp Marks 1Locate the index or temp mark you want to clear 2Press the 9 or 0 button to select an index or temp mark to erase 2 1 Clearing an Index Mark or a Temp Mark Follo...

Страница 74: ...x or temp marks cannot be set or erased in a locked file P75 3Press the ERASE button while the index or temp number appears for approximately 2 seconds on the display The index or temp mark is erased...

Страница 75: ...ock 5Press the OK or 9 button The Lock setup process begins 6Press the or button to choose between On and Off On Locks the file and prevents it from being erased Off Unlocks the file and allows it to...

Страница 76: ...e setup screen 8Press the STOP button to close the menu a Erase lock indicator If a file is locked a lock indicator appears in the file list screen to conveniently distinguish important files from oth...

Страница 77: ...ss begins 4Press the or button to choose a folder for which you want to change the name 5Press the OK or 9 button Display folder names registered in the template a Current folder Changing Folder Names...

Страница 78: ...ss the or button to select the folder name in the template you want to change to 7Press the OK button to change the folder name If the 0 button is pressed the screen goes back to Step 4 without changi...

Страница 79: ...tton Show files in the current folder in a list 5Press the or button to choose the file you want to move it 6Press the OK button The cursor will flash to confirm that the file can be moved Rearranging...

Страница 80: ...e moved If there are more files to move repeat Steps 5 through 8 If the OK button is pressed for one second or longer file order rearrangement will close and the recorder will return to the File Move...

Страница 81: ...recorder all files will be removed and all function settings will return to defaults except date and time settings Transfer any important files to a computer before formatting the recorder If the reco...

Страница 82: ...mat Done displays when formatting ends Notes Never turn the power off or remove batteries during formatting because data may be corrupted It may take over 10 seconds to complete erasing Never format t...

Страница 83: ...d or longer The menu opens P97 99 2Press the or button to choose USB Class 3Press the OK or 9 button The USB Class setup process begins 4Press the or button to choose Audio Class 5Press the OK button...

Страница 84: ...the recorder in such a condition will result in the rapid consumption of batteries 5Press the OK button to complete the setup screen If the 0 button is pressed the setting will be canceled and it will...

Страница 85: ...the external input setting to Stereo for recording 1While the recorder is stopped press the MENU button for 1 second or longer The menu opens P97 99 2Press the or button to choose Ext Input 3Press th...

Страница 86: ...ding PCM ST XQ ST HQ ST SP The same audio picked up with a monaural microphone will be recorded on both the left channel Lch and the right channel Rch Monaural recording HQ SP LP Audio picked up with...

Страница 87: ...ess the MENU button for 1 second or longer The menu opens P97 99 2Press the or button to choose System Info 3Press the OK or 9 button Capacity Model Name will appear Every time the or button is presse...

Страница 88: ...ll switch every time the DISPLAY button is pressed in the File Display screen While in stop or playback mode When pressing Display the recorder will cycle through 1 to 3 1 1Playback elapsed time File...

Страница 89: ...memory bar audio input levels and start levels are displayed with graphic images Waiting is displayed when the VCVA trigger level has not been reached The audio input level display varies depending on...

Страница 90: ...oose between On and Off On Backlight is enabled Off Backlight is disabled 5Press the OK button to complete the setup screen If the 0 button is pressed the setting will be canceled and it will return t...

Страница 91: ...s begins 4Press the or button to choose between On and Off On LED light will be set Off LED light will be canceled 5Press the OK button to complete the setup screen If the 0 button is pressed the sett...

Страница 92: ...s 4Press the or button to set the contrast level You can adjust the LCD display contrast level from 1 to 12 5Press the OK button to complete the setup screen If the 0 button is pressed the setting wil...

Страница 93: ...ess begins 4Press the or button to select the item to set Select items you want to set from among On Off Speed and Volume 5Press the OK or 9 button to move to the respective setting For procedures for...

Страница 94: ...dance will be canceled 2 Press the OK button to exit On Off selection Speed setting 1 Press the or button to choose from Speed5 Speed4 Speed3 Speed2 and Speed1 2 Press the OK button to exit Speed sele...

Страница 95: ...ecorder is formatted P81 guidance data will also be erased and the feature will not be available in the future P122 Set the starting tune closing tune at the guidance Volume setting 6Press the OK butt...

Страница 96: ...ume3 Increase the volume of beeps Volume2 Return the volume of beeps to normal Volume1 Decrease the volume of beeps Off Deactivate beeps 5Press the OK button to complete the setup screen If the 0 butt...

Страница 97: ...tab 1 Press the 0 button for each item to move to a tab a Selected tab 2 Press the or button to move to the tab that contains the item you want to set 3 Press the OK or 9 button to move to the item yo...

Страница 98: ...button Moves to the setting of the selected item 4Press the or button to change the setting 5Press the OK button to complete the setup screen If the 0 button is pressed the setting will be canceled a...

Страница 99: ...99 6 Menu List Menu List is available for the DS 71 only...

Страница 100: ...100 6 Menu List Menu List...

Страница 101: ...101 6 Menu List Menu List Play Mode and Skip Space cannot be set in the Audible mode is available for the DS 71 only...

Страница 102: ...PC When you are downloading a file from the recorder or uploading a file to the recorder do not remove the USB cable even if the screen is indicating you can Data is still being transferred while the...

Страница 103: ...order even though the attribute of the recorder drive is shown as Read only by the operating system of the PC As the noise may cause adverse effects on electronics devices nearby the recorder unplug t...

Страница 104: ...ows Vista 500 MB or more 1 GB or more is recommended 50 MB or more 2x or faster CD ROM CD R CD RW DVD ROM drive Creative Labs Sound Blaster 16 or 100 compatible sound card Microsoft Internet Explorer...

Страница 105: ...included Software CD Installing Software 4The installation Language Selection dialog box opens Click the desired language to select it Applications included with DSS Player DSS Player Recorded voice f...

Страница 106: ...hich to install DSS Player Click Browse to find the desired installation folder To accept the default folder click Next Note If the installation folder does not exist a confirmation dialog box opens t...

Страница 107: ...rring to Connecting to Your PC P110 When you connect the recorder to your PC for the first time after installing DSS Player the recorder s driver will be installed automatically If the driver is insta...

Страница 108: ...elow Uninstalling Software Uninstalling Software 6Confirmation of Deleting the File Click the OK button to start uninstalling An additional message may appear if so read it carefully and follow the in...

Страница 109: ...Programs then Olympus DSS Player then click Help While DSS Player is running choose Contents from the Olympus DSS Player Help menu While DSS Player is running press F1 on the keyboard Search by Key w...

Страница 110: ...s opened a removable disk drive is displayed Connecting to Your PC Notes When connecting this recorder with the PC and utilize DSS Player in the menu setting of this recorder set the USB class P83 to...

Страница 111: ...ng If you do the data will be destroyed When the recorder is connected to a PC the power will be supplied from the USB cable Refer to the user s manual for your PC regarding the USB port or USB hub on...

Страница 112: ...yer Version 7 disappears For automatic start select and click DSS Player to reinstate again By connecting the recorder to your PC you can automatically start the application Note You cannot run more t...

Страница 113: ...ow Will display the directory structure of the DSS WMA MP3 WAV format files stored on your PC s hard disk 3 Device Manager Window Will display the directory structure of the folders in the recorder 4...

Страница 114: ...e recorder to your PC The following is an explanation of Download Selected Files For explanations of Download Folders and Download All refer to Online Help Download Selected Files 1Select the folder F...

Страница 115: ...ecord play indicator light is flashing If you do the data will be destroyed Depending on the size of the voice file and your PC it may take some time to download the files The downloaded files will be...

Страница 116: ...and Index Skip are available from the Play Control Bar Play aVoice File 1 2 3 DS71 0001 WMA Extension Files recorded by this device are saved in WMA or linear PCM format with the file extensions WMA...

Страница 117: ...er window 2Select the voice file Select the voice file to upload from the Voice File List Box 3Select the folder to upload From the Download menu select Upload Files or click the Upload icon Once the...

Страница 118: ...You can also drag and drop files from the Voice File List Box to the Device Manager window Notes NEVER disconnect the USB while the record play indicator light is flashing If you do the data will be d...

Страница 119: ...ayer Lite can be downloaded from Olympus homepage http www olympusamerica com cpg_section cpg_downloads asp http olympus europa com consumer 2590_software cfm Changing User ID The user ID will be auto...

Страница 120: ...w folder name Device Window folder names consist of a string of 12 or fewer single byte alphanumeric characters Note NEVER disconnect the USB while the record play indicator light is flashing If you d...

Страница 121: ...Editing a Template Note NEVER disconnect the USB while the record play indicator light is flashing If you do the data will be destroyed Editing aTemplate Templates of folder name that have been regis...

Страница 122: ...does not have voice guide data the File Transfer dialog will appear 4Copy voice guide data If you click the Yes button in the File Transfer dialog it will start copying voice guide data and a window...

Страница 123: ...is possible to use the recorder as a USB microphone or speaker with the DSS Player to insert add overwrite recordings onto voice files downloaded onto a computer or to save new recordings directly on...

Страница 124: ...USB Audio Device from the recording device Windows XP Select Control Panel Sound and Audio Device Audio tab and select the Microphone Control DVR from the recording device Notes If the USB class is se...

Страница 125: ...of this recorder can be utilized Purchase and Upgrade To purchase DSS Player Plus and upgrading from DSS Player is operated in the following procedures 1Start the DSS Player Please see P112 for the st...

Страница 126: ...S Player Plus Upgrading to DSS Player Plus When upgraded the title of the main menu changes to DSS Player Plus Also you can confirm the upgrade by selecting About DSS Player from the Help menu on the...

Страница 127: ...is as follows As of September 2008 Nuance Communications Inc IBM ViaVoice Pro USB Edition 10 Dragon NaturallySpeaking 8 9 Please inquire to the Olympus Service Center regarding the situation for soft...

Страница 128: ...e recorder to Audio Class Follow the procedure in P83 to change the recorder to Audio Class 3Click the start button select All Programs then select IBM ViaVoice VoiceCenter 4From the IBM ViaVoice Voic...

Страница 129: ...Control DVR for Windows XP 8Proceed with the AUDIO Setup according to the instruction on screen During audio setup enrollment please input voice data from the recorder It is recommended that you enro...

Страница 130: ...ck the start button select in the order of All Programs Dragon NaturallySpeaking Dragon NaturallySpeaking If the DSS Player Plus has started please close it in advance 2 New User Wizard will be displa...

Страница 131: ...ng For Voice Recognition P134 for recording tips After the recording is finished click the Next button 6Transferring the Recorded Voice Click Olympus DSS Player button displayed on the screen The DSS...

Страница 132: ...ct the folder in which the folder to be converted to text is stored 2Select the voice file From the Voice File List Box select the file to be converted to text 3Start of voice recognition Clicking the...

Страница 133: ...ribe button The text conversion will start However if the voice recognition software is not installed the voice recognition software start icon becomes an invalid display Noise Canceling Function Chec...

Страница 134: ...sing the recorder Record in a relatively quiet environment Have the recorder microphone 5 to 10 cm away from your chin The file recorded in the next condition will be a low rate of recognition which c...

Страница 135: ...tion Folder Window select the folder which contains the files to be joined 2Select the voice files From the Voice File List Box select more than one file to be joined 3Select Join from the Edit menu o...

Страница 136: ...e order using the Up and Down buttons 5Input File Names The file name is created automatically after joining and also it enables input optionally 6Press the Join button The resulting file is saved und...

Страница 137: ...folder Select the folder containing the file to be split from the Dictation Folder Window 2Select the voice files Select one file to split from the Voice File List Box 3Select Split from the Edit men...

Страница 138: ...es moving to the position to be split 5Input File Names The file name is created automatically after splitting and also it enables input optionally 6Press the Split button The splitting of the file wi...

Страница 139: ...d menu The Configure recorder menu dialog will be displayed 2Execute Menu Setting Click the radio button to be changed and input a check 3Press the OK button The set contents will be transferred to th...

Страница 140: ...e content from CDs to a computer Please see Copying Music from CD P143 for details Transfer copied music files and language content from the computer to the recorder Please see Transferring Music File...

Страница 141: ...distribute music files that are converted ripped from a music CD or downloaded from music distribution services To transfer a WMA file with DRM to the recorder you need to use appropriate methods such...

Страница 142: ...button 0 Volume slider Windows Media Player 10 1 3 4 5 6 7 9 9 0 Window Names Windows Media Player Window Names Windows Media Player 1 4 5 6 7 8 9 0 3 2 1 Features taskbar 2 Quick Access Panel button...

Страница 143: ...net connectivity is available CD information is searched 3Put a check mark on the music file that you want to copy 4Click Start Rip For Windows Media Player 10 Click Rip Music Files copied to a PC are...

Страница 144: ...set as follows Click on the Create folder hierarchy on device to check 1 2 The folder with artist name or album name is automatically created This will make you find the file you want to listen to mor...

Страница 145: ...can be changed by Drag Drop of the music file in the play list displayed 4From the pull down menu on the right side window select the drive corresponding to the recorder The recorder is recognized as...

Страница 146: ...recorder is displayed in Item on Device Notes Copying the music files with DRM purchased online music distribution service to a portable device such as this recorder may be restricted Refer to the onl...

Страница 147: ...SS Player Podcast registration icons differ depending on Podcasting sites Please check each Podcasting site for details 4Program registration will complete When a program is registered a list of broad...

Страница 148: ...for details P109 If you don t want to update programs automatically you can update the using the following procedure 1Select the Podcast folder 2Select a program you want to update 3Select Update Podc...

Страница 149: ...elp for details P109 If you want to download manually The content can be downloaded with the procedure described below 1Select the Podcast folder 2Click the Download button of the content you want to...

Страница 150: ...follow the procedure below 1Select the Podcast folder 2Select the content you want to transfer and drag it to the Podcast folder of the recorder and drop it Content transfer will start Aprogress windo...

Страница 151: ...ther folder or turn the recorder off the playback starts from the last memorized position when you play the same file 4Playing back the contents file which has been played back halfway Press the PLAY...

Страница 152: ...rom the beginning of the next file Rewinding Press and hold the 0 button while the recorder is stopped When you release the button the recorder stops but the Playback Position will not be updated Pres...

Страница 153: ...Press the 0 button 2 times during playback slow playback or fast playback The previous file is cued and playback starts at the previously set speed If a temp mark P73 is marked in the middle of the fi...

Страница 154: ...k United Kingdom http www audible fr France http www audible de Germany 2Start up the downloaded executable file The AudibleManager Setup screen will be displayed Select the name of the device in use...

Страница 155: ...Add New Device in the Devices menu 2When the dialog box displays verify the internet connection and click the Yes button Loading Audible Content Loading Audible Content 3When the Audible Manager Licen...

Страница 156: ...dibleManager Whendownload has been completed the AudibleManager starts up and purchased content displays on the contents list in the Library Loading Audible Content 3When the dialog box is displayed c...

Страница 157: ...ent to be transferring to the recorder and click the Add to Device button 4When the ActivateYour Device entry screen is displayed enter the user name and password for Audible and click the OK button T...

Страница 158: ...he recorder a pos file will be automatically created for each content file in the Audible folder When the pos file is deleted using Explorer the stored Playback Position will be deleted The next time...

Страница 159: ...selected Normal mode See the Operating Recorder in Audible Mode P161 for details In the Audible mode Playback mode P55 becomes the File setting regardless of the menu settings and the recorder stops...

Страница 160: ...r 0 button to move the stop position while the recorder is stopped The Playback Position will not be updated Notes When a content file is transferred to the recorder a pos file will be automatically c...

Страница 161: ...n the middle of a file the recorder stops at that position Whenthe9buttonishelddownwhiletherecorderisstopped therecordermovestotheendofthefileandthenstops If the 9 button is still held down the record...

Страница 162: ...the file and stops Press the 9 button during playback The recorder skips three seconds forward or to the starting position of the next section whichever is closer and starts to play back the file Afte...

Страница 163: ...rer window The product s name is displayed 4Copy the data While the data are being written or copied the record play indicator light on the recorder will flash 5Unplug the recorder from a computer For...

Страница 164: ...with a folder other than Folder A through to Folder E The folder is full of files maximum of 200 files Error in the internal memory The music files copied illegally No remaining internal memory No fil...

Страница 165: ...oting Symptom Nothing appears on the display Will not start Unable to record No playback tone heard Unable to erase Noise heard during playback Recording level too low Recording level too high Probabl...

Страница 166: ...properly The data has been deleted by the formatting There is feedback Action Erase unnecessary marks P73 Unlock the file P75 Cancel the read only setting of the file on the PC Switch to the right fol...

Страница 167: ...s 3 5 with resistance at both ends Use to connect from the earphone jack output of the recorder to the microphone input jack when recording Converting plug adapters PA331 PA231 which convert to the mo...

Страница 168: ...jack impedance 1 4k or more EAR jack 3 5 mm mini jack impedance 8 or more Maximum working output 3 V DC 250 mW or more 8 speaker Specifications Specifications Maximum working output 3 V DC 250 mW or...

Страница 169: ...It varies greatly according to the type of batteries used and the conditions of use Guide to recording times STEREO HQ STEREO SP HQ SP LP 26 hours 40 minutes 26 hours 40 minutes 53 hours 40 minutes 2...

Страница 170: ...in the U S and Canada distec olympus com Technical Hotline Number in Europe Toll free number 00800 67 10 83 00 available for Austria Belgium Denmark Finland France Germany Italy Luxemburg Netherlands...

Страница 171: ...must accept any interference received including interference that may cause undesired operation Tested To Comply With FCC Standards FOR HOME OR OFFICE USE Canadian RFI This digital apparatus does not...

Отзывы: