114
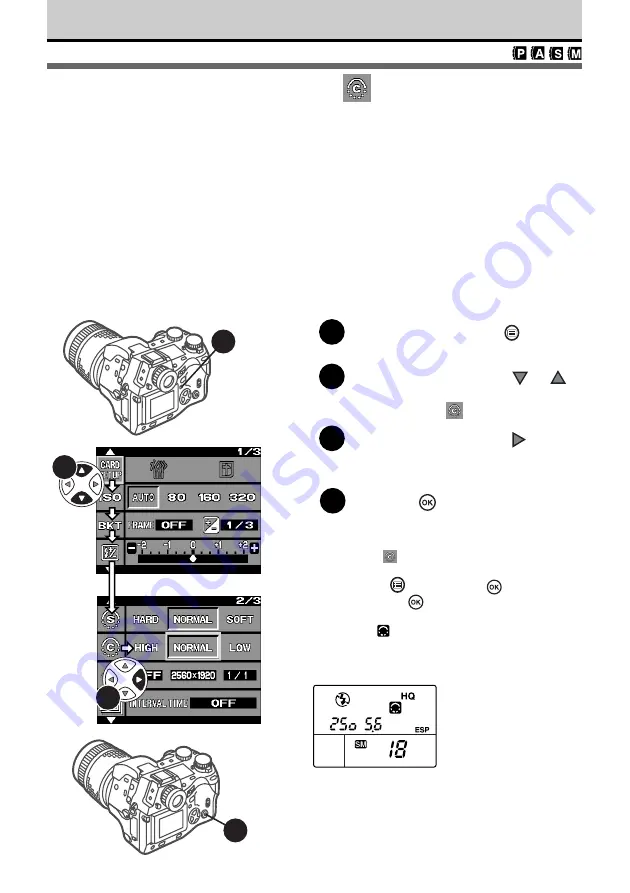
Selecting the Contrast
The contrast option allows you to adjust the amount of gradation between areas of
different brightness in the image. Three settings are available: HIGH, NORMAL, and
LOW.
HIGH
Creates a starkly contrasted image. Light areas may wash out white and
darker areas may turn black, creating a reverse film (slide film) effect.
(However, bright areas could easily wash out or dark areas turn black.)
NORMAL
Achieves medium gradation for a natural appearance. Best selection for
most pictures.
LOW
Achieves low contrast, ideal for images that you intend to process with a
graphics software application on a computer.
1
Press the menu button
.
The menu is displsyed on the monitor.
2
On the arrow pad, press
or
to move the green highlight to the
contrast mark
.
3
On the arrow pad, press
to
move the green highlight to HIGH,
NORMAL, or LOW.
4
Press the
button to select the
setting.
The green highlight returns to the contrast
mark
.
(To cancel the setting, press the menu
button
instead of the
button.)
Press the
button again to close the
menu.
The
mark is displayed in the control
panel when a setting other than NORMAL
is selected.
3
2
4
1
Control panel


