manualshive.com logo in svg
background image

Thank you for purchasing an Olympus digital camera. Before you
start to use your new camera, please read these instructions
carefully to enjoy optimum performance and a longer service life.
Keep this manual in a safe place for future reference.

We recommend that you take test shots to get accustomed to
your camera before taking important photographs.
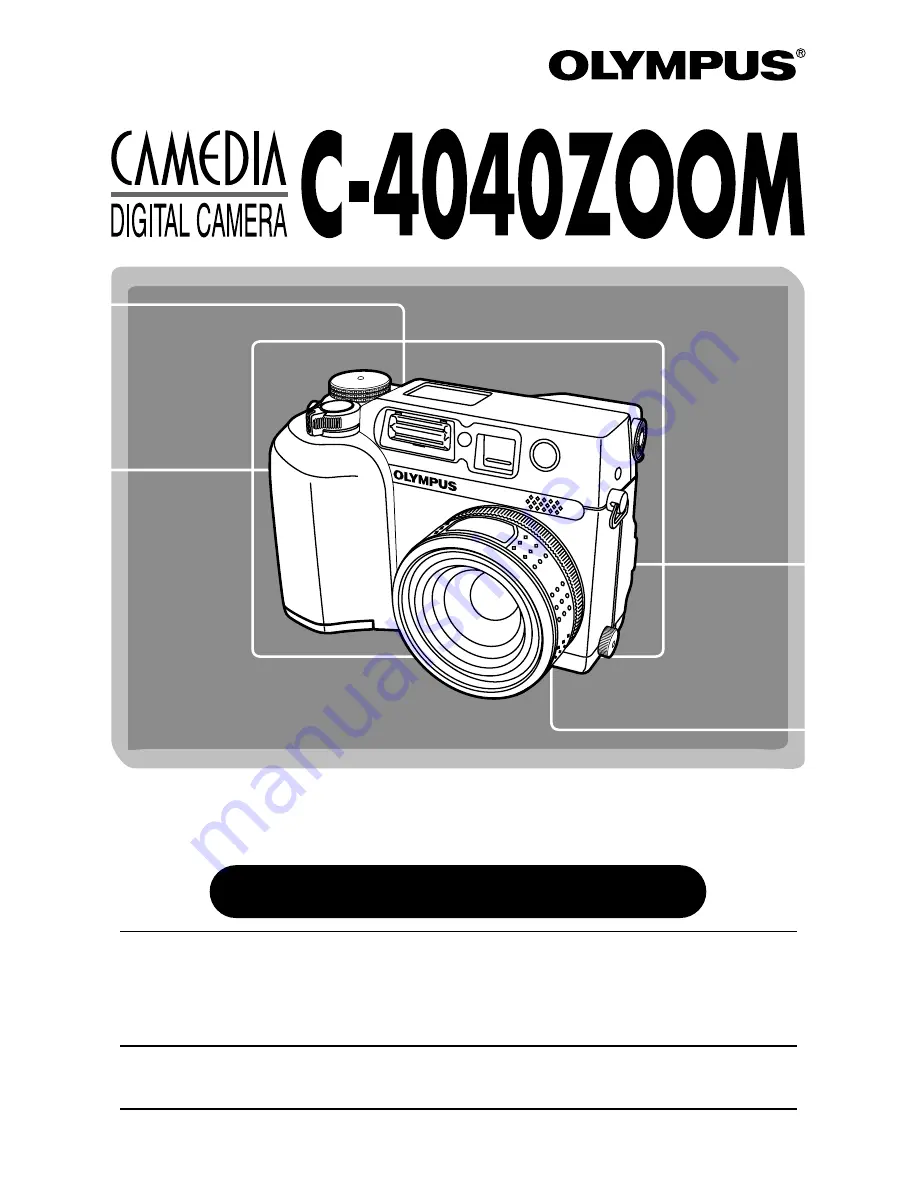
REFERENCE MANUAL

Содержание CAMEDIA C-4040 Zoom

Страница 1: ...w camera please read these instructions carefully to enjoy optimum performance and a longer service life Keep this manual in a safe place for future reference We recommend that you take test shots to...

Страница 2: ...nd or trademarks of their respective owners The standards for camera file systems referred to in this manual are the Design Rule for Camera File System DCF standards stipulated by the Japan Electronic...

Страница 3: ...can also record video with sound Assign a function you use frequently to a button Exposure modes to suit various applications P Program auto A Aperture priority S Shutter priority M Manual mode DRIVE...

Страница 4: ...How to use this manual 21 Getting started 23 Attaching the strap 24 Loading the batteries 25 Battery check 26 Card basics 28 Inserting ejecting the card 29 Power on off 30 Card check 31 Date time set...

Страница 5: ...iority shooting 61 Shutter speed setting Shutter priority shooting 62 Aperture Shutter speed setting Manual shooting 63 How to use the shutter button 64 Focusing 65 Auto focus 65 When Auto focus does...

Страница 6: ...Sequential shooting 88 Auto bracketing Shooting pictures sequentially with a different exposure for each frame 89 Metering modes Metering the subject brightness 91 Spot metering Selecting the metering...

Страница 7: ...nce 109 White balance adjustment 111 Sharpness 112 Contrast 113 Noise reduction 114 Playback 115 Playing back still pictures 116 Single frame playback 116 Quick View 116 Slide show 117 Playing back mo...

Страница 8: ...137 Shortcut 139 Setting the shortcut menu 140 Using the shortcut menu 141 Self timer shooting 142 All Reset 143 Beep 146 Rec View 146 File name 147 Pixel Mapping 148 Measurement units m ft meters fee...

Страница 9: ...om a card 173 Using optional accessories 174 AC adapter 175 External flash 176 Using the FL 40 external flash 176 Using commercially available external flashes 178 Compatible commercially available ex...

Страница 10: ...25 126 Shutter button P 64 Control panel P 13 14 Flash P 84 Microphone P 128 A V OUT jack MONO P 133 Card cover P 29 Strap eyelet P 24 Lens Connector cover P 133 5 pin external flash socket P 176 Unsc...

Страница 11: ...ode button P 84 Macro Spot button P 91 96 Print button P 153 Mode dial A S M P OFF P 30 59 60 116 Viewfinder P 12 Monitor P 15 20 74 OK Menu button P 43 Manual focus button P 70 Monitor button P 74 Ca...

Страница 12: ...inks just after you change from the flash override mode to another mode or after you shoot with the flash it means that the flash is recharging Wait until the lamp stops blinking then press the shutte...

Страница 13: ...remaining battery power is low the battery check indication changes as follows Be aware that the time when the battery check indication appears varies depending on the type of batteries used 1 3 4 2 0...

Страница 14: ...trol mode P 142 180 Displayed when self timer shooting or remote control shooting is set Record mode P 103 TIFF SHQ HQ SQ1 SQ2 Displays the record mode If SHQ or HQ is set higher than 2272 x 1704 the...

Страница 15: ...oting mode P Program mode A Aperture priority mode S Shutter priority mode M Manual mode Movie mode 2 Aperture value P 61 Displays the current aperture value 3 Shutter speed P 62 Displays the current...

Страница 16: ...amount of space used by the pictures stored in the built in memory If you take pictures continuously the indication changes as shown below The memory gauge changes depending on the number of storable...

Страница 17: ...st Tungsten light Fluorescent One touch white balance ISO P 107 Displays the ISO AUTO 100 200 or 400 selected on the menus When set to AUTO the ISO changes to 100 when the Mode dial is set to A S M Wh...

Страница 18: ...ash Fill in flash SLOW1 SLOW2 SLOW1 Slow synchronization flash Off flash override Spot metering Macro mode P 91 96 Displayed when the Spot metering Macro mode is selected by pressing the Macro Spot bu...

Страница 19: ...hen the Print reserve is set 3 Number of prints P 154 Displays the number of prints 4 Sound record Displayed when sound is recorded 5 Protect P 129 Displayed when the picture is protected 6 Record mod...

Страница 20: ...play function P 116 119 1 Battery check P 19 2 Movie mark P 116 3 Sound record Displayed when sound is recorded 4 Protect P 129 Displayed when the picture is protected 5 Frame number 6 Date The year...

Страница 21: ...l is set to any position except 2 Press to display Menu P 43 The monitor turns on automatically m SETUP CAM CARD PIC BA BATTER TTERY SA Y SAVE VE SHOR SHORT CUT T CUT m ft m ft 01 01 01 01 01 01 00 00...

Страница 22: ...used unless the shutter button is pressed halfway FULLTIME AF A reliable time saving way to focus If for movies is set to OFF the camera will adjust the focus and exposure as needed during movie recor...

Страница 23: ...Getting started Before using the camera you should follow the steps outlined in this chapter Chapter 1...

Страница 24: ...5 4 Always put the camera in its case when carrying it Be careful with the strap when you carry the camera as it can easily catch on stray objects causing serious damage Attach the strap correctly as...

Страница 25: ...ed Do not peel the label on a CR V3 lithium battery pack If an insulating sheet covers the terminals peel it off ONLY from the terminals Make sure the camera is turned off i e the mode dial is set to...

Страница 26: ...e inside of the battery compartment If the camera is left for 1 hour with the batteries removed all the internal settings will revert to the default settings 6 7 8 After taking a picture or when turni...

Страница 27: ...acturer camera shooting conditions etc When connecting the camera to a PC it is recommended that you use the optional AC adapter P 175 Power is consumed continuously during the conditions below This c...

Страница 28: ...anual carefully Do not touch the contact area of the card This camera uses SmartMedia to record pictures This reference manual uses the term card when referring to SmartMedia What is SmartMedia Images...

Страница 29: ...rd basics Cont Chapter 1 Make sure the camera is turned off i e the mode dial is set to OFF Open the Card cover Close the cover tightly 1 2 3 3 4 NEVER open the card cover eject the card remove the ba...

Страница 30: ...enters the Sleep mode after about 3 minutes of non operation The camera activates again as soon as you touch the zoom lever or mode dial etc TIPS When there is insufficient space remaining the camera...

Страница 31: ...ed into place T Insert the card until it locks in place There is a problem with the card T Use a new card The card cannot record play back or erase pictures T Format the card 1 Press to select FORMAT...

Страница 32: ...me of the built in clock Since the date time is saved with recorded pictures be sure to set it correctly 1 Set the mode dial to any position except OFF Be sure to remove the lens cap beforehand since...

Страница 33: ...completely set To move back to the previous setting press 6 When is selected in green on the screen press to select the date format Select any one of the following formats DMY Day Month Year MDY Mont...

Страница 34: ...s until the clock hits 00 seconds The clock starts when you press the button 10To turn off the camera set the mode dial to OFF When the shooting mode is set to OFF the lens is retracted The current se...

Страница 35: ...d the camera firmly with both hands while keeping your elbows at your sides to prevent the camera from moving Keep your fingers and the strap away from the lens and flash Be aware that using the zoom...

Страница 36: ...lest shooting and playback methods This Quick start guide has been designed for those who want to become familiar with the camera in a very short time Before using the camera be sure to follow the ste...

Страница 37: ...he card Taking still pictures Green lamp NEVER open the card cover eject the card remove the batteries or pull the plug of an optional AC adapter when the card access lamp is blinking Doing so could d...

Страница 38: ...ll the displayed seconds remaining shooting finishes automatically and the camera starts writing the movie to the card 3 4 5 Recording movies Seconds remaining Remove the lens cap and set the mode dia...

Страница 39: ...ress the monitor button twice quickly The monitor turns on and the recorded picture appears 1 To return to the shooting mode press the shutter button halfway The monitor turns off Shoot pictures using...

Страница 40: ...e data is accessed Press to select MOVIE PLAYBACK on the MOVIE PLAY screen 3 Playing back movies Using Quick View MODE MENU MOVIE PLAY INFO MOVIE PLAYBACK INDEX EDIT MOVIE PLA MOVIE PLAY CANCEL SELECT...

Страница 41: ...ect NO and press or the button 3 Erasing pictures ERASE YES N O N O SELECT GO Display the picture you want to erase T See steps 1 and 2 on page 39 1 Press the erase button 2 Press to erase the picture...

Страница 42: ...Using the Menus This chapter explains what the camera s menus are and how they work Some functions on this camera are only available by using the menus Chapter 3...

Страница 43: ...functions on this camera use the menus understanding them will help you enjoy shooting more See how menu operations flow together on the chart below Menu Basics Displaying the top menu P 44 Selecting...

Страница 44: ...tion see the diagram below On the top menu two types of menus are available MODE MENU P 45 and the other menus shortcut menus T P 54 On the top menu for movies is replaced with MOVIE PLAY A S M top me...

Страница 45: ...ions depend on the mode dial position MODE MENU functions are divided into 4 tabs CAMERA PICTURE CARD SETUP See Using Tabs on the next page P top menu DRIVE WB MODE MENU MODE MENU PIC SET CARD ISO A S...

Страница 46: ...CARD SETUP CARD SETUP CARD SETUP CAM CARD PIC LOW LOW ON ON ON ON RESET RESET REC VIEW REC VIEW FILE NAME PIXEL MAPPING PIXEL MAPPING ALL RESET CAMERA tab PICTURE tab CARD tab SETUP tab CAM CAMERA Fu...

Страница 47: ...T CAMERA tab PICTURE tab CARD tab SETUP tab PIC SET CARD ISO A S M FLASH CAMERA DRIVE BKT PIC SET CARD ISO A S M FLASH AUTO IN CAMERA DRIVE PICTURE CAM SET CARD AUTO AUTO HQ HQ BLUE BLUE RED RED WB CO...

Страница 48: ...enter SETUP SETUP CAM CARD PIC LOW LOW ON ON ON ON RESET RESET REC VIEW REC VIEW FILE NAME FILE NAME ALL RESET PIXEL MAPPING PIXEL MAPPING SETUP CAM CARD PIC LOW LOW ON ON ON ON RESET RESET REC VIEW R...

Страница 49: ...rom A Aperture priority auto S Shutter priority auto or M Manual mode P 86 Adjusts the flash intensity for different shooting conditions FLASH P 177 When using an external flash you can choose whether...

Страница 50: ...or SPOT still pictures P 100 Allows approx 4 seconds of sound recording to be attached to a picture PANORAMA P 98 Allows panorama pictures to be taken with Olympus CAMEDIA brand SmartMedia cards To co...

Страница 51: ...mode WB P 109 Sets the appropriate white balance according to the light source P 111 Lets you make fine changes to the white balance manually SHARPNESS P 112 Adjusts the sharpness of images CONTRAST...

Страница 52: ...FILE NAME P 147 Chooses how to name files folders of images to be saved PIXEL MAPPING P 148 Selects whether to perform Automatic pixel mapping when the power is turned on P 76 Adjusts the brightness o...

Страница 53: ...erases all images in the card ALL ERASE ALL RESET P 143 Selects whether to keep the current camera settings when you turn off the power P 146 Sets the beep sound used for warnings etc to OFF LOW HIGH...

Страница 54: ...e shortcut menus can be replaced only when the mode dial is set to P or A S M See Shortcut P 139 for more details Drive mode setting screen Record mode setting screen White balance setting screen P to...

Страница 55: ...Sets the record mode White balance Sets the appropriate white balance according to the light source Slide show Runs through all saved pictures one after another Information display Changes the amount...

Страница 56: ...ITAL ZOOM FULLTIME AF AF MODE still pictures movies FUNCTION WB single frame shooting When BKT is selected 1 0 x3 OFF AUTO 100 AUTO A 0 IN SLOW1 OFF OFF OFF OFF iESP OFF ON OFF HQ 2272x1704 For other...

Страница 57: ...Default Settings Cont Chapter 3 Mode dial P A S M Function SHARPNESS CONTRAST CARD SETUP ALL RESET REC VIEW FILE NAME m ft SHORT CUT CUSTOM BUTTON INFO 0 AE LOCK A DRIVE B C WB 9 0 0 ON LOW ON RESET...

Страница 58: ...he basics of taking good pictures with your camera You should read it through in order to make the most of the information provided Before using the camera also be sure to read How to use this manual...

Страница 59: ...re and or shutter speed manually When the mode dial is set to A S M the following items can be set with the menus A Aperture priority shooting Allows you to set the aperture manually The camera sets t...

Страница 60: ...ngs you need to get the type of picture you want regardless of optimum exposure Aperture shutter speed setting T P 63 Movie record Allows you to record movies The camera sets the aperture and shutter...

Страница 61: ...he conditions appears T Press to decrease the aperture value appears T Press to increase the aperture value Green The aperture setting will provide optimum exposure Red The aperture setting is unsuita...

Страница 62: ...RA T A S M T S 2 To set the shutter speed faster press To set the shutter speed slower press If the shutter speed is shown in red The shutter speed you have set is unsuitable for the conditions appear...

Страница 63: ...mined by the currently selected aperture and shutter speed compared to the exposure level considered optimal by the camera appears in the upper right hand corner When the exposure differential is set...

Страница 64: ...the green lamp blinks P or A S M mode The camera starts storing your pictures on the card While pictures are being stored the card access lamp blinks mode The camera starts recording a movie 3 ONLY fo...

Страница 65: ...halfway the green lamp lights up This means that focusing is being performed automatically If the green lamp blinks focusing is not correct If this happens use the AF mode P 68 Manual focus P 70 or F...

Страница 66: ...us Re position the camera horizontally compose the picture and then fully press the shutter button to take the picture P 67 5 Subjects with no vertical lines 1 Subjects with low contrast 2 Subjects in...

Страница 67: ...point the camera towards the subject while keeping the Shutter button pressed halfway 3 Press the Shutter button all the way The green lamp blinks TFocus and exposure are not locked Release your finge...

Страница 68: ...reen Even when the subject is not in the center of the screen focusing is possible SPOT Focus selection is based on the picture within the AF target mark In the top menu select MODE MENU T CAMERA T AF...

Страница 69: ...way This function reduces focusing time When OFF is selected images cannot be focused unless the shutter button is pressed halfway FULLTIME AF A reliable time saving way to focus If for movies is set...

Страница 70: ...rged The lengths shown are for reference only When the length indicator is moved to less than 0 8 m 2 6 ft the bar display automatically switches to the 20 cm 8 80 cm 31 bar display 3 Hold down for mo...

Страница 71: ...down for more than 1 second The focus distance screen appears On the screen MF is selected and the focus distance is the same as when you performed focus lock Although MF is selected and the length in...

Страница 72: ...all the way The green lamp blinks and the camera begins storing pictures on the card When the green lamp stops blinking you can take another shot The card access lamp blinks while pictures are being s...

Страница 73: ...pictures to a computer P 161 173 The subject is outside the AF target mark TPlace the subject within the AF target mark and use the focus lock P 67 The green lamp blinks TIf you want to shoot a subjec...

Страница 74: ...Advantage Camera movement does not occur easily and subjects can be seen clearly even in bright places Little battery power is used Disadvantage When close to a subject the image in the viewfinder is...

Страница 75: ...en focus and exposure brightness are locked the green lamp lights If the orange lamp lights the flash fires automatically T See Flash shooting P 84 4 Press the shutter button all the way The bottom of...

Страница 76: ...nitor In such a case use the viewfinder How to brighten darken the monitor T 1 In the top menu select MODE MENU T SETUP T 2 To brighten the monitor press To darken it press To complete the setting pre...

Страница 77: ...on all the way During movie recording sound is recorded simultaneously T See Recording sound with movies P 101 During movie recording recording continues with the focus locked However if for movies is...

Страница 78: ...ning shooting finishes automatically and the camera starts writing the movie to the card If you take pictures continuously the indication changes as shown below Recording movies Cont Shooting is not p...

Страница 79: ...er toward T to zoom in Shoot a wider picture wide angle Press the zoom lever toward W to zoom out 79 Chapter 4 Since focus is locked during movie recording the subject may go out of focus if the dista...

Страница 80: ...n at higher magnifications Stabilize the camera with a tripod etc to avoid camera movement Mode dial Digital zoom Mode dial Digital zoom Factory default setting P OFF A S M OFF 2 Press the zoom lever...

Страница 81: ...flashes Flash shooting Auto flash Red eye reduction flash The subject s eyes appear red After the pre flash it takes about 1 second before the shutter is released so do not move the camera and hold it...

Страница 82: ...s fires Flash off Since a slow shutter speed is automatically selected in low light situations when in the flash off mode the use of a tripod is recommended to prevent your pictures from being blurred...

Страница 83: ...is set to 4 sec In the top menu select MODE MENU T CAMERA T SLOW T SLOW1 SLOW2 or SLOW 4 0 4 sec Shutter closes Shutter fully opens 2nd curtain flash fires 1st curtain flash fires front curtain rear...

Страница 84: ...hutter button all the way The flash fires Using the flash Auto flash no indication Fill in flash Control panel Flash mode Viewfinder Orange lamp SLOW Slow synchronization flash Off Red eye reduction f...

Страница 85: ...ng Auto Red eye reduction Fill in When the orange lamp lights the shutter speed locks at its current level This helps prevent camera shake problems shutter speeds that are too slow can cause blur Howe...

Страница 86: ...ERA T To increase the light emission press To decrease the light emission press To complete the setting press Flash intensity control The flash adjustment effect may not be sufficient if the shutter s...

Страница 87: ...Advanced shooting Advanced shooting methods such as metering modes and special effects let you take more creative pictures Chapter 5...

Страница 88: ...utton is pressed all the way normal shooting Sequential shooting Sequential shooting AF Sequential shooting T P 88 AF Sequential shooting Sequential shooting AF Sequential shooting T P 88 Self timer r...

Страница 89: ...us Focus and white balance are locked at the first frame Auto bracketing Shooting pictures sequentially with a different exposure for each frame Ex When BKT is set to 1 0 x3 1 In the top menu select M...

Страница 90: ...hooting BKT is not possible During sequential shooting BKT the main flash does not fire If there is not enough space available on the card for the number of frames you have set during auto bracketing...

Страница 91: ...range of the macro mode spot metering is also available spot metering macro mode Mode dial Spot metering Macro mode Mode dial Spot metering Macro mode Factory default setting P A S M Digital ESP Cont...

Страница 92: ...nu select MODE MENU T CAMERA T A S M T A or S 2 Press to engage the spot metering mode P 91 3 In the top menu select MODE MENU T CAMERA T MULTI METERING T ON 4 Point the AF target mark where you want...

Страница 93: ...verage value unless you press When moves 3 far from the center of the bar the average reading the red appears The reading with pressed indicates the number of times you have pressed the button indicat...

Страница 94: ...in the frame and shoot In other words use AE lock when you want an exposure setting that s different from the setting that would normally apply to the image you want to shoot 1 In the A S M mode In th...

Страница 95: ...M M N A How to save the locked Multi metering exposure after shooting AE memory TAfter step 2 or 3 hold down the button for more than 1 second MEMO appears When MEMO appears the locked exposure is mem...

Страница 96: ...ring P 91 If you are close to a subject the picture area in the viewfinder is different from the picture that the camera actually records P 72 For macro mode shooting we recommend using the monitor P...

Страница 97: ...BOARD Same as WHITE BOARD but for white letters on black backgrounds Reverses blacks and whites in the image In the top menu select MODE MENU T CAMERA T FUNCTION T Select a mode Mode dial Function sho...

Страница 98: ...cture Do not adjust the zoom after the first picture Pictures with differently sized images cannot be connected Panorama shooting is possible for up to 10 pictures Panorama shooting You can take advan...

Страница 99: ...only available with the OLYMPUS CAMEDIA brand SmartMedia cards The camera itself cannot edit panorama pictures To connect each picture the CAMEDIA Master software is necessary Your computer s memory m...

Страница 100: ...ord The sound recording screen appears Mode dial for still picture Mode dial Factory default setting P OFF A S M OFF Sound can be added later to still pictures P 128 Recorded sound can also be changed...

Страница 101: ...Mode dial Factory default setting P A S M ON Sound cannot be played back on the camera itself For playback connect the camera to a TV with the provided A V cable P 133 For movie or sound playback on...

Страница 102: ...Adjusting image quality and exposure Chapter 6...

Страница 103: ...printing or image processing on a computer This mode has different resolutions to choose from depending on how it is used A high quality mode using the JPEG format Because the compression rate is ver...

Страница 104: ...2816x2112 compression 3 3 7 7 2272x1704 16 15 32 31 HQ ENLARGE SIZE 3200x2400 Normal 8 8 16 16 P 106 2816x2112 10 10 21 21 2048x1536 HIGH 7 7 14 14 NORMAL JPEG 20 19 40 39 SQ1 1600x1200 HIGH 11 11 23...

Страница 105: ...the size of the picture on the computer screen varies depending on the computer s monitor setting For instance a picture taken in 640 x 480 resolution is the same size as the screen if you set the pic...

Страница 106: ...izes also become larger ENLARGE SIZE is not available in the movie mode ENLARGE SIZE SmartMedia memory capacity listed in the table is approximate The number of storable images differs depending on th...

Страница 107: ...st when you want to shoot clear sharp images in daylight With a higher ISO setting you can use faster shutter speeds with the same amount of light Mode Dial ISO Sensitivity Mode dial ISO sensitivity F...

Страница 108: ...steps Adjusts towards images become brighter Adjusts towards images become darker 2 0 2 0 0 0 Mode Dial Exposure Compensation Mode dial Exposure compensation Factory default setting P 0 0 A S M excep...

Страница 109: ...looking color PRESET WB CANCEL SELECT GO PRESET WB screen In the top menu select MODE MENU T PICTURE T WB then select the best WB AUTO PRESET for your shooting conditions In the mode select WB in the...

Страница 110: ...the menu disappears 110 White Balance Cont Chapter 6 Control panel White balance This does not appear during the AUTO setting Set AUTO for the normal shooting When setting the white balance by pointin...

Страница 111: ...balance adjustment indicator appears on the screen The color becomes bluer each time you press and redder each time you press depending on the original white balance conditions Press to save your adju...

Страница 112: ...d 5 using The outlines of images are more emphasized and the images themselves look more vivid making this ideal for printing The outlines of images are softer making this ideal for editing the images...

Страница 113: ...r differences can become more vivid In the top menu select MODE MENU T PICTURE T CONTRAST Contrast can be adjusted between 5 and 5 using Light and shadow are defined more clearly and images look crisp...

Страница 114: ...y twice as long as usual Noise reduction can only be used when the shutter speed is set slower than 1 2 sec In the top menu select MODE MENU T CAMERA T NOISE REDUCTION T ON When you set noise reductio...

Страница 115: ...Playback This chapter explains how to play back still pictures or movies plus how to use available functions when the mode dial is set to playback Chapter 7...

Страница 116: ...splays the previous picture Jumps to the picture 10 frames ahead 1 Press monitor button twice quickly while in the shooting mode The monitor turns on and displays the last picture taken To play back o...

Страница 117: ...der to hear the sound Movies are played back like still pictures starting from the first frame Playback top menu still pictures MODE MENU INFO The next picture is not displayed until the sound playbac...

Страница 118: ...tem in the MOVIE PLAY screen that you need then press See the pages above for how to use each item This function lets you play back or edit movies MODE MENU MOVIE PLAY INFO Playback top menu movies MO...

Страница 119: ...tructions below Displaying movies using the arrow pad Displays the beginning of the movie Displays the end of the movie Every time you press the button the next frame appears The movie can be displaye...

Страница 120: ...on screen appears The card access lamp blinks during downloading CARD FULL P 190 appears if there is not enough memory left on the card 3 Press to select the first frame of the index then press After...

Страница 121: ...ur choice OK Saves the index on the card The menu disappears from the screen RESET Resets the index Returns to the first frame selection screen CANCEL Cancels the index Returns to the MOVIE PLAY scree...

Страница 122: ...to select the first frame of the movie then press After the first frame is selected the selection frame moves to the last frame of the movie Using the arrow pad Jumps to the first frame of the movie...

Страница 123: ...DIT screen appears 6 Press to select items 7 Press to run your choice OK Selects NEW FILE or OVERWRITE NEW FILE saves the edited movie as a new movie with a different file name OVERWRITE saves the edi...

Страница 124: ...ils on each piece of information displayed see pages 19 and 20 1 Press to display the top menu 2 Pressing turns INFO on and displays the full amount of shooting information on the monitor To turn INFO...

Страница 125: ...onitor can be enlarged Each time you turn the zoom lever towards T pictures are enlarged by 1 5 2 2 5 3 3 5 or 4 times 1 With the arrow pad select the picture you want to enlarge Pictures with the mar...

Страница 126: ...n the single frame playback mode P 116 press the zoom lever to W Pictures including the one displayed in the single frame playback mode appear in the index display Index display 9 frame How to use the...

Страница 127: ...picture with the arrow pad then press the zoom lever toward T TIPS This function lets you change the number of pictures in an index display Selecting the Number of Pictures 1 In the top menu select MO...

Страница 128: ...A bar is displayed to show the progress of recording Built in microphone To obtain the optimum sound the microphone should be placed no further than 1m 3 3 ft away from the subject When a new sound i...

Страница 129: ...protected To cancel protection press again Displayed when a picture is protected HQ 01 12 23 21 56 24 Protected pictures cannot be deleted with the ALL ERASE all frame erase function but they can be...

Страница 130: ...you wish to erase by using the arrow pad If the picture is protected cancel the protection P 129 2 Press the erase button The ERASE screen is displayed 3 Press to select YES 4 Press to erase the pictu...

Страница 131: ...displayed 3 Press to select YES 4 Press to start erasing A bar is displayed to show the progress of erasing To cancel erasing select NO in step 3 and press This function erases all still pictures and...

Страница 132: ...FORMAT 2 Press The FORMAT screen is displayed 3 Press to select YES 4 Press to start formatting A bar is displayed to show the progress of formatting To cancel formatting select NO in step 3 and press...

Страница 133: ...on the TV Connect to the TV s video input yellow and audio input white terminals AV cable Connect to the A V OUT jack black The optional AC adapter is recommended when using the camera with a TV Image...

Страница 134: ...P 116 2 Each time the button is pressed the picture is rotated as shown Normal playback of a vertically oriented picture Picture rotated 90 counter clockwise from normal playback position Picture rot...

Страница 135: ...Useful Functions This chapter explains various useful camera functions Also see Using the Menu in Chapter 3 Chapter 8...

Страница 136: ...AF Sequential Self timer remote control BKT ISO sensitivity P 107 AUTO 100 200 400 A S M P 61 63 A S M Flash selection IN main external external only P 176 177 Slow synchronization SLOW1 SLOW SLOW2 P...

Страница 137: ...en press to save your setting AE LOCK DRIVE ISO A S M CUSTOM BUTTON CUSTOM BUTTON screen Using the Custom Button 1 Press custom button The function currently set to the custom button appears 2 Press r...

Страница 138: ...S M AE LOCK Using AE LOCK after setting a different function to the custom button TAE lock cannot be used when a different function is set to the custom button Re set AE LOCK to the custom button by f...

Страница 139: ...djustment P 86 2 0 2 Flash selection IN main external external only P 176 177 Slow synchronization SLOW1 SLOW SLOW2 P 83 Noise reduction P 114 OFF ON Multi metering P 92 OFF ON Digital zoom P 79 OFF O...

Страница 140: ...ars 2 Select A then press to display the menu functions on page 139 A B and C on the monitor are the same as top left and bottom on the top menu 3 Select the item you want by pressing then press to sa...

Страница 141: ...item DIGITAL ZOOM WB MODE MENU Ex When DIGITAL ZOOM is set to the A shortcut Press this button Pressing takes you directly to the DIGITAL ZOOM setting screen Mode Dial Shortcut Menu Mode dial Shortcut...

Страница 142: ...for approx 10 seconds then starts blinking After blinking for approx 2 seconds the picture is taken In the mode recording starts To stop shooting while in the mode press the shutter button fully again...

Страница 143: ...aved The settings that All Reset affects are listed on P 145 1 In the top menu select MODE MENU T SETUP T ALL RESET The All Reset setting screen appears 2 Select OFF ON or CUSTOM then press When selec...

Страница 144: ...OOM Ex When setting the aperture on the CUSTOM screen CUSTOM screen Press to go to the aperture setting screen CUSTOM CUSTOM FNo FNo SHUTTER LCD ZOOM Increases the value Decreases the value Press to s...

Страница 145: ...d iESP P 68 Sound recording OFF still pictures P 100 Sound recording ON movies P 101 Function P 97 OFF Record mode HQ still pictures P 104 Record mode HQ movies P 104 White balance P 109 AUTO White ba...

Страница 146: ...ded is displayed on the monitor during shooting ON The image being recorded onto the card is displayed on the monitor This is useful for a brief check of images you have just taken Pressing the shutte...

Страница 147: ...ed in the camera The folder number returns to No 100 and the file number returns to No 0001 This is useful when grouping files on separate cards AUTO When AUTO is selected the same folder number is re...

Страница 148: ...ra to check a CCD and image processing circuit automatically It is not necessary to operate this function frequently Approximately once a year is recommended Wait a few minutes after the monitor is us...

Страница 149: ...ith centimeters inches 1 In the top menu select MODE MENU T SETUP T m ft The m ft setting screen appears 2 Select m or ft then press SETUP CAM CARD PIC CUSTOM BUTTON CUSTOM BUTTON SHORT CUT m ft m ft...

Страница 150: ...Print setting Print reserve prepares pictures you have taken with the camera for printing at a photo lab or on your printer Chapter 9...

Страница 151: ...with Print Reserve data into the printer printing is possible without using a computer For more details refer to the printer s instructions Transferring pictures to a computer P 161 173 and printing...

Страница 152: ...with the message PICTURE ERROR Print reserve may be performed on it In such a case the print reserve icon does not appear where an image is displayed for full view Since appears where multiple images...

Страница 153: ...d the PRINT ORDER SETTING screen appears giving you the choice of resetting the data or keeping it P 159 Select 3 Select x number of prints or date time by pressing or then press to set the numbers SE...

Страница 154: ...SETTING PRINT ORDERED PRINT ORDERED RESET KEEP KEEP EXIT EXIT SELECT SELECT GO GO PRINT ORDER PRINT ORDER If Print Reserve data is already stored on the card the PRINT ORDER SETTING screen appears giv...

Страница 155: ...number To Trimming setting P 156 DA DATE TE TIME TIME N O EXIT EXIT SELECT SELECT GO GO 5 To save the setting press to exit from the selection screen To perform Print Reserve for more pictures repeat...

Страница 156: ...reen appears giving you the choice of setting trimming SETUP or canceling trimming CANCEL CANCEL RESET O K CANCEL SETUP 2 The trim screen appears Set the top left corner point of the desired picture M...

Страница 157: ...moved frame lines white appear on opposite sides from the trimming lines green When the zoom lever is moved toward W the intersection point green moves toward the top left corner of the display When...

Страница 158: ...inted picture varies depending on the printer setting If the trimmed picture size is small printing magnification increases accordingly resulting in a printed picture with lower resolution For best re...

Страница 159: ...SETTING screen does not appear 3 Select RESET Remove selected pictures only Select KEEP then set the number of prints to 0 on the single frame print reserve screen 4 To save the setting press to exit...

Страница 160: ...ransferring pictures to a computer Pictures stored on the card can also be viewed on a computer This chapter shows you how to transfer pictures to a computer for viewing and image processing Chapter 1...

Страница 161: ...river P 164 165 Transferring images to a computer Downloading P 166 167 Transferring images to a computer Downloading P 168 169 Removing the card P 170 Removing the card P 171 Even if your computer ha...

Страница 162: ...camera from the computer and make sure that the camera s power is off To avoid computer malfunctions do not turn off the camera or switch the camera s mode dial position when the camera is connected t...

Страница 163: ...nal Me The USB driver will be automatically installed Click on the OK button when a message appears saying that the installation is complete The camera is displayed as Removable Disk in either My Comp...

Страница 164: ...Device hardware 2 Click on the Next button 3 Confirm that Search for the best driver for your device Recommended is selected then click on the Next button 4 Place the software CD in the CD ROM drive...

Страница 165: ...om of the USB folder Click on the OK button after selecting the Win98 folder 7 The window at right appears Click on the Next button A second window appears Again click on the Next button A window appe...

Страница 166: ...t to use CAMEDIA Master software version 2 5 or higher is required When using CAMEDIA Master software click on Removable Disk not My Camera Under Mac OS the file name is Untitled Windows 1 Referring t...

Страница 167: ...click the 100OLYMP folder A new window opens displaying your image files 6 Copy download the image files to your computer using Explorer When moving or copying a file be sure to follow any instruction...

Страница 168: ...ly Go back to How to connect P 162 and connect again 2 Double click the Untitled icon A window containing a folder named DCIM opens 3 Double click the DCIM folder A window containing a folder named 10...

Страница 169: ...o follow any instructions provided by your computer You can view images using graphics applications that support JPEG Paint Shop Pro Photoshop etc Internet browsers Netscape Communicator Microsoft Int...

Страница 170: ...connect the USB cable and re connect it and or re start your personal computer Removing the card Windows 1 Make sure the camera s access lamp is off 2 Select the Drive icon Removable Disk on My Comput...

Страница 171: ...0 1 Make sure the camera s access lamp is off 2 Drag and drop the Untitled Drive icon onto the Trash on the desktop or select Special Eject on the menu 3 Open the card cover on the camera and remove t...

Страница 172: ...circled in the illustration below on the task bar at the lower right hand side of your computer screen 2 When a message appears saying that the driver has been stopped left click on the message 3 When...

Страница 173: ...mputer equipped with a 3 5 floppy disk drive Personal computer equipped with a PC card slot PCMCIA or an external PC card reader writer Personal computer equipped with a USB port Required devices Flop...

Страница 174: ...Using optional accessories Chapter 11...

Страница 175: ...ff the camera 2 Plug the AC adapter into a power outlet 3 Open the jack cover and plug the connection cord into the DC In jack 4 To disconnect turn off the camera and unplug the AC adapter first from...

Страница 176: ...era the exclusive FL BK01 flash bracket optional and FL CB01 bracket cable optional are required 1 Mount the FL 40 external flash on the flash bracket then fasten it to the camera s tripod socket and...

Страница 177: ...nal flash begins communicating with the camera and automatically switches to TTL AUTO 5 Press the flash mode button to select the camera s flash mode P 84 Flash mode button If close up pictures are ov...

Страница 178: ...4 Set the mode that automatically controls the amount of light emitted by the external flash Also set ISO and aperture on the external flash to match the camera s settings See the user s manual for t...

Страница 179: ...it is possible that the correct exposure may not be obtained anyway In such a case adjust the auto F value or ISO value on external flash unit or calculate the distance in the manual mode and use it...

Страница 180: ...ming press the W or T button on the remote control During operation the camera s self timer remote control lamp blinks 180 Chapter 11 Remote control shooting Shooting is possible using the remote cont...

Страница 181: ...s instructions for information on playback with the remote control If the camera s self timer remote control lamp does not blink after pressing the shutter button on the remote control TThe remote con...

Страница 182: ...Miscellaneous This chapter includes helpful information about troubleshooting camera operations error codes etc Chapter 12...

Страница 183: ...d to a personal computer 6 Operate the camera press the shutter button turn the mode dial etc P 30 P 25 P 25 P 27 P 162 P 30 POSSIBLE CAUSES CORRECTIVE ACTION REF PAGE The camera does not work No pict...

Страница 184: ...inking 6 See the error code chart 7 Replace the card or delete unwanted pictures etc 8 Replace the batteries with new ones 9 Replace the batteries with new ones Do not open the battery compartment cov...

Страница 185: ...he menus P 81 83 P 81 P 88 P 59 P 98 P 97 Pictures you have already taken do not appear on the monitor 1 The camera is in the shooting mode 2 There is no picture in the card 3 There is a problem with...

Страница 186: ...xhausted 4 The USB driver is not installed properly 1 Connect the cable correctly 2 Set the mode dial to 3 Replace the batteries with new ones or use the optional AC adapter 4 Try installing the USB d...

Страница 187: ...2 Position the AF target mark on the subject or use the focus lock 3 Clean the lens with a soft dry cloth 4 Set the camera to the macro mode The shooting distance varies according to the zoom setting...

Страница 188: ...4 Set the flash to Fill In mode Or use the spot metering mode 5 Higher shutter speeds are used when the sequential mode is selected which may result in pictures that are darker than usual P 35 P 84 17...

Страница 189: ...t with a dry cloth If you have used your camera at the beach use a cloth dampened with fresh water Monitor and viewfinder Wipe gently with a soft cloth Lens Blow dust off the lens with a blower brush...

Страница 190: ...annot be played back with this camera Corrective action Insert the card correctly Insert a different card Replace the card or erase unneeded pictures If you are taking pictures remove the write protec...

Страница 191: ...nothing to play back There is no empty space in the card so it cannot record new information such as print data and sound The card cover is open Corrective action Format the card Insert a card which...

Страница 192: ...Approx 165 frames SQ2 640x480 NORMAL Image pickup element 1 1 8 CCD solid state image pickup 4 130 000 pixels gross Recording image 2272 x 1704 pixels TIFF SHQ HQ 2048 x 1536 pixels TIFF SQ1 1600 x 12...

Страница 193: ...socket Automatic calendar Up to 2031 system Operating environment Temperature 0 C to 40 C 32 F to104 F operation 20 C to 60 C 4 F to 140 F storage Humidity 30 to 90 operation 10 to 90 storage Power su...

Страница 194: ...t its widest Conversely the highest aperture value gives the narrowest aperture Backlight A light source in the Monitor to let it be seen more easily CCD Charge coupled Device This converts light pass...

Страница 195: ...the shutter speed is 1 second The EV then increases by 1 each time the aperture increases by one F stop or the shutter speed increases by one increment EV can also be used to indicate brightness and...

Страница 196: ...r speed and the camera automatically varies the aperture so that the picture is taken with the best exposure Synchro Terminals Terminals on an external flash unit for connecting it to the camera TFT T...

Страница 197: ...gs 32 DCF 2 Digital ESP metering 91 Diopter adjustment 35 Displaying movies 116 118 Displaying multiple pictures at one time 126 DPOF 151 Drive mode 88 E ENLARGE SIZE 106 Erasing pictures 130 131 Expo...

Страница 198: ...P PIXEL MAPPING 52 148 SETUP monitor brightness 52 53 76 SETUP date time setting 32 52 53 SETUP m ft 52 149 SETUP SHORT CUT 52 139 SETUP CUSTOM BUTTON 52 136 SETUP number of pictures displayed in the...

Страница 199: ...ecifications 192 193 Spot AF 68 Spot metering 91 T Taking a still picture 72 76 Telephoto shooting 79 TIFF non compression 103 Top menu 44 Transferring pictures to a computer 166 169 W White balance A...

Страница 200: ...rt olympus europa com http www olympus com 2001 OLYMPUS OPTICAL CO LTD OLYMPUS OPTICAL CO LTD San Ei Building 22 2 Nishi Shinjuku 1 chome Shinjuku ku Tokyo Japan Customer support Tel 0426 42 7499 Toky...

Отзывы: