background image

13

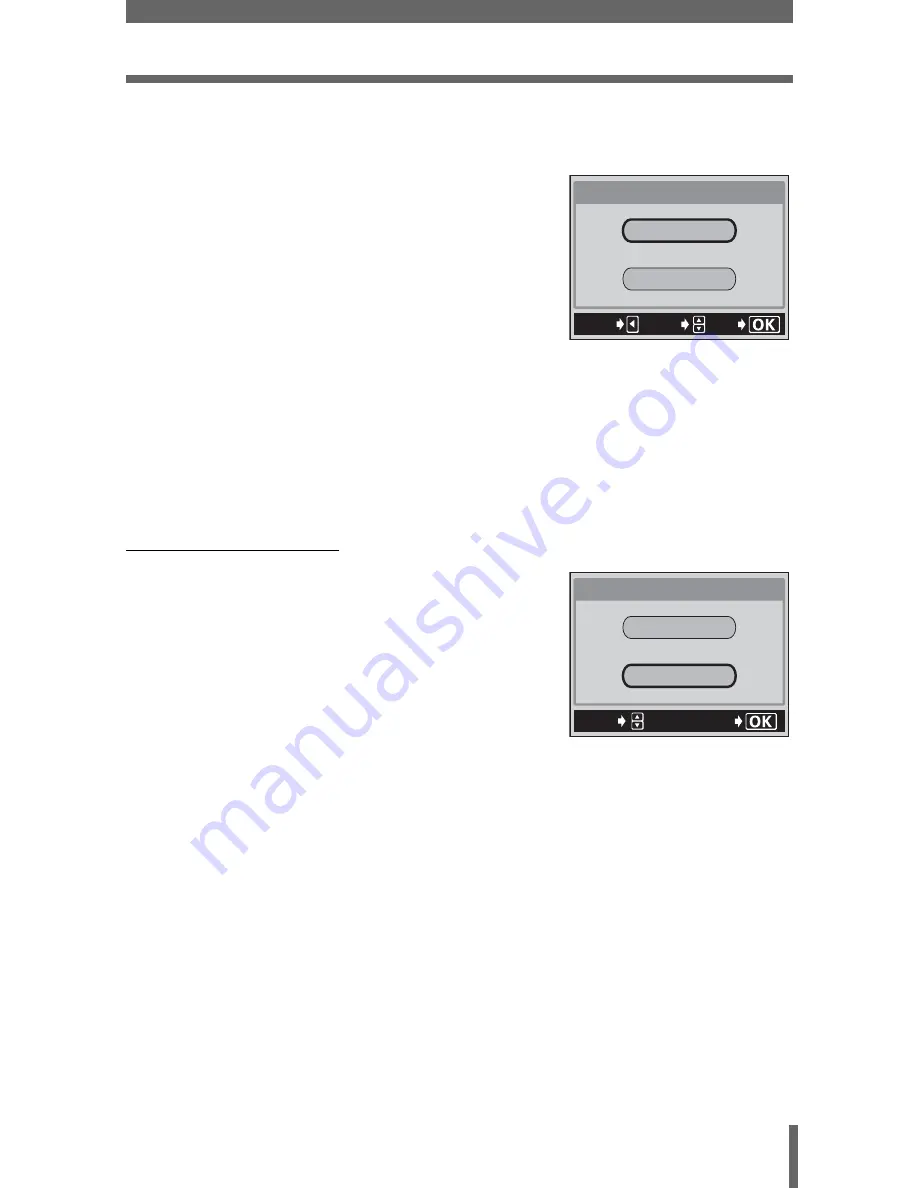
Printing pictures

5

Press 

e

.

• The PRINT screen is displayed.

6

Print the pictures.

• Press 

ac

 to select OK or CANCEL, 

then press 

e

.

OK

Printing starts.

CANCEL

The settings are 
canceled and the monitor 
returns to the PRINT 
MODE SELECT screen.

• When printing is finished, the monitor returns to the PRINT MODE 

SELECT screen.

g

 “Exiting direct printing” (P.16)

z

To cancel printing

Pressing 

e

 during print data transfer displays 

the screen for selecting whether to continue or 
cancel printing. To cancel printing, press 

ac


to select CANCEL, then press 

e

.

CANCEL

GO

SELECt

PRINt

OK

CANCEL

GO

PRINt

CONtINUE

CANCEL

SELECt

Содержание CAMEDIA C-350ZOOM

Страница 1: ...M z In the interest of continually improving products Olympus reserves the right to update or modify information contained in this manual DIGITAL CAMERA D 560ZOOM C 350ZOOM MANUAL FOR DIRECT PRINTING...

Страница 2: ...that originally provided with your camera What is PictBridge It is the standard for connecting digital cameras and printers of different makers and printing out pictures directly Indications used in...

Страница 3: ...ect printing function 5 2 Direct printing 6 Using the direct printing function 6 Connecting the camera to a printer 7 Printing pictures 8 PRINT mode MULTI PRINT mode 8 ALL PRINT mode 12 ALL INDEX mode...

Страница 4: ...the provided USB cable into the USB port on your computer as shown below The location of the USB port varies depending on the computer For details refer to your computer s manual 2 Plug the other end...

Страница 5: ...is completed appears The computer recognizes the camera as a Removable Disk After updating the camera s firmware to enable PictBridge pictures can be printed directly from the camera By connecting the...

Страница 6: ...s directly STANDARD All printers that support PictBridge have standard print settings Selecting STANDARD on the settings screens g P 9 to 14 images are printed according to the default settings See th...

Страница 7: ...USB cable into the camera s USB connector 3 Press q to turn the camera on The monitor turns on and the selection screen for the USB connection is displayed 4 Press ac to select PRINT then press e ONE...

Страница 8: ...mat g PRINT mode MULTI PRINT mode P 8 ALL INDEX Prints an index of all the pictures stored on the card g ALL INDEX mode PRINT ORDER mode P 14 PRINT ORDER Prints the pictures according to the print res...

Страница 9: ...he paper size set in step 2 and the capabilities of your printer 5 Press bd to select the picture you want to print Turn the zoom lever toward to display the pictures in index format You can then sele...

Страница 10: ...e The available options vary depending on the type of printer Items outside the capability of the printer are not available Sets the number of prints You can select up to 10 prints DATE If you select...

Страница 11: ...es Press ac to select OK or CANCEL then press e OK Printing starts CANCEL The settings are canceled and the monitor returns to the PRINT MODE SELECT screen When printing is finished the monitor return...

Страница 12: ...page Print information setting screen is displayed 4 Press ac to select the item you want to set then press d Press ac to select the item then press e If PRINT INFO cannot be set with your printer go...

Страница 13: ...rns to the PRINT MODE SELECT screen When printing is finished the monitor returns to the PRINT MODE SELECT screen g Exiting direct printing P 16 zTo cancel printing Pressing e during print data transf...

Страница 14: ...he selected print mode SIZE cannot be selected When the PRINT PAPER screen is not displayed SIZE is set to STANDARD Go to step 3 3 Print the pictures Press ac to select OK or CANCEL then press e OK Pr...

Страница 15: ...cel printing To cancel printing press ac to select CANCEL then press e In ALL INDEX mode the printer automatically selects the number of pictures per sheet etc ALL INDEX printing is only available on...

Страница 16: ...nect the camera from the printer 1 In the PRINT MODE SELECT screen select b The message shown right is displayed 2 Turn the camera off 3 Remove the USB cable from the camera 4 Remove the USB cable fro...

Страница 17: ...Disconnect the camera and connect it again correctly NO PAPER There is no paper in the printer Load some paper in the printer NO INK The printer has run out of ink Replace the ink cartridge in the pri...

Страница 18: ...ating the firmware take the action described below The printer fails to connect Possible cause Corrective action Ref Page PC was selected on the monitor after connecting to the printer with a USB cabl...

Страница 19: ...18 20097 Hamburg Germany Tel 49 40 23 77 3 0 Fax 49 40 23 07 61 Letters Postfach 10 49 08 20034 Hamburg Germany European Technical Customer Support Please visit our homepage http www olympus europa co...

Отзывы: