


Complete Teardown, Cleaning, and Reassembly of the Olympus BHSU/BHTU Reverse Nosepiece Assembly
Revision 3
Page 5 of 19
Introduction
The microscopes in the Olympus BH-2 line have largely
been replaced in the professional and clinical world,
due to their advancing age and the lack of repair parts
from Olympus. A great many of these microscopes
were produced in their day, and because of this they
are readily available on the used market for very
reasonable prices. Thanks to their excellent build
quality and solid optical performance, these scopes are
now very popular with hobbyists, providing an
affordable, high-quality alternative to the Chinese-made
scopes prevalent today.
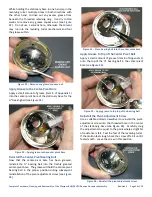
One issue that might be encountered when purchasing
either the BHSU or BHTU version of these microscopes
is that the grease in the reverse nosepiece assembly
may be dried and gummy, resulting in a stiff or gritty
feel of the revolving nosepiece.
Another issue that may be encountered is with the
mechanical detents in the revolving nosepiece. After
many years of hard service, especially if the nosepiece
assembly has not been periodically lubricated
throughout its life, one or more of the detent stops may
be worn to the point where the detents are sloppy, and
the affected objectives do not maintain proper radial
indexing. At best, this is annoying to the operator, and
at worst can render the revolving nosepiece unusable.
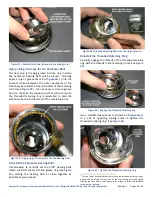
This document describes the complete teardown,
cleaning, lubrication, and reassembly of the reverse
nosepiece assembly on a BHTU microscope stand.
Completion of this maintenance procedure should
restore the proper feel to the nosepiece turret.
Additionally, this maintenance should reduce further
wear of the mechanical detent stops. Note that if the
detents stops are already excessively worn, there is no
repair for this other than the replacement of the
revolving turret.
Scope of this Document
The procedures detailed in this document apply to the
reverse nosepiece assembly used on the Olympus BHSU
and BHTU microscope stands.
Note that the original Olympus service literature did not
address the teardown and repair of the various
revolving nosepiece assemblies used on BH-2 stands, as
these were field-replaceable assemblies that were
considered unserviceable by Olympus.
Tools Needed
The following tools will be needed to complete the
teardown, cleaning, lubrication, and reassembly of the
BHSU/BHTU reverse nosepiece assembly.
•
Center punch or nailset tool
•
Electric heat gun (item 1 of
•
Lens-spanner tool (item 6 of
•
Screwdriver set, JIS (item 2 of
•
Soft-jaw pliers (item 5 of
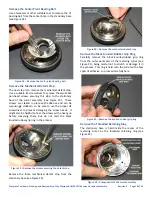
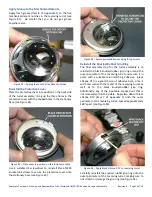
A Few Words About JIS Screws
Screws with JIS heads are frequently found in much of
the equipment designed and manufactured in Japan.
JIS screws look very much like standard Phillips screws,
but they differ in that JIS screws were designed to not
cam-out under torque, whereas Phillips screws were
designed to intentionally cam-out, as a means to limit
the torque applied to the fasteners. Because of this
crucial difference in the geometry of the two driver
types, JIS screws will be damaged by standard Phillips
drivers if too much torque is applied. JIS screws can
usually be identified by the presence of a single dot, or
by an “X”, stamped into one of the four quadrants of
the cross-point depression (see
).
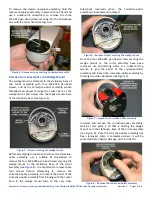
Figure 1
–
A typical JIS screw
Supplies Needed
The following supplies will be needed to complete the
teardown, cleaning, lubrication, and reassembly of the
BHSU/BHTU reverse nosepiece assembly.
•
Cleaning solvent (see recommendations below)
•
Lubricant (see recommendations below)
•
Silicone RTV adhesive, black (item 7 of
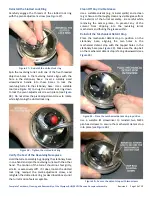
Recommended Lubricant Types
Plastilube® Brake Grease or Mobilgrease 28 (item 8 of
) are recommended for use in the reverse
nosepiece assembly. Both Plastilube® Brake Grease and
Mobilgrease 28 are medium-consistency greases which
will remain stable and serviceable for many years to
come.
Recommended Solvents
Some type of cleaning solvent will be needed to remove
the old grease from the various components of the
BHSU/BHTU reverse nosepiece assembly. Solvents that
can be used are acetone (commonly sold as fingernail


