background image

6

2. 

Press 

 + CENTER

. The 

 symbol will appear on the display.

3. 

Type the text to be centred. The display will show the characters typed.

4. 

Press 

 . The words will be printed in the centre between the margins. The printer unit

moves to the start of the next line. The 

 symbol disappears from the display.

IF...

You want to abort the procedure:

 check that the 

 symbol is at the work point and

press 

 . Characters that have already been typed can be displayed by pressing the

 key (except in C-C mode).

You  have  made  a  mistake:

  proceed  as  described  for  making  corrections  on  the

display.

You exceed the maximum capacity of the line:

 the typewriter emits an audible error

signal. Press  

  and change as required.

RIGHT FLUSH

Text can be aligned at the right margin.

1. 

Press 

 , if necessary, to move to the start of the line.

2. 

Press 

 + RIGHT FLUSH

. The 

 symbol appears on the display.

3. 

Type the words to be aligned at the right margin. The display shows the characters
typed.

4. 

Press 

  .  The  words  are  printed  aligned  at  the  right  margin.  The  printer  unit

moves to the start of the next line. The 

 symbol disappears from the display.

IF...

You want to abort the procedure:

 check that the 

 symbol is at the work point and

press 

  .  Characters  that  have  already  been  typed  can  be  viewed  by  pressing  the

 key (except in C-C mode).

You  have  made  a  mistake:

  proceed  as  described  for  making  corrections  on  the

display.

You exceed the maximum capacity of the line:

 the typewriter emits an audible error

signal. Press 

  and change as required.

AUTOMATIC LINE INDENT

This function is used for indenting a line 2.54 cm (1") from the left margin. The printer
unit must be situated on the line immediately before the one that is to be indented.

1. 

Press 

 + 

 . The printer unit moves to the indent on the next line.

2. 

Type  the  text.  The  next  time  you  execute  a  carriage  return,  the  printer  unit  will
move to the original left margin.

HYPHEN AND FIXED SPACE

While  working  with  an  automatic  carriage  return,  you  may  have  to  type  a  space  (e.g.
Henry  VIII)  or  a  hyphen  (e.g.  London-Paris)  less  than  eight  characters  from  the  right
margin (after the audible end of line signal), without printing the characters or executing
an  automatic  carriage  return.  The  fixed  space  is  used  for  keeping  a  space  between
words or formulas unchanged while working in RTJ mode.

To enter a hyphen:

Press 

MODE

 + 

-

 to type a hyphen after the audible signal without executing a carriage

return. The display shows the 

 symbol.

To enter a fixed space:

Press 

  +  SPACE  BAR

  to  enter  a  space  after  the  audible  signal  without

executing a carriage return. The display shows the 

 symbol.

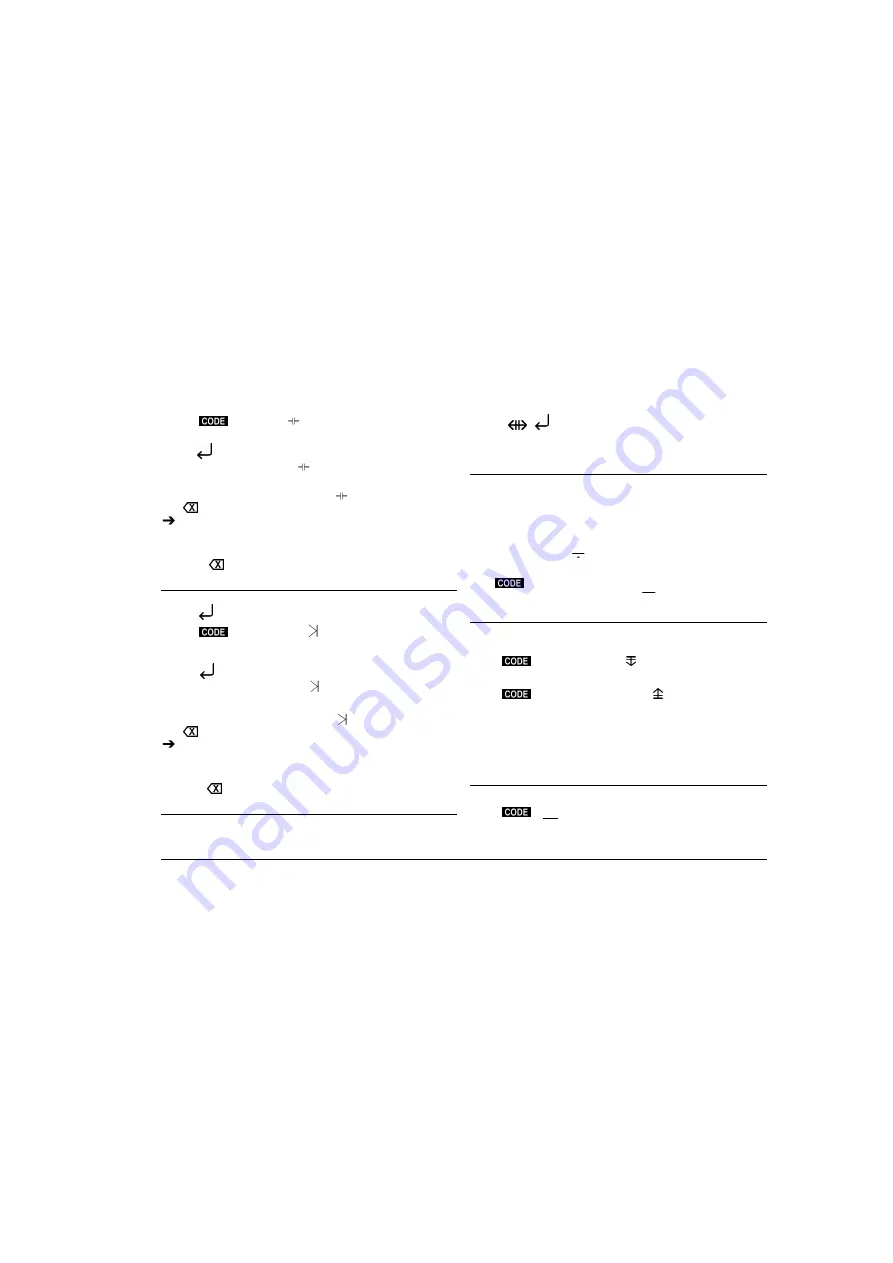
SUBSCRIPT AND SUPERSCRIPT

You  can  enter  characters  in  subscript  or  superscript  (bases  or  exponents)  by  causing
the platen to rotate back or forward by half a line feed.

1. 

Press:


 + SUB

 to type a base. The 

 symbol appears in the service area of

the display

or


 + SUPER

 to type an exponent. The 

 symbol appears in the service

area of the display.

2. 

Type  the  base  or  exponent.  The  corresponding  symbol  appears  below  the
character in the work area of the display.

3. 

Continue typing the text.

IF...

You are working in C-C mode

: the character is printed immediately.

UNDERLINE AND BOLD FACE

Characters can be printed with the underline and/or bold face attribute.

1. 

Press:


  +  XXX

  to  activate  the  underline  attribute.  The  display  shows  the

symbol ||| in correspondence to the separator.

All manuals and user guides at all-guides.com

Содержание ETP 630

Страница 1: ...PORTABLE TYPEWRITERS Instructions ETP 630 All manuals and user guides at all guides com a l l g u i d e s c o m...

Страница 2: ...All manuals and user guides at all guides com...

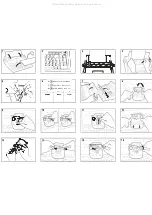
Страница 3: ...1 10 11 3 4 12 13 15 7 1 1 2 xxxxxx xxxxxx xxxxxx xxxxxx xxxxx xxxxx xxxxx xxxxx xxxxx 6 9 16 8 14 5 2 All manuals and user guides at all guides com...

Страница 4: ...UPERSCRIPT 6 UNDERLINE AND BOLD FACE 6 TYPING IN CAPITALS WITH THE FULL STOP COMMA AND NUMBERS ACTIVE 7 THE LINE FORMAT 7 ARRANGING WORDS OR NUMBERS INTO COLUMNS 8 CREATING AND PRINTING TABLES 8 THE P...

Страница 5: ...16 characters It shows the text as it is typed and the messages that will make the typewriter easy for you to use and has the following structure I the work area 13 characters which contains the chara...

Страница 6: ...message CHECK BATTERIES appears this means that the battery that powers the permanent memory is flat or is not present in the machine Press the key and see the Replacing the Battery section FIG 4 The...

Страница 7: ...t to change the line format see the corresponding section of this manual 1 Type the text until you hear the end of line signal The service area of the display indicates the capacity of the line To exe...

Страница 8: ...ACKSPACE 2 Press and type the incorrect character The character will be erased 3 Repeat steps 1 and 2 for each other character to be erased 4 Type the correct characters if appropriate IF the characte...

Страница 9: ...printer unit must be situated on the line immediately before the one that is to be indented 1 Press The printer unit moves to the indent on the next line 2 Type the text The next time you execute a c...

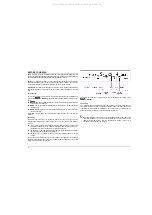
Страница 10: ...line format is defined by the left and right margins any tab stops present the print pitch and line feed values Each time you switch on the typewriter the line format presented is the one defined in...

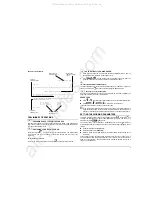
Страница 11: ...s and the counter indicates the number of integers digits still available 2 Type the number to be put in the column with decimal numbers once the decimal point has been entered the counter indicates t...

Страница 12: ...ed in the memory as if you were working in normal typewriter mode You can therefore change the line format parameter settings and use functions such as centring correction tabulation and so on The cha...

Страница 13: ...straight to a point in the text by searching for a word or symbol This procedure is defined a Search key Searching for words The search key may consist of a maximum of 20 characters The underline and...

Страница 14: ...int by pressing MODE MEM MODE MEM or MODE SEARCH KEY press MODE STOP CODE to insert a new stop code The display shows the symbol to remove a stop code with its symbol at the work point 4 Repeat step 3...

Страница 15: ...ged and set in the correct position 7 FIG 12 Reinsert the ribbon cartridge in its housing and press until it clicks into place 8 Close the printer unit cover and the transparent cover Press The printe...

Страница 16: ...harge it When it runs low the machine displays the message CHECK BATTERIES To replace the battery proceed as follows 1 Switch off the machine and unplug the power cable from the mains socket 2 FIG 7 O...

Страница 17: ...entring RIGHTFLUSH Right alignment SUB Half a line feed down base SUPER Half a line feed up exponent BACKSPACE Half a step back IMPACT Stroke impact DISPLAY Display brightness ADDRESS Defines start en...

Страница 18: ...presence of an incorrect command executed during the text editing phase MANUAL CORRECTION Appears while making manual corrections of characters that have already been printed RTJ PRINT Y or N During...

Страница 19: ...illeur Appareils Num riques NMB 003 dict e par le ministre des Communications USER SAFETY To avoid injury to the user and damage to the machine the following rules must be respected I The machine must...

Отзывы: