Diagnostic information
2-11
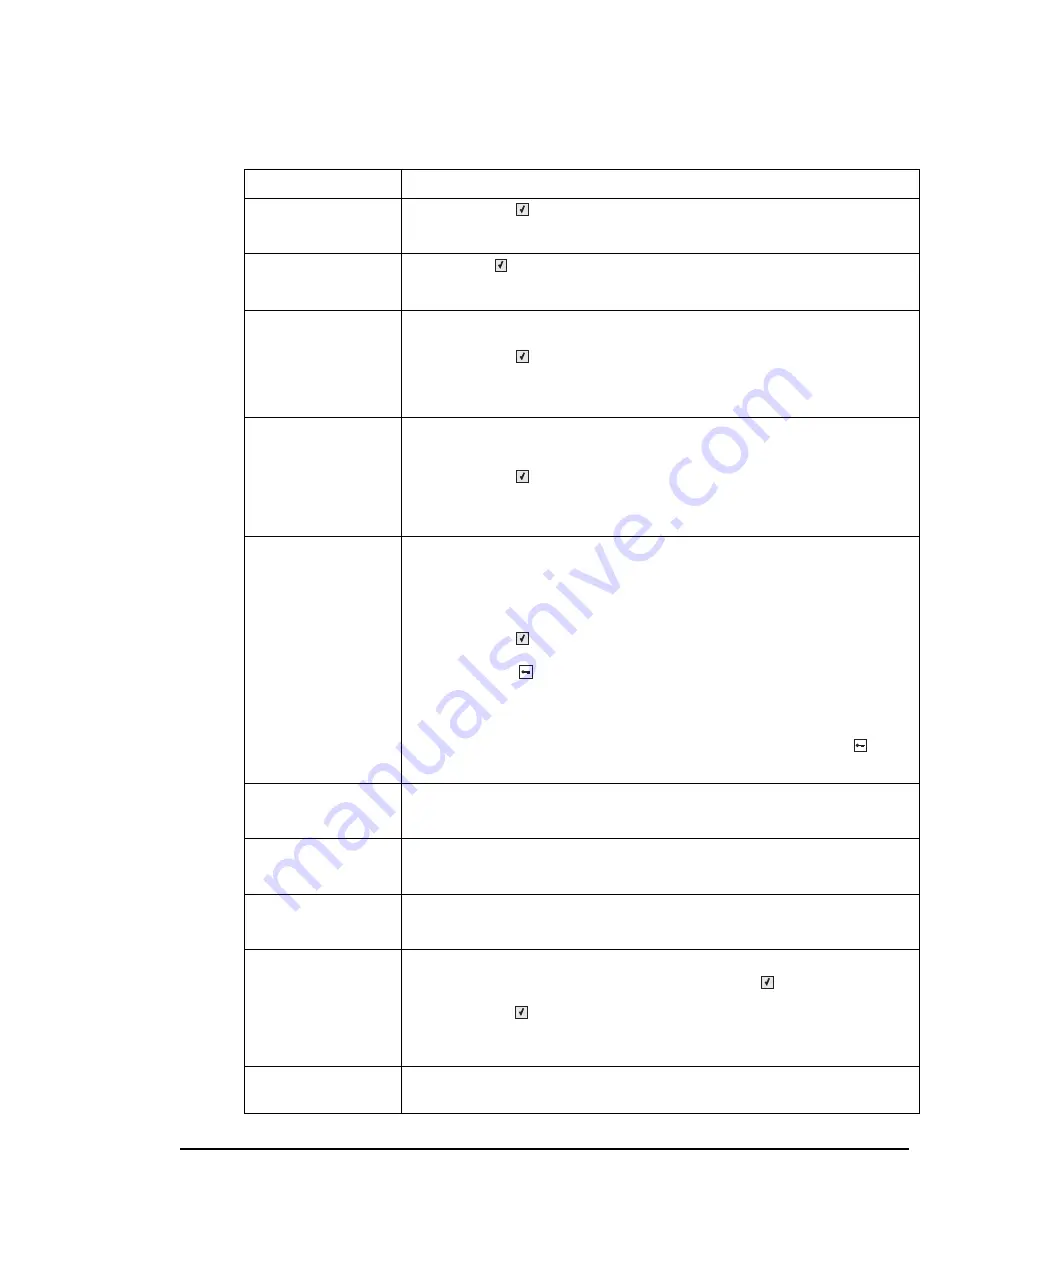
52 Flash Full
• press
Select
(
to clear the message and continue printing.
• Delete fonts, macros, and other data stored on the flash memory.
• Install a larger capacity flash memory card.
53 Unformatted Flash
press
Select
(
to clear the message and continue printing.
You must format the flash memory before you can store any resources on it. If the
error message remains, the flash memory may be defective and require replacing.
54 Standard Network
Software Error
This message is displayed when the RIP software detects that a network port is
installed but cannot establish communications with it.
• press
Select
(
to clear the message and continue printing.
The job may not print correctly.
• Program new firmware for the network interface.
• Turn the printer power off and then back on to reset the printer.
54 Network <
x
>
Software Error
The printer disables all communications to the associated network interface. No data
may be received or sent from or to the associated interface. The user can program
new firmware in the network using the parallel port after this message clears.
• press
Select
(
to clear the message and continue printing.
The job may not print correctly.
• Program new firmware for the network interface.
• Turn the printer power off and then back on to reset the printer.
56 Standard USB
Port Disabled
This message may appear when data is sent to the printer across a USB port, but the
port is disabled.
Note
: Once the error is displayed the first time, reporting of further errors is
suppressed until the printer is reset or menus are entered.
The following actions can be taken:
• press
Select
(
to clear the message.
Any data received on the USB port is discarded.
• press
Menus
(
to access the Busy/Waiting Menu.
The following functions may be available:
- Turn the printer power off and then back on to reset the printer.
- Reset Active Bin
- Check Supply Levels
Make sure the USB Buffer menu item is not set to Disabled. (press
Menus
to
access the Administrative Menus, select
Network/Ports
,
USB Menu
, and
USB Buffer
.)
58 Too many Flash
Options Installed
1. Turn off and unplug the printer.
2. Remove the excess flash memory.
3. Plug in the printer, and turn it on.
58 Too Many
Trays Installed
1. Turn off and unplug the printer.
2. Remove the additional trays.
3. Plug in the printer, and turn it on.
59 Incompatible
Tray <
x
>
1. Turn off and unplug the printer.
2. Remove the specified incompatible tray.
3. Plug in the printer, and turn it on.
82 Waste Toner Nearly
Full
Try one or more of the following:
• Replace the waste toner bottle, and then press
Select
(
) to clear the message
and continue printing. See Go to
“Waste toner bottle” on page 4-67
.
• press
Select
(
) to clear the message and continue printing.
Order the waste toner bottle so it will be available when the replacement message is
displayed. Once the replacement message is displayed, the printer will not continue
until the waste toner is replaced.
82 Waste Toner Missing Waste toner box must be present. Install the waste toner bottle.
• Replace the specified toner cartridge.
User status and attendance messages (continued)
User primary message Explanation
Y112730-2
Содержание d-Color MF920
Страница 1: ...SERVICE MANUAL Copiatrici Copiers d Color MF920 d Color MF923 Code Y112730 2...
Страница 10: ...x Service Manual Y112730 2...
Страница 15: ...Notices and safety information xv Y112730 2...
Страница 16: ...xvi Service Manual Y112730 2...
Страница 18: ...xviii Service Manual Y112730 2...
Страница 22: ...xxii Service Manual Y112730 2...
Страница 124: ...2 80 Service Manual Y112730 2...
Страница 198: ...3 74 Service Manual Y112730 2...
Страница 203: ...Repair information 4 5 4 Remove the three screws A on the rear side of the left cover A Y112730 2...
Страница 211: ...Repair information 4 13 9 Remove the two springs D 10 Remove the two screws E on the bottom Y112730 2...
Страница 234: ...4 36 Service Manual 4 Snap the new gear onto the shaft D The installation is the same as the old gear Y112730 2...
Страница 288: ...4 90 Service Manual 6 While holding the op panel mounting assembly remove the op panel bezel cover Y112730 2...
Страница 302: ...4 104 Service Manual Y112730 2...
Страница 305: ...Locations 5 3 Interior view Y112730 2...
Страница 306: ...5 4 Service Manual Printer boards Controller Board Y112730 2...
Страница 317: ...Locations 5 15 HVPS Y112730 2...
Страница 319: ...Locations 5 17 LVPS Y112730 2...
Страница 324: ...6 2 Service Manual Y112730 2...
Страница 331: ...Index I 7 Y112730 2...
Страница 332: ...UPDATINGSTATUS DATE UPDATEDPAGES PAGES CODE 09 2010 1ST EDITION 332 Y112730 2...


