background image

3) Install the FabGL library

3.1) Go to "Main menu -> Sketch -> Include Library -> Manage Libraries..." (CTRL+SHIFT+I);

3.2) Look for library FabGL (just like the packages earlier you can filter all the libraries by typing "FabGL" 
in the search bar);

3.3) Install it (it is tested with 1.0.8, newer versions of the library may not work);

4) Compile and Upload the firmware (Agon Quark VDP);

4.1) Open the sketch 2-AgonLight2-VDP-104-RC1.ino(the provided one is version 1.04RC1, for the latest 
one check https://github.com/breakintoprogram/agon-vdp );

4.2) Go to "Main menu -> Tools -> Board -> ESP32 Arduino" and select "ESP32 Dev Module";

4.3) Plug the USB to the AgonLight2 board;

4.4) In Device manager you can see the COM# at which our device has connected;

4.5) Go to "Main menu -> Tools -> Port" select the one ESP32 has connected;

4.6) Go to "Main menu -> Tools -> PSRAM" select Enabled;

4.7) Compile and Upload (every time after opening the project in Arduino the first compilation is VERY slow
– be patient).

Agon Quark MOS installation on the eZ80 chip

1) If there is no MOS at all or it's older than 1.02 you must have "ZILOG eZ80F92" programmer and have to 
install IDE:

1.1) Download "ZDS II - eZ80Acclaim!" from here: https://zilog.com/index.php?
option=com_zcm&task=view&soft_id=54&Itemid=74 (tested with 5.3.5 but should work with newer 
versions)

1.2) Install the IDE and run it

1.3) Go to "Main menu -> File -> Open Project" and navigate to 
"3-AgonLight2-MOS-104-RC1/MOS.zdsproj" (the provided version is 1.04-RC1, for the latest one check 
https://github.com/breakintoprogram/agon-mos )

1.4) Build the project (F7)

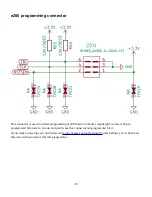
1.5) Connect the programmer to the ZDI connector on the AgonLight2 board

1.6) Go to "Main menu -> Debug -> Download the code"

24

Содержание AgonLight2

Страница 1: ...AgonLight2 User Manual Rev 1 8 October 2023 olimex com 1...

Страница 2: ...power supply and consumption 15 GPIO connector 16 UEXT connector 17 Access bus connector 18 eZ80 programming connector 19 Jumpers 20 SOFTWARE 21 Official AgonLight Firmware 22 Extra info about AgonLi...

Страница 3: ...INTRODUCTION 3...

Страница 4: ...th additional hardware sensors expansions etc AgonLight and AgonLight2 are Open Source Hardware and officially OSHWA certified All CAD source files are available at AgonLight and AgonLight2 GitHub rep...

Страница 5: ...400mAh note that these batteries can be shipped only by ground so we can deliver only to EU destinations USB KEYBOARD PS2 USB keyboard which supports PS2 and can be used for AgonLight2 BREADBOARD 1 Br...

Страница 6: ...ard must be PS2 compatible SRAM routed with 40 ohm impedance as per part datasheet Fixed some wrong signal naming on ESP32 PICO D4 GPU co processor Fixed GPIO and programming connector pin ordering Re...

Страница 7: ...n 1 SD card contents then copy the contents of the folder 5 Attach a class 10 micro SD card to your PC formatted in FAT32 and with a size of maximum 32GB 6 Paste the contents of the folder 1 SD card c...

Страница 8: ...HARDWARE 8...

Страница 9: ...ut 9 Micro SD card USB PS2 keyboard Buzzer LiPo battery UEXT GPIO connector ESP32 programming jumper ESP32 UART disable jumper Buzzer enable jumper EZ80 programming Access bus Audio Out VGA USB C powe...

Страница 10: ...ad and print at GitHub there is PDF export of the schematic all sources 3D view files gerbers bill of materials and more AgonLight2 dimensions Dimensions can be found in this document https github com...

Страница 11: ......

Страница 12: ......

Страница 13: ......

Страница 14: ......

Страница 15: ...h a keyboard connected If a Li Po battery is connected it will get charged automatically when power supply is attached with up to 100mA When the LiPo battery is attached and external power supply is m...

Страница 16: ...ower supply applying more than 5V will damage the board Pin 3 Pin 5 Pin 33 are GND Pin 34 is 3 3V output capable to source up to 2A note that 200mA are used by AgonLight2 Pin 4 is 5V output capable to...

Страница 17: ...als UEXT is 0 1 2 54mm step boxed plastic connector All signals are with 3 3V levels Olimex has developed number of MODULES compatible with this connector There are temperature humidity pressure magne...

Страница 18: ...Access bus connector This is I2C and power supply with 3 3V levels 18...

Страница 19: ...0 microcontroller AgonLight2 comes with pre programmed firmware so you do not need to use this connector nor programmer for it If you want to develop your own firmware Jeroen Venema wrote flash utilit...

Страница 20: ...isabled ESP_PROG1 ESP programming enabled when closed ESP32 enters bootloader mode at reset and can be programmed over the USB connector Default state Open ESP programming handled by software UART_D U...

Страница 21: ...SOFTWARE 21...

Страница 22: ...patible Meaning that you might need to upgrade or downgrade MOS VDP basic in order to run the board If in doubt use the versions we provide It is always recommended to get the latest files and instruc...

Страница 23: ...on Quark VDP on the ESP32 chip you have to install IDE package and libraries 1 Arduino IDE 1 1 Go to https www arduino cc en software 1 2 While this will most likely work with 2 x x we recommend you t...

Страница 24: ...in menu Tools Port select the one ESP32 has connected 4 6 Go to Main menu Tools PSRAM select Enabled 4 7 Compile and Upload every time after opening the project in Arduino the first compilation is VER...

Страница 25: ...hout the need of the programmer and IDE Olimex tested firmware and examples These can be found in the repository here https github com OLIMEX AgonLight2 tree main SOFTWARE Disclaimer Most of the examp...

Страница 26: ...MOS commands LOAD SAVE CAT DIR CD MKDIR BYE CPM ERA file ESC ON OFF EXEC file OPT REN oldfile ewfile SAVE file aaaa bbbb SPOOL file TYPE file comment 26...

Страница 27: ...DIV DRAW ELSE END ENDPROC ENVELOPE EOF EOR ERL ERR ERROR EVAL EXP EXT FALSE FN FOR GCOL GET GET GET GOSUB GOTO HIMEM IF INKEY INKEY INPUT INSTR INT LEFT LEN LET LINE LIST LN LOAD LOCAL LOG LOMEM MID...

Страница 28: ...d the Port C direction register we can PRINT GET 159 and it should return 255 If we want to set GPIO_PC0 as output we should write 0 in bit 0 with the command PUT 159 254 Data registers are 8 bit and...

Страница 29: ...Software access to I2C TBD 29...

Страница 30: ...Software access to SPI TBD 30...

Страница 31: ...Software access to VPU TBD 31...

Страница 32: ...e of the document added more info about first steps with the board Revision 1 3 July 2023 general improvements to the structure of the document fixed links added info about firmware and firmware updat...

Отзывы: