background image

OLIMEX© 2015

A10-OLinuXino-LIME user's manual

The connector case is also grounded.

We have configured an Android image with settings suitable for A10-OLinuXino-LIME. Then using
PhoenixSuit tools we uploaded the image to the board via the USB OTG. The image is available for
users to try and tweak the settings. The images can be downloaded from the wiki article at: 

https://www.olimex.com/wiki/A10-OLinuXino-LIME

The board variant without NAND needs an SD card with bootable OS – Android or Linux. There 
are ready images available for download at the above-linked A10 wiki article.

To repair the image on NAND re-upload it following these easy steps:

1. Install and run PhoenixSuit (can be found in the wiki article of the board).

2. Go to firmware tab of the program and point to a valid Android image (the latest official one may
also be downloaded from the wiki article). 

3. Disconnect the power supply and USB cable from the A10 board.

4. Press and hold RECOVERY button, apply power supply 5V, release RECOVERY button.

5. Connect USB cable to the mini USB connector

6. You will be asked for drivers for the bootloader. Navigate to the folder where you extracted the 
PhoenixSuit and install the drivers from the respective executables (or manually point the installer 
to the drivers folder in the PhoenixSuit installation path).

7. PhoenixSuit will detect the board and would ask for the method of writing the image. Choose 
method of writing the image and confirm your wish to write the image.

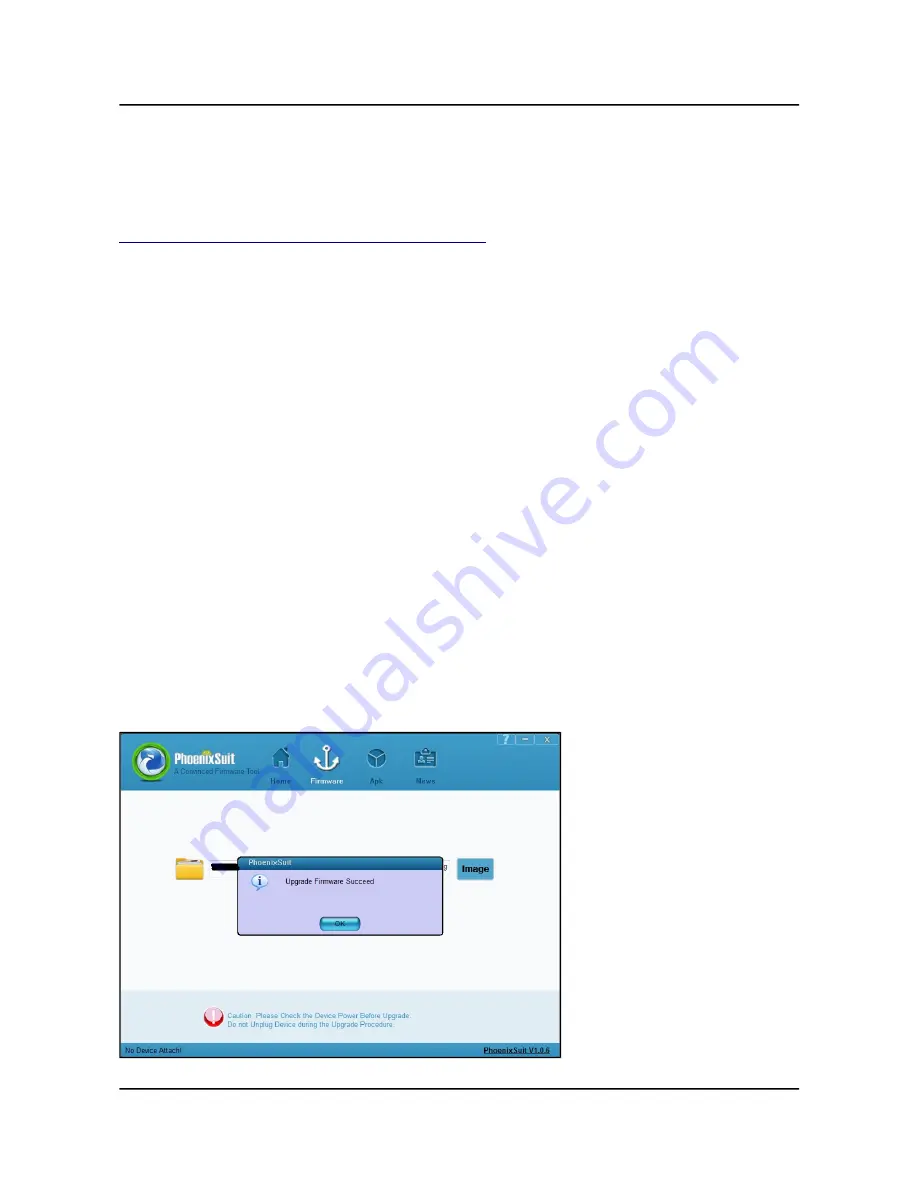
8. Wait till upgrade succeeds as shown below:

Page 25 of 45

Содержание A10-OLINUXINO-LIME

Страница 1: ...UXINO LIME and A10 OLINUXINO LIME 4GB Open source single board Android Linux mini computer USER S MANUAL Revision H March 2015 Designed by OLIMEX Ltd 2015 All boards produced by Olimex LTD are ROHS co...

Страница 2: ...urpose are excluded This document is intended only to assist the reader in the use of the product OLIMEX Ltd shall not be liable for any loss or damage arising from the use of any information in this...

Страница 3: ...6 Connecting and calibrating a display 12 2 6 1 Android calibration 13 2 6 2 Debian calibration 13 2 7 GPIO under Debian 13 2 8 I2C and SPI under Debian 14 2 9 Software support 15 CHAPTER 3 A10 OLINUX...

Страница 4: ...l Purpose Input Output 40pin connector 34 6 9 4 GPIO 4 General Purpose Input Output 20pin connector 34 6 10 LCD_CON 40pin connector 35 6 11 Jumper description 36 6 12 Additional hardware components 37...

Страница 5: ...Cortex A8 CPU 1GHz and Mali 400 GPU 512MB DDR3 RAM memory 4GB NAND FLASH memory available only on the 4GB version of the board Android already loaded on the NAND available only on the 4GB version of...

Страница 6: ...n has a built in NAND memory that allows the storage of an operating system without the need of a SD card The 4GB version comes with already programmed Android image The A20 OLinuXino LIME and A20 OLi...

Страница 7: ...e notes Chapter 3 contains the general board diagram and layout Chapter 4 describes the component that is the heart of the board the A10 Allwinner processor Chapter 5 is an explanation of the control...

Страница 8: ...ard make sure that they have equal electrical polarity For example when you connect an HDMI cable between a TV and the board it is a good idea to have them both connected to the same electrical source...

Страница 9: ...ut Some of the above suggested items can be purchased by Olimex for instance SY0605E reliable power supply adapter 50Hz for EU 5V 1A for A10 OLinuXino LIME SY0605E CHINA cheaper power supply adapter 5...

Страница 10: ...rom the USB_OTG the current provided might be insufficient to also power a bigger LCD connected to the LCD_con However this power option is capable of driving the board when using external display con...

Страница 11: ...file format first There are ready to use tools that convert script bin script fex Note that script bin fex contains configuration settings and definitions not only for the video output but also for th...

Страница 12: ...768 5 800 600 6 640 480 7 1920 1080 8 1280 720 2 6 Connecting and calibrating a display One of the ways to interact with the board is via an external display with or without touchscreen component If...

Страница 13: ...e the image no matter whether the SD card or the NAND memory you might need to use a mouse to calibrate the display initially It might be impossible to calibrate it via touching the display 2 6 2 Debi...

Страница 14: ...out sys class gpio gpio49_ph9 direction 3 Set value or read value GPIO 49 3 1 Set value echo 0 sys class gpio gpio49_ph9 value echo 1 sys class gpio gpio49_ph9 value 3 2 Read input cat sys class gpio...

Страница 15: ...e on the market If you are in a hurry consider the older OLinuXino designs which have almost everything supported have examples available and so on You are more than welcome to send or share your sugg...

Страница 16: ...you get acquainted with the main parts of the board Note the names used on the board might differ from the names used below to describe them For the actual names check the A10 OLinuXino LIME board its...

Страница 17: ...A10 OLinuXino LIME user s manual 3 2 Layout bottom view At the bottom are located mainly the buttons and microSD card connector You should be careful of the surface that you use to place the board Pa...

Страница 18: ...KB L2 Cache GPU ARM Mali 400 VIDEO UHD 2160P video decoding 3D video decoding Support various video decoding formats including VP8 AVS H 264 MVC VC 1 MPEG 1 2 4 etc H 264 HP video encoding up to 1080p...

Страница 19: ...ore information can be found on Allwinner s web site at the following web address http www allwinnertech com en product A10 html A good source of information on the processor is the linux sunxi wiki a...

Страница 20: ...al Q3 is found at pins N22 and N23 of the A10 microcontroller 5 3 Power supply circuit The power supply is handled mainly by AXP209 power management system an Allwinner chip that goes together with th...

Страница 21: ...t at hand when debugging the video output is not always reliable and if you set wrong display settings you might be unable to recover the settings without a proper UART0 connection The more indirect w...

Страница 22: ...he official Linux image from the wiki pages https www olimex com wiki A10 OLinuXino LIME When removing the card please make sure that you release it from the connector by pushing and NOT by pulling th...

Страница 23: ...ng and whether there is a card inserted 6 3 PWR jack The power jack used is the typical DC barrel jack one used by Olimex 2 1 6 3 9 2mm in most of our products More information about the exact compone...

Страница 24: ...ntrolled by the same signal Please note that the USB0 DRV pin C12 port B9 is multiplexed with the I2S_DO1 signal If you are going to use the I2S audio interface then you would probably need to change...

Страница 25: ...enixSuit can be found in the wiki article of the board 2 Go to firmware tab of the program and point to a valid Android image the latest official one may also be downloaded from the wiki article 3 Dis...

Страница 26: ...sts is exactly 523mA The SY6280 responsible for the USB_HOST1 is enabled by USB0 DRV1 processor pin A4 The SY6280 responsible for the USB_HOST2 is enabled by USB0 DRV2 processor pin A5 USB_HOST connec...

Страница 27: ...in etc network interfaces For DHCP you need to enable auto detection and dhcp as shown below auto eth0 iface eth0 inet dhcp For setting a static address please follow the pattern below auto eth0 ifac...

Страница 28: ...l Ethernet Pin Signal name 1 TD 2 TD 3 VDD 4 NC 5 NC 6 VDD 7 RD 8 RD The RJ45 connector has a small yellow and a small built in LEDS and they are described below LED Color Usage Right Green Link statu...

Страница 29: ...runs Android there is a specific option to set the appropriate HDMI output HDMI connector Pin Signal name Processor pin Pin Signal name Processor pin 1 HTX2P T23 11 GND 2 GND 12 HTXCN W22 3 HTX2N T22...

Страница 30: ...adapter cable accordingly The other options is to check the SATA CABLE SET that we have available For more information please visit https www olimex com Products Components Cables SATA CABLE SET Pay...

Страница 31: ...connector named CABLE 40 40 10CM IMPORTANT the cables and the 0 05 connectors are very fragile if you attempt to disconnect the setup by pulling the cable it might break Furthermore you might bend th...

Страница 32: ...is described below GPIO 1 connector Pin Signal name Processor pin Pin Signal name Processor pin 1 5V 2GND 3 3 3V 4GND 5PG0 F20 6LRADC0 AB23 7PG1 E21 8LRADC1 AB22 9PG2 E20 10MICIN1 AC20 11PG3 D21 12VM...

Страница 33: ...5 TWI0 SCK A15 6 PE0 E23 7 TWI0 SDA B15 8 PE1 E22 9 PI0 A20 10 PE2 D23 11 PI1 B20 12 PE3 D22 13 PI2 A19 14 PE4 C23 15 PI3 B19 16 PE5 C22 17 PI10 C17 18 PE6 B23 19 PI11 D17 20 PE7 B22 21 PC3 NCE1 L22 2...

Страница 34: ...39 PH23 E2 40 PH27 F4 6 9 4 GPIO 4 General Purpose Input Output 20pin connector GPIO 4 connector features the rest of the signals available and few additional signals that might need testing GPIO 4 c...

Страница 35: ...AB11 14 LCD_D9 AC11 15 LCD_D10 Y15 16 LCD_D11 AA15 17 LCD_D12 Y14 18 LCD_D13 AA14 19 LCD_D14 Y13 20 LCD_D15 AA13 21 LCD_D0 AB15 22 LCD_D1 AC15 23 LCD_D2 AB14 24 LCD_D3 AC14 25 LCD_D4 AB13 26 LCD_D5 A...

Страница 36: ...is port PC3 Changing this jumper also changes the availability of PC3 and PB8 at GPIO 1 pin 29 and GPIO 3 pin 16 Please note that if you change the position of the jumper from PC3 to PB8 then you migh...

Страница 37: ...the board is SAMSUNG K4B4G1646D BCK0 The DDR3 memory part name in the schematic might be outdated We have used a number of different but fully compatible DDR3 memories due to supply unavailability It...

Страница 38: ...d A10 OlinuXino LIME are similar and it is possible that a single board file and schematic for both boards exist We mostly use Eagle by Cad Soft 4 16r2 for designing However the files should be compat...

Страница 39: ...OLIMEX 2015 A10 OLinuXino LIME user s manual 7 2 Physical dimensions Note that all dimensions are in mils Page 39 of 45...

Страница 40: ...information Replaced misleading suggested 12V power supplies with 5V ones 28 9 37 C 27 08 14 Clarified few important points in the features Expanded the text which details the limits of the software s...

Страница 41: ...PB8 both on the schematic and the print 2 Added R73 10M in parallel to the 32768 crystal 3 Added 2 FET transistors and MCP130 for switching directly external 5V without voltage drop 4 USBDRV0 goes th...

Страница 42: ...Y0605E CHINA cheaper power supply adapter 50Hz EU 5V 1A for A10 OLinuXino LIME A10 ANDROID SD a tested class 10 micro SD card with the latest by the time of leaving the Olimex facilities official Andr...

Страница 43: ...ressing or holding down the PWR button for a couple of seconds to wake it up Q How do I write the Linux image to a micro SD card to use with my A10 board A To write a Linux image to an SD card under W...

Страница 44: ...r drivers for the boot loader Navigate to the folder where you extracted the PhoenixSuit and install the drivers from the respective executables or manually point the installer to the drivers folder i...

Страница 45: ...rect ordered items are allowed subject to a 10 restocking fee What is unaffected If you hooked it to power you affected it To be clear this includes items that have been soldered to or have had their...

Отзывы: