6
SDI
OSD
Manual
R062013
‐
V26
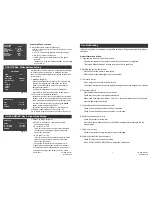
7. ADJUST: Screen Adjustment Function
ADJUST
SHARPNESS
MONITOR
LCD
OSD
LSC
ON
NTSC
/
PAL
NTSC
RETURN
RET
1.
SHARPNESS:
display
precision
(Sharpness)
0
~
100
steps
to
adjust
the
level.
a.
Selected:
i.
RESOLUTION:
ON
/
OFF
at
the
same
time,
the
resolution
will
augment.
2.
MONITOR:
select
the
type
of
video
output
device
‐
optimized
video
monitoring
of
the
environment
provided.
a.
LCD:
gamma
level
(GAMMA)
and
blue
(BLUE
GAIN)
and
red
(RED
GAIN)
to
100
steps
each
can
be
adjusted.
b.
CRT:
Black
Level
(BLACK)
and
blue
(BLUE
GAIN)
and
red
(RED
GAIN)
to
100
steps
each
can
be
adjusted.
3.
LSC:
adjust
digital
Keystone
Correction.
a.
OFF:
Turn
off
this
function.
b.
ON:
digital
Keystone
Correction
function
is
selected,
and
an
optimized
digital
image
to
automatically
adjust
the
amount
of
light
that
is
optimized
for
video.
4.
NTSC
/
PAL:
select
CVBS
additional
video
connection,
TV.
8. RESET: Factory Rest Function
RESET
FACTORY
RESET
RETURN
RET
1.
FACTORY:
The
factory,
set
to
default
values
to
initialize
the
set
of
all
modes.
3
SDI
OSD
Manual
R062013
‐
V26
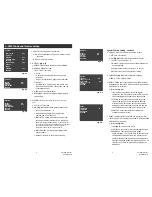
B/W
BURST
OFF
IR
SMART
OFF
RETURN
Fig.
4.2
Day
&
Night
Mode
Setting
‐
continue
2.
B/W
Mode:
(Fig.
4.2)
a.
BURST:
OFF
or
ON.
Color
signal
to
noise
generated
by
switching
to
black
and
white
mode
to
full
function
is
used
b.
IR
SMART:
OFF
or
ON.
IR
LED
lights
up
at
night
or,
if
the
object
is
close
to
the
front
of
the
camera,
IR
LED
to
increase
visibility
for
yourself
is
to
adjust
the
brightness.
LEVEL
15
steps
and
AREA
(area)
can
be
set.
3.
EXT
Mode:
(Fig.
4.3)
External
input
to
the
value
of
the
amount
of
light
control
sensor
day
&
night
conversion
is
performed.
*The
case
of
an
infrared
camera,
EXT
mode
is
set
by
default.
4.
COLOR
Mode:
(Fig.
4.3)
Color
(weeks)
only
mode
is
fixed.
MAIN
MENU
LENS
DC
EXPOSURE
WHITE
BAL
MANUAL
DAY
&
NIGHT
EXT
NR
SPECIAL
ADJUST
RESET
EXIT
Fig.
4.3
5. NR: Digital Noise Reduction Feature Setting
3DNR
3DNR
ON
LEVEL
+++++++80
SMART
NR
OFF
RETURN
1.
3DNR,
three
‐
dimensional
digital
noise
on
the
screen
(3D
image)
compression
that
reduces
the
noise
significantly
functions:
a.
ON:
(Fig.
5.2)
i.
S
‐
LEVEL:
Indicates
where
to
Start
the
3DNR.
ii.
E
‐
LEVEL:
Indicates
where
to
End
the
3DNR.
b.
OFF:
Turn
off
the
function.
2.
LEVEL:
Increase
the
level
of
noise
reduction.
*DNR
LEVEL
increasing,
powerful
noise
reduction
performed
by
the
first,
so
the
camera's
resolution
is
to
take
off.
3.
SMART
NR:
Intelligent
Noise
Reduction
a.
ON:
Autumnally
reduce
noise
when
a
person
or
object
is
motion.
b.
OFF:
Function
off.
*DNR
feature
on
‐
screen
Functionality
first
performed
to
remove
noise,
so
the
camera's
resolution
is
closely
related
to
the
decrease
in
the
LEVEL
control.
3DNR
S
‐
LEVEL
+++++++0
E
‐
LEVEL
+++++++0
RETURN
Fig.
5.2
Fig.
5.1


