


7
3.
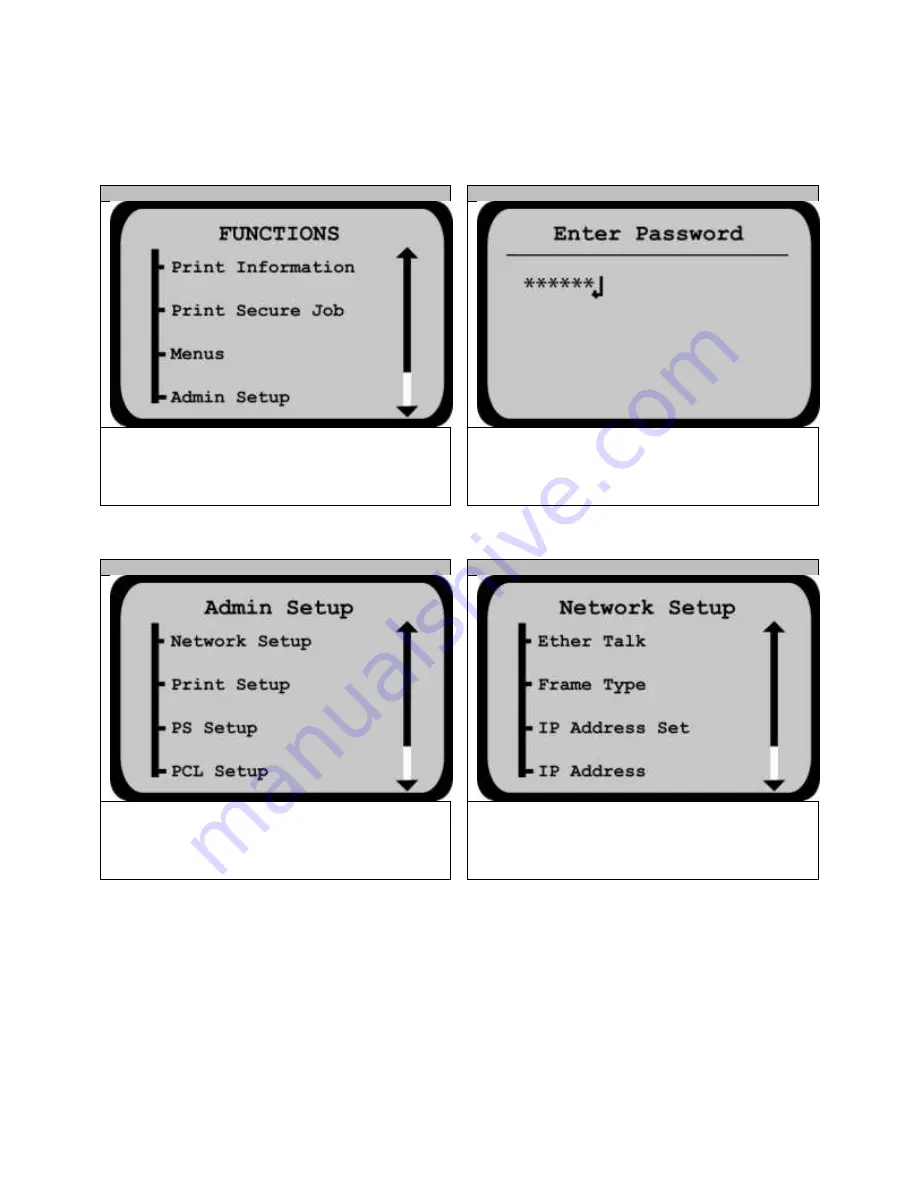
Setting the IP Address at the Printer
STEP 3-1
STEP 3-2
Enter the printer menu. Scroll down and select
Admin
Setup
to enter.
Using the up and down arrow keys, enter the password
aaaaaa (six lower case a’s). Select Enter.
STEP 3-3
STEP 3-4
Select the
Network Setup
menu.
Scroll down to the
IP Address
and select Enter.
Содержание proColor Pro510DW
Страница 1: ......
Страница 13: ...13 STEP 4 9 Enter the Printer Name and click Next STEP 4 10 You ve successfully added the printer Select Finish...
Страница 17: ...17 STEP 6 3 Open the Workflow STEP 6 4 This screen will pop up Click Allow Access...
Страница 18: ...18 STEP 6 5 Right click the Printer Output icon and select Setup STEP 6 6 Select Edit...
Страница 22: ...22 STEP 7 3 Select Import Certified Media STEP 7 4 Click the and select the certified media list...
Страница 23: ...23 STEP 7 5 Click Open STEP 7 6 Ensure the Set the Import Media to Enabled box is checked and click OK...
Страница 24: ...24 STEP 7 7 Click Close STEP 7 8 From the General Options side bar click Update Stock Database...
Страница 35: ...35 STEP 9 7 After the job has finished submitting click Close...
Страница 41: ...41 STEP 11 5 From the File menu select Print STEP 11 6 Select OK...


