


30
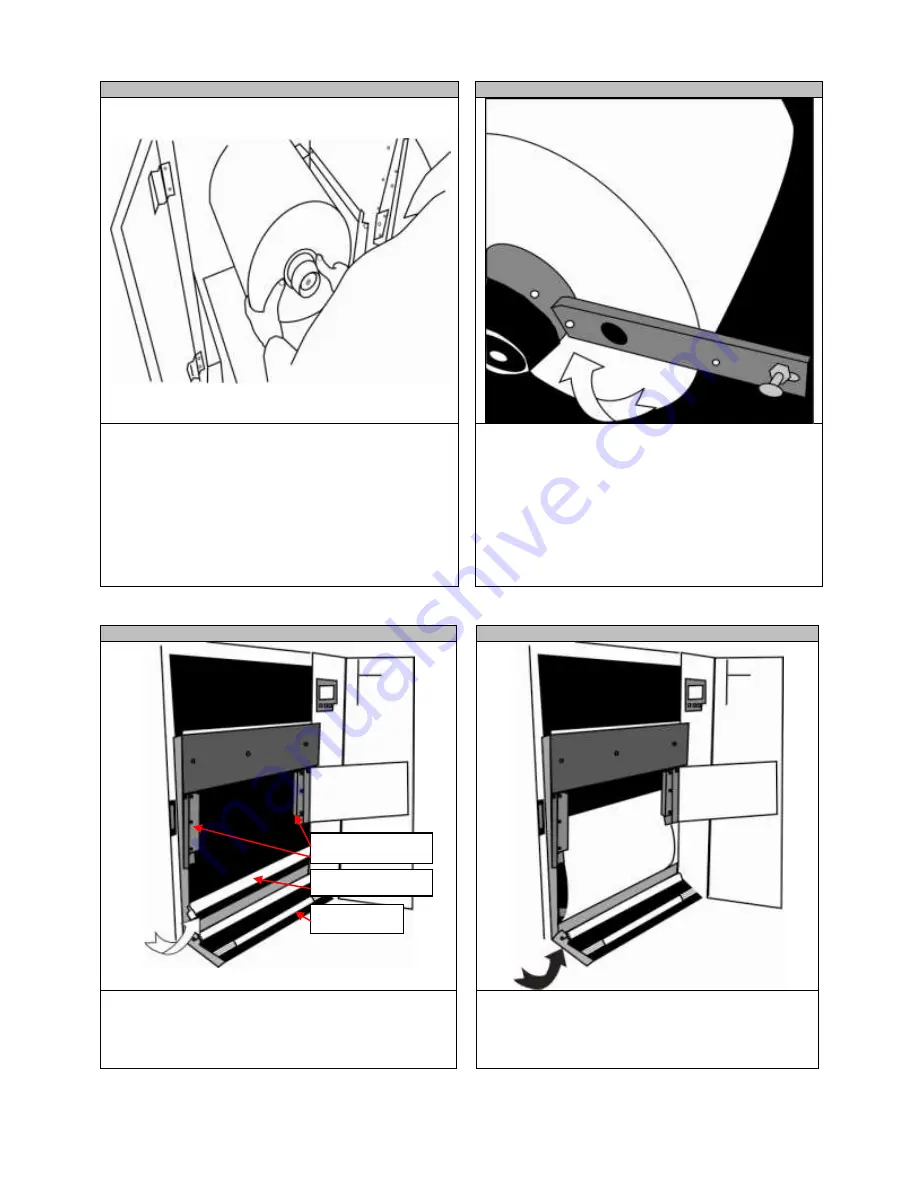
STEP 8-1
STEP 8-2
Open the Media Door.
Before loading the roll, ensure the sides of the roll are flat.
Insert a roll paper as shown
, ensuring you’re holding the
roll on the side and the media is flat and does not cone.
If this is not done properly, there will be tracking problems.
Ensure the roll is pushed all the way into the feeder
against the back, red Extension Arm.
Lift the Extension Arm back up into position making
sure both the Plunger and Extension Arm lock.
The Extension Arm should be rubbing on the roll
slightly to provide some back tension (drag).
STEP 8-3
STEP 8-4
Open the Load Door at the bottom front of the feeder by
releasing the two yellow latches.
Open the Guide Cover and Guide Channels. Feed the
media under the orange Tension Swing as shown.
Place the media three quarters of the way up the path
so it has covered the paper sensors completely.
Place the paper evenly between the Guide Channels
and hold it steady with one hand.
Guide Channels
Tension Swing
Load Door
Содержание proColor Pro510DW
Страница 1: ......
Страница 13: ...13 STEP 4 9 Enter the Printer Name and click Next STEP 4 10 You ve successfully added the printer Select Finish...
Страница 17: ...17 STEP 6 3 Open the Workflow STEP 6 4 This screen will pop up Click Allow Access...
Страница 18: ...18 STEP 6 5 Right click the Printer Output icon and select Setup STEP 6 6 Select Edit...
Страница 22: ...22 STEP 7 3 Select Import Certified Media STEP 7 4 Click the and select the certified media list...
Страница 23: ...23 STEP 7 5 Click Open STEP 7 6 Ensure the Set the Import Media to Enabled box is checked and click OK...
Страница 24: ...24 STEP 7 7 Click Close STEP 7 8 From the General Options side bar click Update Stock Database...
Страница 35: ...35 STEP 9 7 After the job has finished submitting click Close...
Страница 41: ...41 STEP 11 5 From the File menu select Print STEP 11 6 Select OK...


