4
7.
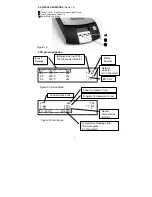
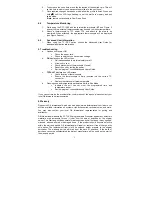
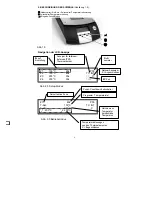
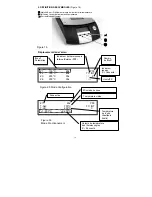
As the profile runs you will see the zone numbers, Z1
Æ
Z4 then ZC (Cool-
Down Zone), increment and the times and temperatures for that particular
zone displayed on the LCD (see Figure 3 above).
8.
To quit the profile, simply depress the footswitch continually for 2 seconds.
The profile will skip to the Cool-Down Zone.
4.1.1 Manual Mode [For Pre-programmed, Single Zone, Heater]
1. Steps 1
Æ
6 as above to start the PCT-1000.
2.
Z1: will read MANUAL and the Temperatures will be displayed.
3.
To stop the heater, depress the footswitch a second time to place the PCT-
1000 into the cooling zone.
4.2
Setup Mode ~
Changing Profile Time/Temperature Parameters:
4.2.1
Manual Entry [4 Heating Zones, Timed]
1.
Press the Mode button
(
↵
)
once to start “P:” flashing.
2. Use
the
⊕
/
\
buttons to scroll through the profiles.
3. Press
(
↵
)
to
select the desired profile.
4.
Press and hold
(
↵
)
for 2 seconds
to activate program mode (first temperature
in zone 1 will flash).
5. Use
the
⊕
/
\
buttons to change the temperature to the desired value. (
Note:
continually pressing either the
⊕
or
\
buttons for 5 seconds will change the
count up/down in an accelerated mode)
6.
When the value is set, press
(
↵
)
to move to the next parameter.
7.
Step through each parameter and enter your values as you go.
Note:
In the
Cool-Down Zone you can only modify the Time parameter.
8. Press
(
↵
)
to move to the next parameter. This is the Internal or External TC
option. Use
⊕
or
\
to switch between
Int
or
Ext
or press
(
↵
)
to skip.
9.
Once required changes have been made, press and hold
(
↵
)
for 2 seconds
until the LCD stops flashing, to set the profile to memory and exit setup mode.
4.2.2
Manual Entry [Single Heating Zone, not Timed]
1.
Select Profile to be modified as per steps 1
Æ
4 above.
2.
Set the Temperature in Zone 1 to the Desired Value steps 5
Æ
6 above.
3.
Set the Time for Zone 1 to a value greater than 300 seconds. The display will
now show the word MANUAL and Z2, Z3, Z4 will no longer be shown on the
display.
4.
Once required changes have been made, press and hold
(
↵
)
for 2 seconds
until the LCD tops flashing, to set the profile to memory and exit setup mode.
4.3
Teach Mode Setting
1.
Select Profile to be modified as per steps 1
Æ
4 as per 4.2.2.
2.
Once the temperature in Z1 has started to flash, activate Teach Mode by
depressing the footswitch
3.
Profile will start to run and ‘SETUP’ will be displayed on LCD.
4.
To modify the current zone set-temperature use the
⊕
/
\
buttons.
5. To
increase
the time of the current zone press and hold the
(
↵
)
button as the
zone ends. Instead of stepping onto the next zone the current zone time-
setting will increment the original setting for as long as you keep the
(
↵
)
button
depressed. Releasing the button will allow the profile to progress onto the next
Zone.*
Note:
Steps 4 & 5 can be carried out simultaneously.


