background image

11

Basic settings

2

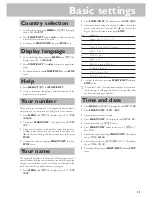
Press 

START/COPY

. The display shows 

ENTeR NaME

.

3

Enter your name using the keypad. Use 

>

 to move the

cursor one position to the right. Use  

<

 to delete the last

digit. To delete the whole entry press  

STOP

.

Key

character

0

space . - 0 + ?/ : * % ! ( ) [ “

1

1

2

A B C  2  a b c  Ä Å Æ Ç  ä å æ ç

3

D E F  3  d e f

4

G H I  4  g h i

5

J K L  5  j k l

6

M N O  6  m n o  Ñ Ö  ñ ö

7

P Q R S  7  p q r s

8

T U V  8  t u v  Ü ü

9

W X Y Z  9  w x y z

4

Confirm the entry by pressing 

START/COPY

 and then

STOP

 twice.

D

“Your name” and “your telephone number” are transmit-
ted at the top of  each page (the first 4 mm) together with
the date, time and page number.

Time and date

1

Press 

MENU

 then 

16

. The display shows 

DATE/TIME

.

2

Press 

START/COPY

YEAR: 2003

.

3

Enter the year using the keypad.

4

Press 

START/COPY

. The display shows 

MONTH: 05

.

5

Enter the month (e.g. 

05

 for May).

6

Press 

START/COPY

 and enter the day (e.g. 

07

 for 7

May 2002).

7

Finalise the entry by pressing 

START/COPY

. The display

shows 

TIME 00:00

.

8

Enter the exact time (e.g. 

2330

 for 23

30

). The display

shows 

TIME 23:30

.

9

To confirm the entry press 

START/COPY

 and then 

STOP

twice.

Country selection

1

To select the country press 

MENU

 and 

18

. The display

shows

 18 COUNTRY

.

2

Press 

START/COPY

 and use 

u

 to select the country,

where the fax machine will be used.

3

Confirm with 

START/COPY

 and press 

STOP

 twice.

Display language

1

To set the display language press 

MENU

 then 

17

. The

display shows 

17 LANGUAGE

.

1

Press 

START/COPY

. Use 

u

 to select the display lan-

guage.

1

To confirm the entry press 

START/COPY

 and then 

STOP

twice.

Help

1

Press 

MENU

667

 and 

START/COPY

.

2

A list of functions (including a brief description of the
main functions) is printed.

Your number

When you enter your number, it will appear on the recipient's
fax printout. You can enter up to 20 digits for your number.

1

Press 

MENU

 and 

14

. The display shows 

14 Your

NUMBER

.

2

Then press 

START/COPY

. The display shows 

Enter

NUM

.

3

Enter your telephone or fax number using the digit keys.
Use 

>

 to move the cursor one position to the right. Use

<

 to delete the last digit. To delete the whole entry press

STOP

.

4

Confirm the entry by pressing 

START/COPY

 and then

STOP

 twice.

Your name

You can use the digit keys to write up to 32 letters to enter your
name. Each key is assigned several letters (see table). By pressing
a digit key several times you can reach the next character in the
table. After the fifth character the row starts again.

1

Press 

MENU

 and 

15

. The display shows 

15 Your

NaME

.

Содержание OKIFAX 4510

Страница 1: ......

Страница 2: ...s this may damage both the cable and the fax machine Unplug the fax machine from the mains and the telephone line before cleaning Do not use liquid or aerosol cleaners such as sprays or polishes Never...

Страница 3: ...ettings 12 Fax switch 13 MANU mode 13 AUTO mode 13 Fax reception from a different phone 13 Dial options 14 Re dialling 14 Speed dialling 14 Phonebook 14 Groups 15 Calling line identification 15 Printi...

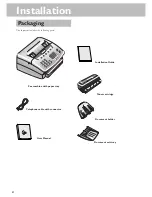
Страница 4: ...ckaging The shipment includes the following parts Installation Telephone cable with connector User Manual Toner cartridge Document holder Document exit tray Installation Guide Fax machine with paper t...

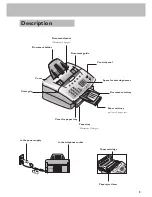
Страница 5: ...guide Cover Cover grip Paper tray Maximum 125 pages Cover for paper tray Document exit tray Paper exit tray pull out of paper tray to the power supply to the telephone socket Toner cartridge Paper eje...

Страница 6: ...clarity of text and drawings when sending and copying u Select options set volume move display cursor MENU Use to select functions AUTO MANU Set receive mode AUTO MANU R For special functions e g whe...

Страница 7: ...locks Document exit tray Insert the document exit tray gently into the opening under the control panel For non standard documents e g larger than A4 just extend the tray Paper exit tray The paper exit...

Страница 8: ...paper tray v v v v v Do not fill the paper tray above the mark Do not insert paper when the machine is printing Do not use paper that has already been printed by a laser printer as this can lead to p...

Страница 9: ...r in the holder until it locks and then close the cover D Keep the open used toner in its original packaging or wrap it in a cloth and return it to your local retailer Connecting the fax machine To th...

Страница 10: ...nected to an ISDN connection but requires an analog adapter or an ISDN system with connections for analog terminals For further information please see the user guide for your ISDN system Private branc...

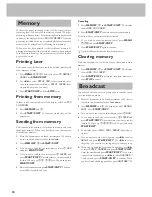
Страница 11: ...MENU and 18 The display shows 18 COUNTRY 2 Press START COPY and use u to select the country where the fax machine will be used 3 Confirm with START COPY and press STOP twice Display language 1 To set...

Страница 12: ...T COPYandthenSTOP twice Energy save mode Energy save mode reduces the energy consumption in standby mode You can select how many minutes after the last entry before energy save mode is activated 1 Pre...

Страница 13: ...e number of rings press MENU and 222 The display shows AUTO RING COUNT 2 Press START COPY and enter the desired number of rings 3 Press START COPY and then STOP twice v v v v v If the volume level is...

Страница 14: ...and START COPY 2 The speed dial list will be printed out Phonebook Your fax machine has space to store around 99 names and numbers The precise number will depend on the length of the entries Storing...

Страница 15: ...have finished entering numbers use u to select ANOTHER N Then press START COPY 5 The document is scanned and automatically sent Canceling Tocancelautomaticredial pressMENU 776andSTART COPY Press STAR...

Страница 16: ...Printing a journal The journal contains the numbers of the last forty faxes sent or received 1 Press MENU 66 and then START COPY 2 The journal is printed out The journal can be printed out automatica...

Страница 17: ...automatic redial without ejecting the document press MENU 773 and then START COPY Press START COPY to confirm Resolution Your fax machine has four different resolutions In addition to STANDARD for fax...

Страница 18: ...er the time you want to send it within 24 hours e g 18 30 for 6 30 pm and press START COPY 3 EnterthefaxnumberandpressSTART COPY Thedocu ment will be scanned and sent Canceling 1 Press MEMORY 4 and ST...

Страница 19: ...ou have received from your fax partner up to 20 digits and press START COPY 4 Enter the fax number and press START COPY Receive polling This function enables you to receive documents that have been st...

Страница 20: ...is poor transmission errors may occur at normal speed 14 400 bps In such cases it is best to reduce the speed When you have successfully sent the fax remember to set your fax machine back to the stan...

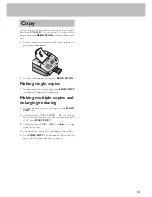
Страница 21: ...omakeasinglecopyof theoriginal pressSTART COPY three times Copying starts immediately Making multiple copies and enlarging reducing 1 To make multiple copies of the original press START COPY once 2 Th...

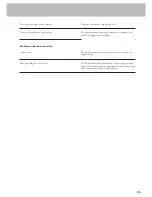
Страница 22: ...rvices Check that the recipient s machine is working Check whether the display shows an error message Press l to check whether you are getting dial tone If not check the telephone connection Check tha...

Страница 23: ...e toner drum with a soft cloth The toner cartridge is damaged and must be replaced Only use OKI original toner cartridges Check that the machine is connected to the mains and to a telephone line Check...

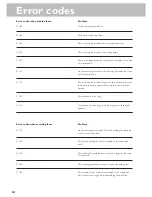
Страница 24: ...mission The receiving fax machine requests a second transmission as there were too many transmission errors in the first trans mission The document is too long Transmission of one page took too long m...

Страница 25: ...detects that the wrong password has been entered on the sending fax machine In attempting to poll a fax the machine detects that the sending fax machine has not been set up correctly for polling Prob...

Страница 26: ...t sketch or drawing you want to fax to someone else DTMF Dual Tone Multiple Frequency This tone dialing signal lets you start the fax machine from any phone that has tone dialing Fax switch ring patte...

Страница 27: ...27 Guarantee...

Страница 28: ...28 Declaration of conformity...

Страница 29: ...ion safety 2 interrupt process 6 ISDN connection 10 K key A Z 6 AUTO MANU 6 13 MEMORY 6 MENU 6 R 6 RESOLUTION 6 speed dial 6 START COPY 6 STOP 6 L lamp display 6 list group 15 settings 12 M machine de...

Страница 30: ...30...

Страница 31: ...31...

Страница 32: ...eration manual has been printed on chlorine free recycled paper in line with the highest standards of envi ronmental friendliness The used cardboard packaging as well as the cardboard protecting your...

Отзывы: