background image

OKIFAX 4100

Handbook

English

4100 Fax ENGLISH  15/1/97 9:37 am  Page 1

Содержание OKIFAX 4100

Страница 1: ...OKIFAX 4100 Handbook English 4100 Fax ENGLISH 15 1 97 9 37 am Page 1...

Страница 2: ...f the information in it This handbook is subject to change without notification 1996 by Oki Data Corporation All rights reserved OKI and OKIFAX are registered trademarks of OKI Electric Industry Co Lt...

Страница 3: ...ket outlet should be installed near the equipment and should be easily accessible The TEL port on the back of the fax is only suitable for 2 wire devices Not all standard telephones will respond to in...

Страница 4: ...age drum unit to direct sunlight Always hold the image drum unit by the ends never by the middle Never touch the green drum inside the image drum unit Exercise care when removing the toner cartridge D...

Страница 5: ...Machine 19 Unpacking 19 Setting Up Your Fax Machine 20 Install the Paper Tray Copy Stacker 20 Install the Document Tray 20 Install the Toner Cartridge 20 Connect to the Telephone Line 22 Option Insta...

Страница 6: ...er Date and Time 41 Sending a Delayed Fax From the Document Feeder 41 Sending a Delayed Fax From Memory 42 Cancelling a Delayed Transmission 43 Sending a Fax to Multiple Locations 43 Sending a Confide...

Страница 7: ...ort 57 Printing Reports 57 Printing a Message Confirmation Report 57 Printing Other Reports 57 Codes Used in Reports 57 Result Codes 57 Communication Codes 58 Problem Solving 59 Clearing a Document Ja...

Страница 8: ...e to allow you to look for pre programmed telephone numbers by name Halftone transmission in up to 16 shades of gray Fax communication at up to 14 400 bits per second Automatic redial and page re tran...

Страница 9: ...ng a MEMORY OVERFLOW message on your fax machine you should consider purchasing additional memory A 1MB memory expansion board is available PC Interface Board This option allows your fax machine to co...

Страница 10: ...cation What You Should Receive Facsimile Unit Power Cord Toner Cartridge Telephone Cord Image Drum Unit inside fax machine Optional Document Stacker Document Tray Paper Tray Copy Stacker Optional Exte...

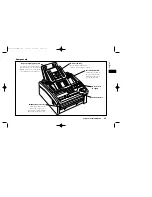
Страница 11: ...Tray Copy Stacker Load up to 100 sheets of paper into this tray Up to 30 sheets of finished copies or received faced are stacked on top of this tray Document Tray Holds original documents that are to...

Страница 12: ...Drum Unit The image drum unit contains the green pho tosensitive drum which receives images from the LED print head and transfers them to the printing paper Toner Cartridge This black cylinder install...

Страница 13: ...UNCTION COPY ALARM UNIQUE YES NO 8 5 A4 B5 A5 STOP START 1 2 3 4 5 6 7 8 9 SPACE 10 PAUSE 1 2 3 4 5 6 7 8 9 0 DEF JKL MNO TUV WXYZ GHI PQRS 3 2 4 9 5 6 7 8 10 12 23 20 21 11 12 13 14 15 17 16 REPORT P...

Страница 14: ...tion See Setting the Answering Mode in the Installation chapter for more information about the answering modes available in your fax machine 5 Hyphen Key When programming One Touch keys and Auto Dial...

Страница 15: ...mode 11 Copy Key After loading a document press this key to make a copy When no documents are loaded press this key once to obtain a Message Confirmation Report about your last transmission on the LC...

Страница 16: ...h keypad see the next section The One Touch Keypad 19 One Touch Labels After programming a loca tion into a One Touch key write the location s name on the One Touch label Lift off the plastic cover ab...

Страница 17: ...or obtaining reports and for programming To select a function from the One Touch keypad press the Select Function key then press the corre sponding One Touch key 1 Delayed TX Key Use this key to send...

Страница 18: ...its a number of sounds to inform you of specific conditions Key Select Tone This is a short beep that occurs each time you press a key Error Tones If you press a wrong or inappropriate key your fax ma...

Страница 19: ...able nearby Choose a location where the relative humidity is between 20 and 80 and where the temperature is between 10 C 50 F and 32 C 92 F Unpacking Before you begin be sure that all the items listed...

Страница 20: ...horizontal slot on the top of the unit You will feel it lock into place Install the Toner Cartridge 1 Open the fax machine s top cover 2 Remove the protective plastic cover from the toner well in the...

Страница 21: ...gray lever on your right insert the toner cartridge into the image drum unit Slide the left end of the cartridge in first then lower the right end into place 5 Once the toner cartridge is in place pu...

Страница 22: ...ons below Option Installing an External Handset If you purchased an external handset option with your fax machine follow these instructions to install it 1 Plug one end of the handset cord into the ha...

Страница 23: ...machine to work with your fax machine See Setting the Answering Mode in this chapter Connect Power 1 Plug the power cord into the power inlet located on the back of the unit 2 Plug the unattached end...

Страница 24: ...paper guides to the width of your paper 2 Remove the paper from its wrapper up to 100 sheets Note the print side notice printed on the label Fan the paper 3 Insert the paper into the paper tray print...

Страница 25: ...machine will assume all incoming calls are fax messages and automatically receive all incoming fax messages Telephone Fax Mode T F When incoming calls are a mixture of fax and telephone calls your bes...

Страница 26: ...ted at the top of every fax you send You can enter up to 32 characters The first 16 characters of your Sender ID will also be used as your Personal ID which may appear on the displays or reports of ot...

Страница 27: ...characters are available Enter two letters using Press the No key to move to the the same key next character Move the cursor to Yes and No keys make corrections 8 Press the Start key to save your entr...

Страница 28: ...n some countries you may require service assis tance to make these changes Also some PBX installations may require additional adjustments to your fax machine If you continue to have difficulty with fa...

Страница 29: ...After the display clears enter the main fax number Refer to the instructions below To Do This Use Enter numbers Numeric keypad Enter spaces Space One Touch key Enter hyphens Hyphen key Enter pauses i...

Страница 30: ...Press the 9 User Program One Touch key The display will show 1 FUNC PROGRAMMING 3 Press the Yes key The display will show FUNCTION NO 4 Using the numeric keypad enter 23 The display will show 23 ONE...

Страница 31: ...uto Dial number you want to program 5 The display will briefly show NO FAX NO ID LOCATION ID or a previously programmed fax number and location 6 After the display clears enter the fax number Refer to...

Страница 32: ...his Use Add a One Touch Press the One Touch key location Press Yes to add it to the group Add an Auto Dial Press Auto Dial Enter the 2 digit Auto location Dial number Press Yes to add it to the group...

Страница 33: ...bent creased or torn make a copy on a photocopier and send the copy instead You can also use a photocopier to enlarge or reduce documents before sending Document Size All documents must have a minimu...

Страница 34: ...r document will be sent when the current communication ends 1 Adjust the document guides to the width of the paper you are using 2 Neatly stack your documents then insert them face down into the docum...

Страница 35: ...art key to begin the trans mission Refer to the table below to understand some of the messages you may see during a typical fax transmission Message Explanation location The remote location s Personal...

Страница 36: ...See the chapter on Reports for more information Stopping a Transmission To stop a transmission while it is in progress follow the instructions below 1 Press the Stop key twice The display will show S...

Страница 37: ...running low follow the instructions below 1 Press the Select Function key 2 Press the 10 Message Print From Memory One Touch key The display will show 1 PRINT MEMORY MSG 3 Press the Yes key The store...

Страница 38: ...rogram One Touch key The display will show 1 FUNC PROGRAMMING 3 Press the Yes key The display will show FUNCTION NO 4 Using the numeric keypad enter 08 The display will show 08 CLOSED NETWORK and the...

Страница 39: ...feeder allows you to make copies on a different type of paper than what you normally keep in the paper tray To make copies using the manual paper feeder follow the instructions below 1 Load your docu...

Страница 40: ...swers your request your fax machine will emit a repetitive warbling sound The display will show LIFT HANDSET AND PRESS VOICE REQUEST 3 Lift your handset and press the Voice Request key Tip If you pres...

Страница 41: ...Document Feeder 1 Load your documents 2 Press the Select Function key 3 Press the 1 Delayed TX One Touch key The display will show DELAYED TX and today s date 4 If the transmission is to occur today p...

Страница 42: ...on which you wish the transmission to begin 6 Press the Yes key The display will show PRG START TIME 7 Using the numeric keypad enter the time on which you wish the transmission to begin Tip Be sure t...

Страница 43: ...structions below 1 Press the Stop key The display will show COMMUNICATION CANCEL 2 Press the Yes key The display will show the Location ID or telephone number of the delayed transmission currently loa...

Страница 44: ...chine will store the message in a confidential mail box in memory and will not print it until a password is entered Tip You must know in advance the mail box the mes sage should be sent to Ask the per...

Страница 45: ...ssage to other remote fax machines For this feature to be available the relay key station must be an OKIFAX OF 27 OKIFAX OF 38 or OKI FAX 2600 facsimile machine Relay Broadcast Report After the relay...

Страница 46: ...your fax machine to be polled or polling transmission Calling a remote fax machine to receive documents someone else has loaded is called polling or polling reception Note that this feature works with...

Страница 47: ...Press the Yes key The report will begin printing User Function Settings User function settings allow you to customize the general operation of your fax machine Refer to User Function Settings List to...

Страница 48: ...r fax machine to transmit faxes to or receive faxes from locations outside your network select T R If you only want your fax machine to refuse to receive faxes from outside your network select RX Avai...

Страница 49: ...VE You may have manually answered and incoming call and had a conversation and then wish to receive a fax message from the other party before hanging up Or you may have picked up the telephone and hea...

Страница 50: ...ngs for a specific One Touch key without changing the normal communication settings used by your fax machine For instructions on changing One Touch Parameters settings for a One Touch key see One Touc...

Страница 51: ...ine to detect a busy tone when sending a fax Available settings are on and off MF TONE DP PULSE This function controls what method your fax machine uses for dialling Two dialling methods are in common...

Страница 52: ...have to press Start Available settings are on and off DIAL PREFIX If your fax machine is connected to a PBX use this function to tell your fax machine what access number is used to obtain an outside...

Страница 53: ...machine to operate on the same line as your fax machine TEL FAX SWITCH When this function is on the tele phone fax T F answering mode is available which allows your fax machine to automatically disti...

Страница 54: ...ing H MODEM RATE This function controls the communications speed your fax machine s modem uses at the beginning of a fax communication Available settings are 14 4K 9 6K and 4 8K 4100 Fax ENGLISH 15 1...

Страница 55: ...r reception The name or telephone number of the fax machine you were communicating with DISTANT STATION ID If you were sending a fax the telephone number or the Location ID will be printed If you were...

Страница 56: ...he fax machine you were communicating with DISTANT STATION ID The communication mode used The number of pages sent or received The result of the communication Service codes If the Image in MCF functio...

Страница 57: ...oaded to see a report confirming your transmission on your fax machine s display To print the report press the Copy key a second time Printing Other Reports 1 Press the Select Function key 2 Press the...

Страница 58: ...rred in the sending fax machine STOP The Stop key was pressed ending the communication session Communication Codes Communication codes indicate the communication mode was used for a communication Code...

Страница 59: ...t is posi tioned straight in your feeder press the Stop key to try to feed the document the rest of the way through the feeder If this fails follow the instructions below 1 Grasp the control panel Pul...

Страница 60: ...f paper you are using For best results select a paper which has been developed specifi cally for photocopying or laser printing Be sure to fan the paper before loading it into your paper tray 1 Lift t...

Страница 61: ...drum until it snaps into place Warning Never expose the image drum unit to light for more than 5 minutes Never expose the image drum unit to direct sunlight Always hold the image drum unit by the ends...

Страница 62: ...drum unit itself has to be filled If your fax machine displays REPLACE TONER CART replace the toner cartridge with a new one However if the print density is high enough you can continue to use the to...

Страница 63: ...on the old toner cartridge all the way toward you Carefully pull the old toner cartridge out of the image drum unit Dispose of it in the plastic bag you received with your new toner cartridge 4 Remove...

Страница 64: ...then lower the right end into place 6 Once the toner cartridge is in place push the gray lever all the way forward to secure it and release the toner 7 Using the cleaning wipe provided in the package...

Страница 65: ...of paper you use and the number of pages per job The image drum cartridge should last about 10 000 pages for continuous printing up to 8 000 pages at 3 pages per job and about 4 500 pages at 1 page pe...

Страница 66: ...green drum inside the image drum unit 5 Ensure that the tabs on both sides of the image drum are inserted correctly as shown below Then press down firmly on both ends of the image drum until it snaps...

Страница 67: ...isplay is blank Check the power cord to make sure that it is firmly plugged in Check your wall outlet to make sure that it has power Nothing happens when you press the control panel keys Turn the fax...

Страница 68: ...en changing the One Touch Parameters for that One Touch key see the Dial Directories chapter Lastly either your fax machine or the remote fax machine may need servicing Try sending a fax to another lo...

Страница 69: ...oes not work properly remove the image drum unit refer to Replacing the Image Drum Unit tap the toner car tridge and slowly swing it 20 30 degrees vertically several times Be careful not to let the to...

Страница 70: ...cument to fit on your paper This type of problem could also be communication related You are constantly receiving unsolicited adver tising on your fax machine Try using the closed network function See...

Страница 71: ...transmission 16 shades of gray Document size A4 A5 letter or legal size Recording paper Plain paper A4 letter or legal size Effective scan width 209 mm Category Specifications Weight 8 kg approx excl...

Страница 72: ...tions Plc or Mercury Communications Ltd The OKIFAX 4100 may be connected to any direct PSTN exchange line except as an extension to a pay phone The exchange line must provide facilities for either loo...

Страница 73: ...elephone number of this apparatus should not be issued to other parties without instructions concerning the correct method of making calls to this apparatus While operation may be possible initially c...

Страница 74: ...y 18 10 Message Print From Memory key 18 A AC power 4 12 Activity report 55 Alarm indicator 15 Answering mode Changing 26 Options 25 Setting 25 Auto Dial key 15 Auto Dial numbers 31 Auto Rec Key 14 Au...

Страница 75: ...feeder 39 Counter Display One Touch key 18 67 Counters reading 67 COVER 57 Customizing operations 47 D DARK contrast 14 Delayed transmission Cancelling 43 Delayed TX One Touch key 17 41 Programming 4...

Страница 76: ...tomizing 47 Installing 19 Moving 4 Setting up 20 Unpacking 19 FAX mode 25 FINE resolution 14 First aid 4 FLASH EARTH NORMAL 52 Function settings Changing 50 Service 53 G Grounding 3 Group key 16 Group...

Страница 77: ...n 43 Memory Cancelling messages in 37 Power failures and 38 Message confirmation report 36 47 56 57 Message Print From Memory key 18 MF TONE DURATION 52 MF TONE DP PULSE 52 MH ONLY 54 Monitor volume 4...

Страница 78: ...oblem checklist 67 Product options 9 PULSE DIAL RATE 52 PULSE MAKE RATIO 52 PUNIT 57 R REAL TIME DIAL 54 Real time dialling 36 Receiving 36 Cancelling memory messages 37 Into memory 37 Manual receptio...

Страница 79: ...18 Space key 16 Start key 15 STD resolution 14 STOP 57 Stop key 15 36 Stopping a transmission 36 S_JAM 57 T T F mode 25 48 T F TIMER PROG 48 TAD mode 23 25 53 TEL mode 25 36 TEL terminal 12 22 23 TEL...

Страница 80: ...of Original No key 14 35 U Unique characters 16 Unique key 16 Unpacking 19 Unsolicited fax messages rejecting 38 User function settings 47 50 User language 49 User program key 18 V V Request Hook key...

Отзывы: