Overlays and Macros (Windows only) > 42
O
VERLAYS
AND
M
ACROS
(W
INDOWS
ONLY
)
W
HAT
ARE
OVERLAYS
AND
MACROS
?
If you would like to print on special stationery, such as forms and letterhead, but do not
want to use pre-printed stationery, you can create your own using these advanced
features.
You can use PostScript overlays to generate all your special stationery and store it in the
printer for use whenever you need it. If you have chosen to install the PCL driver, macros
perform a similar function.
You can create several overlays or macros, and combine them in any way you like to
produce a variety of forms and other special stationery. Each image can be printed on just
the first page of a document, on all pages, on alternate pages, or just the pages that you
specify.
C
REATING
P
OST
S
CRIPT
OVERLAYS
Three steps are required to create an overlay:
1.
Create the form data using your own application software and print it to a printer
(.PRN) file.
2.
Use the Storage Device Manager utility software supplied on CD with your printer to
create a “project file,” import the.PRN file(s), and download the generated filter
(.HST) file to the printer. The project file will contain one or more overlay images
which are functionally related, such as the cover page and the continuation page
images for business letters.
3.
Use downloaded files to define your overlays ready for use when printing your
documents.
When printing overlay files to disk, do not select any special features, such as two-sided
printing or multiple copies. These are not appropriate to overlays, they apply only to your
final documents.
C
REATING
THE
OVERLAY
IMAGE
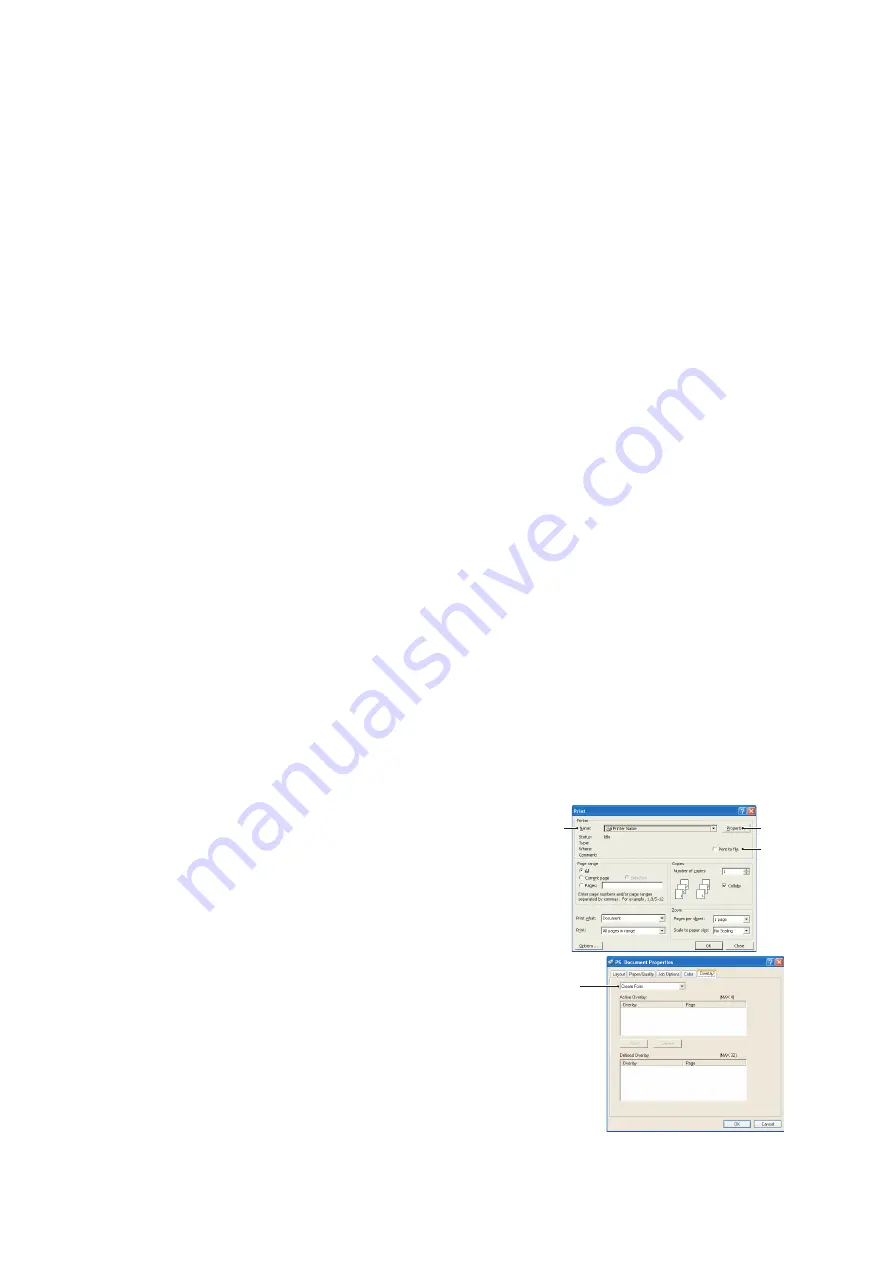
1.
Use your preferred application, perhaps a graphics program, to create the required
overlay image and save it.
2.
Open your application’s
Print…
dialogue.
3.
Make sure that the selected printer name (1) is
that of your PostScript printer driver.
4.
Select the
Print To File
(2) option.
5.
Click the
Properties
button (3) to open the
Document Properties window.
6.
On the Overlay tab, choose
Create Form
from the
drop-down list (4).
7.
Click
OK
to close the Document Properties window.
8.
Click
OK
again to close the Print dialogue.
9.
When prompted for a print file name, enter a
meaningful name with the extension.PRN.
10.
Close your application.
1
3
2
4
Содержание ES4140dn
Страница 1: ...ES4140dn User s Guide...


