REPLACING CONSUMABLE ITEMS > 58
3.
Lift each of the image drum units out of the printer and place
them in a safe place away from direct sources of heat and
light.
4.
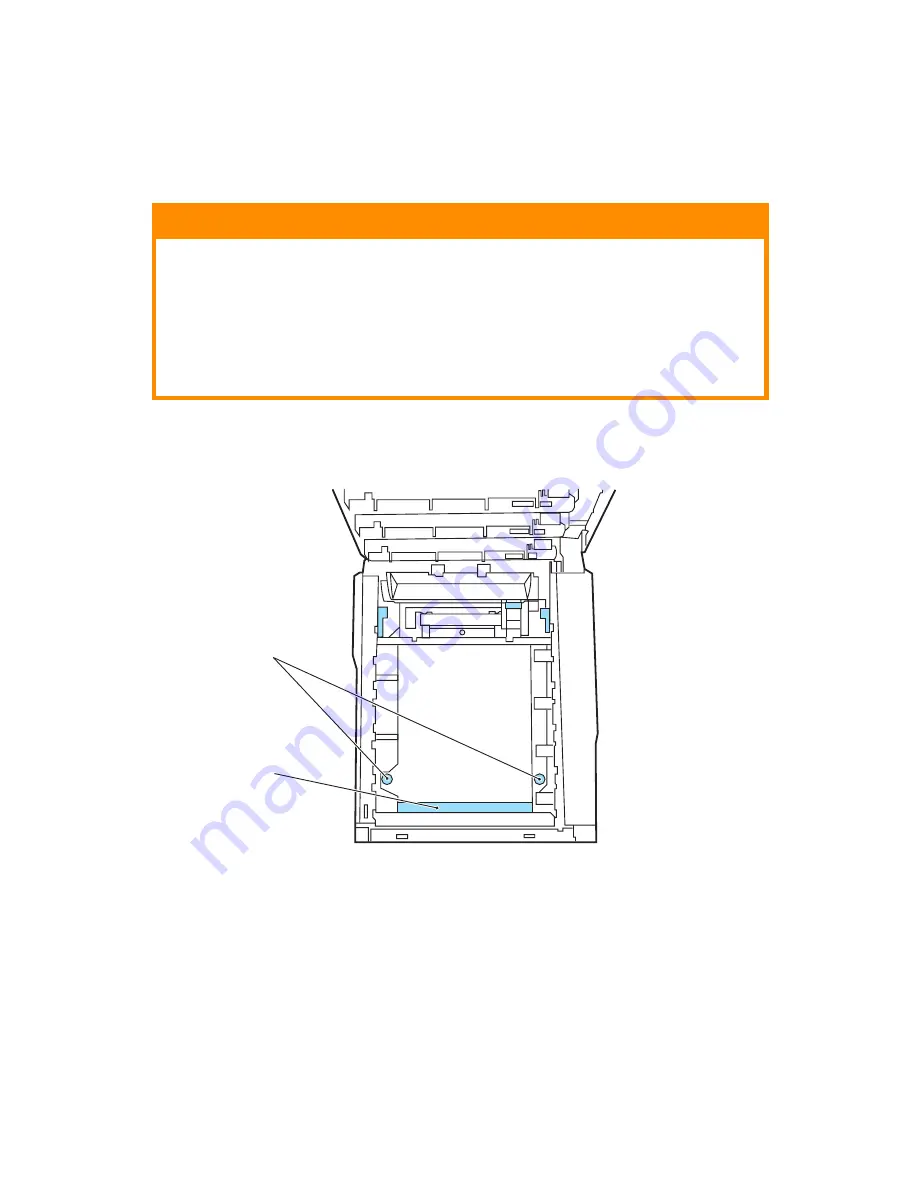
Locate the two fasteners (5) at each side of the belt and the
lifting bar (6) at the front end.
5.
Turn the two fasteners 90° to the left. This will release the belt
from the printer chassis.
6.
Pull the lifting bar (6) upwards so that belt tilts up towards the
front, and withdraw the belt unit from the printer.
7.
Lower the new belt unit into place, with the lifting bar at the
front and the drive gear towards the rear of the printer. Locate
the drive gear into the gear inside the printer by the rear left
CAUTION!
The green image drum surface at the base of each cartridge is very
delicate and light sensitive. Do not touch it and do not expose it to
normal room light for more than 5 minutes. If the drum unit needs to
be out of the printer for longer than this, please wrap the cartridge
inside a black plastic bag to keep it away from light. Never expose the
drum to direct sunlight or very bright room lighting.
5
6
Содержание C5100n
Страница 1: ...USER S GUIDE l C5100n ...


