background image

6

owner’s manual | 

check & use

3. 

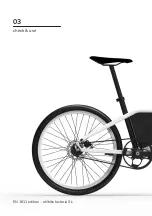
To unfold it, you just have to turn the pedal 

upwards.

2  battery

Check that the battery is correctly fixed and 
connected, and that it has a sufficient charge 

level.

To remove the battery:

Never remove the battery without the bi-
king being switched off.

1. 

. Use the key to open the lock. The teeth of 

the key facing the front of the bike.

Содержание Carmela24

Страница 1: ...check use 03 owner s manual Carmela24 ...

Страница 2: ......

Страница 3: ...Model Carmela24 According to EN ISO 4210 2 2015 and EN 15194 2018 oh bike factoria S L B66493271 Diputació 286 Baixos 08009 Barcelona info carmelabikes com ...

Страница 4: ...its use revisión The following are 9 items that you should check before each use 1 folding Check that the handlebar and pedals are not folded and that the front wheel is perfectly perpendicular to the handlebar To fold or unfold the handlebar 1 Press the red button 2 Keeping the red button pressed rotate the lever ...

Страница 5: ...r perpendicular to the front wheel 4 Turn the lever 180º again until you hear the click of the red button that indicates that the handlebar position is fixed To fold or unfold the pedals 1 Press the pedal inwards 2 Keeping the pedal pressed in rotate the pedal up or down ...

Страница 6: ...ards 2 battery Check that the battery is correctly fixed and connected and that it has a sufficient charge level To remove the battery Never remove the battery without the bi king being switched off 1 Use the key to open the lock The teeth of the key facing the front of the bike ...

Страница 7: ...ubes 3 With the help of your other hand remove the battery through the middle of the two top tubes To insert the battery Check that you have the key in the lock that the latch is open and the battery switched off 1 Fit the battery between the two top tubes by rotating on the front rubber buffer and let it fall fitting the back ...

Страница 8: ...has been co rrectly secured to the frame 3 Remove the key and store it in a safe place 3 engine boost 1 Check that the motor connector is con nected and correctly fixed to the fork 2 Press the boost button to check that there is assistance Make sure that you have no one in front of you the bike will advance ...

Страница 9: ...t it in a position where you feel comfor table and tighten the screw 2 To adjust the displacement and the ad justment of the angle of the saddle you must open the screws of the saddle post head Do not turn the screw anymore than two or three turns as this can cause the me chanism to come apart Move the saddle to your liking and do not exceed the mar ks ...

Страница 10: ... are for high speeds Check that the belt tensions is correct appl ying force on it It should not have a clearan ce of more than 15mm 6 wheels tires 1 Check that the wheels are properly aligned with the fork and frame and that they rotate without brushing on any fixed part 2 Check the tire pressure which should be between 2 75 and 4 5 bar ...

Страница 11: ...ever controls the front brake Check that the brake levers are in a comfor table position for you If not adjust them by loosening the screws 8 accessories key Check that the bell lights and other acces sories are in place and working properly Check that before you get on the bike you have removed the key from the battery and stored it in a safe place ...

Страница 12: ... two copies of keys that we give you take a deep breath and keep calm Get in touch immediately with Customer Service 9 legislation Remember that riding a bicycle means you are driving a vehicle You must know and fo llow the rules of circulation ...

Страница 13: ...ts use 1 POWER ECO mode Never start the electrical system with the bi cycle in motion You should always turn on the battery before you start To turn on the battery and POWER mode press the button for 3 seconds This mode offers maximum assistance when pedaling The button will light indicating the level of ba ttery charge one red LED and 7 green LEDs turn off as battery levels decrease ...

Страница 14: ... take longer trips To activate or deactivate this mode you must press the button The led will change from green to orange or vice versa To turn off the battery press the POWER but ton for 3 The light will turn orange or green and then turn off If you forget to turn off the battery it will au tomatically turn off after 10 minutes ...

Страница 15: ...ton will get an extra assistance of 40 for a limited period 3 battery charge The process of charging the battery lasts be tween 3 and 4 hours To charge the battery you have to remo ve it from the bicycle Never remove it without first turning it off To charge it 1 Connect the charger to the power The green light on the charger will turn on Recharge the battery only with the su pplied charger ...

Страница 16: ...attery is fully charged this light will turn off Remember that the battery connector is magnetic and can attract metal objects that may remain in the connector 4 USB connectors The battery has two USB connectors in its base where you can connect any device an ywhere For reasons of road safety they cannot be used when the battery is installed on the bicycle ...

Страница 17: ...17 owner s manual check use ...

Страница 18: ......

Страница 19: ......

Страница 20: ...EN 1811 edition oh bike factoria S L 03 check use ...

Отзывы: