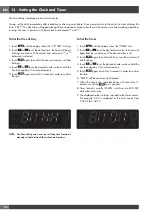
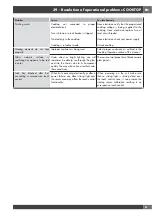
background image

EN

36

25 - Sabbath Mode Instruction

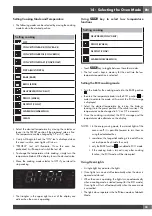
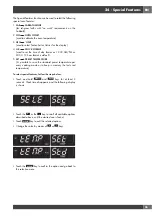
•  Enter the user option menu holding 

MENU

 and 

TIME

  keys 

for 3 seconds. Scroll the option list (DEG, OFS, HR, SAB), 
shown by the temperature module, by pressing 

+

 / 

-

until Sabbath item is found.

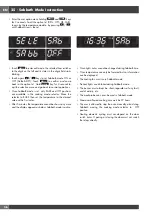
• Touch 

MENU

 to enter edit mode: the selected item switches 

to the digits on the left and its status in the digits field starts 
blinking.

• Touch again 

+

 / 

-

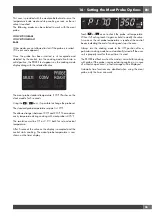
 keys to set Sabbath mode ON or 

OFF (Default=OFF). Touch 

MENU

 to confirm and come 

back to the option list. Hold 

MENU

 key for 3 seconds to 

quit the selection menu and go back to normal operations.

•  Once Sabbath mode is set, only BAKE and OFF positions 

are available in the cooking mode selector. Move the 
selector to BAKE then set the temperature to the desired 
value within 5 minutes.

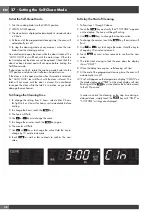
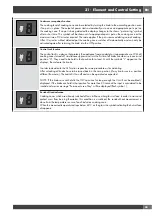
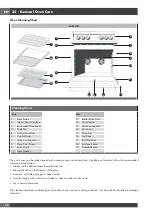
•  After 5 minutes, the temperature cannot be shown any more 

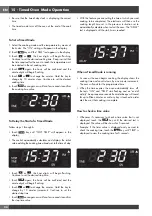
and the display appears as below: Sabbath mode is active.

•  Oven lights status cannot be changed during Sabbath time.

•  Oven temperature can only be lowered but no information 

can be displayed.

•  The cooling fan must run in Sabbath mode.

•  Preheat lights are inhibited during Sabbath mode.

•  The buzzer must always be silent, regardless of any fault, 

end of activity, etc.

•  The meat probe can never be used in Sabbath mode.

•  Maximum allowed cooking time must be 72 hours.

•  The user is allowed to stop the oven manually, also during 

Sabbath, moving the cooking mode selector to  OFF 
position.

• Heating elements cycling must not depend on the door 

switch status. Opening or closing the door must not switch 
the relays directly.

Содержание OGG304IC

Страница 1: ...2 2 6 5 1 7 29 1 FOR RESIDENTIAL USE INSTRUCTIONS for installation and use...

Страница 2: ......

Страница 3: ...art 28 19 Convection Roast Tips and Techniques 29 TABLE OF CONTENTS PAGE Convection Roast Chart CONVECTION CAVITY 29 20 Convection Broil Tips and Techniques 31 Convection Broil Chart CONVECTION CAVITY...

Страница 4: ...FN DFN 7HOHVFRSLF 5DFN LI SUHVHQW 6WRS 3DQ 6WRS 6OLGH UP DQGOH LI HTXLSSHG QRW DOO PRGHOV URLOHU 3DQ 5DFN URLOHU 3DQ LVSOD SDQHO URLO XUQHU RROLQJ 9HQWV RRU JDVNHW DORJHQ LJKW 0RGHO DQG 6HULDO 3ODWH R...

Страница 5: ...IPTION QTY DESCRIPTION 5 1 22 5 227 7 2 5 63 6 7 5 1 6 5 6 17 7 3 285 1 6 5 6 29 5 0 18 1 5 2 80 17 7 21 16758 7 21 0 18 7 86 5 29 1 6625 6 2 285 5 1 QTY DESCRIPTION QTY DESCRIPTION 29 1 1 0 52 67 1 3...

Страница 6: ...VWURQJ KHDWLQJ YHQWV RU IDQV OHFWULFDO JURXQGLQJ LV UHTXLUHG 6HH OHFWULFDO 5HTXLUHPHQWV IMPORTANT 6DYH WKHVH LQVWUXFWLRQV IRU WKH ORFDO HOHFWULFDO LQVSHFWRU XVH INSTALLER 3OHDVH OHDYH WKLV PDQXDO ZLWK...

Страница 7: ...from the mains Do not use the appliance if any part is broken for example a glass Disconnect it from the mains and call service Before using the oven it is recommended to make it operate at noload at...

Страница 8: ...on or near the cooktop Use only dry potholders moist or damp potholders on hot surfaces may cause burns from steam Never leave the cooktop unattended when in use Always position handles of utensils in...

Страница 9: ...s and spillage due to unintentional contact with the utensil the handle of a utensil should be positioned so that it is turned inward and does not extend over adjacent surface units Do Not Cook on Bro...

Страница 10: ...1 3URGXFW LPHQVLRQV DQG XWRXW 5HTXLUHPHQWV PRODUCT DIMENSIONS 30 Wide Range Models...

Страница 11: ...a noncombustible material Consult local code for exact location requirements OPENING WIDTH A B Range 30 764 mm Minimum clearances Above cooking surface above 36 91 4 cm Sides 3 7 6 cm Within 3 7 6 cm...

Страница 12: ...WKH ZHLJKW DQG VL H RI WKH UDQJH DQG WR UHGXFH WKH ULVN RI SHUVRQDO LQMXU RU GDPDJH WR WKH SURGXFW 7 2 3 23 5 5 48 5 25 3523 5 167 7 21 Anti Tip Bracket Installation WARNING Tip Over Hazard FKLOG RU...

Страница 13: ...and or air conditioning vents or fans IMPORTANT NOTE When installing against a combustible surface a minimum riser is required for a the range Follow all minimum clearances to combustible surfaces sho...

Страница 14: ...talling the legs position the appliance near its nal location as the legs are not suitable for moving the appliance over long distances Legs are packed in the cardboard top pack CAUTION Doors and pass...

Страница 15: ...verify if ooring is level Adjust the leveling legs to the desired height and ensure range is level Turn the bottom section of each leg counter clockwise to raise the leg and clock wise to lower it Ens...

Страница 16: ...low the appliance to be removed from its housing unit when maintenance work is required The terminal box is located at the rear of the appliance If a new cable is tted route it through the clamp and m...

Страница 17: ...EN 15 CONNECTION A CONNECTION B CONNECTION C 7 Electrical supply...

Страница 18: ...the clock by following these steps Press TIME key twice until the display shows SET TIME Immediately press or keys to set hours Press TIME key again to change minutes Immediately press or keys to set...

Страница 19: ...W XWRPDWLF RU PDQXDO GRRU ORFN LV DOVR LQGLFDWHG KHUH Temperature Setting Display HJUHH XQLW RU LQGLFDWLRQ LV SUHVHQW W VKRZV WKH WHPSHUDWXUH VHW SRLQW IRU WKH FXUUHQW FRRNLQJ PRGH LQ WKH VHOHFWHG FDY...

Страница 20: ...but holds an optimum low temperature while circulating the heated air to remove moisture slowly for food preservation Convection Broil CONV BROIL Broil BROIL Pizza PIZZA Set temperature from 170 F 75...

Страница 21: ...d when a different one is needed It s also possible to set a user option in order to save the last used temperature for each cooking mode Failure Number Codes These codes are displayed when the electr...

Страница 22: ...th the empty broiler pan in the oven as this could change cooking performance Store the broil pan outside of the oven Oven Condensation and Temperature It is normal for a certain amount of moisture to...

Страница 23: ...only be held or carried by grasping the sides NOTE Always remove the extendable rack before self cleaning the oven ATTENTION To avoid burns pull rack all the way out and lift pan above handle when tra...

Страница 24: ...con rm the hour now the minutes will start ashing 4 Touch or to set the desired minutes value or hold the key to change by 10 minute increments 5 Touch TIME again or wait for 5 seconds in order to con...

Страница 25: ...ggle between these four modes The last used is kept in memory for the next time the low temperature operation is selected Setting the ECO cooking mode Turn the knob for the cooking mode into the BAKE...

Страница 26: ...ime Touch TIME again the hours will be con rmed and the minute digits will begin ashing Touch or to change the minutes Hold the key to change by 10 minutes increments Continue to set the desired stop...

Страница 27: ...is between 130 F and 210 F The maximum cavity temperature during cooking with meat probe is 475 F The resolution must be 5 F or 2 5 C both for set and actual temperature After 5 seconds the value on t...

Страница 28: ...ng performance and can damage the nish of the oven Avoid using the opened door as a shelf to place pans Tips for Solving Baking Problems are found on Page 34 BAKE CHART CONVECTION CAVITY FOOD ITEM RAC...

Страница 29: ...me stagger pans so that one pan is not directly above another For best results place cakes on front of upper rack and back of lower rack See graphic at right Allow 1 1 2 5 3cm air space around pans Co...

Страница 30: ...ast rolls 2 350 375 175 190 12 15 Biscuits 2 375 190 8 10 Muf ns 2 400 205 17 21 PIZZA Frozen 2 375 425 190 220 23 26 Fresh 2 450 232 15 18 Convection Bake Chart DOUBLE CONVECTION CAVITY FOOD ITEM RAC...

Страница 31: ...temperature for stuf ng in poultry is 165 F 75 C After removing the item from the oven cover loosely with foil for 10 to 15 minutes before carving if necessary to increase the nal foodstuff temperatur...

Страница 32: ...0 145 63 medium rare PORK LoinRoast bonelessorbone in 5 8 350 175 2 18 22 160 71 medium Shoulder 3 6 350 175 2 20 25 160 71 medium POULTRY Chicken whole 3 4 375 190 2 20 23 180 82 Turkey not stuffed 1...

Страница 33: ...11 13 Sausage fresh 4 450 235 160 71 4 6 3 5 Broiling and convection broiling times are approximate and may vary slightly Cooking times are indicative and also depend on the thickness and the starting...

Страница 34: ...slices 11 15 Slightly pliable Bananas Dipped in cup lemon juice and 2 cups water slices 11 15 Slightly pliable Cherries Wash and towel dry For fresh cherries remove pits 10 15 Pliable leathery chewy O...

Страница 35: ...until opaque akes easily with fork 10 14 Do not turn Buttered LAMB Chops 1 Medium Rare 5 5 145 63 5 7 4 6 Medium 5 5 160 71 6 8 4 6 Well 5 5 170 77 7 9 5 7 BREAD Garlic Bread 1 slices 4 5 2 2 30 Garl...

Страница 36: ...d metal pans Incorrect rack position Pans touching each other or oven walls Food is dry or has shrunk excessively Oven temperature too high Baking time too long Oven door opened frequently Pan size to...

Страница 37: ...12 hour format is default 5 SET PRESET TEMPERATURE it s possible to save the standard preset temperature per every cooking mode or to keep in memory the last used temperature To select special feature...

Страница 38: ...Move the selector to BAKE then set the temperature to the desired value within 5 minutes After 5 minutes the temperature cannot be shown any more and the display appears as below Sabbath mode is acti...

Страница 39: ...WKH SUHVHW WLPH KHQ WKH RYHQ KHDW GURSV WR D VDIH WHPSHUDWXUH WKH DXWRPDWLF GRRU ORFN ZLOO UHOHDVH DQG WKH GRRU FDQ EH RSHQHG Preparing the Oven for Self Clean 5HPRYH DOO XWHQVLOV DQG EDNH ZDUH 5HPRY...

Страница 40: ...hours for heavy soil immediately before starting 2 To change the hours touch the TIME key 3 The hours will ash 4 Use or keys to change the value 5 To change the minutes touch the TIME key again 6 The...

Страница 41: ...curity clips 1 back into position 3 Close and open the door slowly to assure that it is correctly and securely in place TO REPLACE DOOR 2 4 3 5 ATTENTION Make sure oven is cool and power to the oven h...

Страница 42: ...YHU 5HPRYH WKH OLJKW EXOE IURP LWV VRFNHW E SXOOLQJ LW 5HSODFH WKH EXOE ZLWK D QHZ RQH YRLG WRXFKLQJ WKH EXOE ZLWK QJHUV DV RLOV IURP KDQGV FDQ GDPDJH WKH EXOE ZKHQ LW EHFRPHV KRW 7KH EXOE LV KDORJHQ...

Страница 43: ...FRQWURO Position 2 RRVW PP LQGXFWLRQ HOHPHQW DQG FRQWURO Position 3 RRVW PP LQGXFWLRQ HOHPHQW DQG FRQWURO Position 4 RRVW PP LQGXFWLRQ HOHPHQW DQG FRQWURO Position 5 HG LVSOD DISPLAY UNIT INDICATIONS...

Страница 44: ...HQW GLVSOD XQLW VKRZV WKLV 8 V PERO 7KH ZDUPLQJ IXQFWLRQ LV XVHG WR KHDW XS WKH ERWWRP RI WKH SRW WR LQVLGH WKH SRW 8VLQJ WKLV IXQFWLRQ WKH IRRG FDQ EH NHSW ZDUP RU LW FDQ EH XVHG WR ZDUP XS IRRG JHQW...

Страница 45: ...he rst two left knobs counterwise in overwind position A They need to be hold in that position for a least 2s until the symbols L appear on the displays then release the knobs In order to deactivate t...

Страница 46: ...own if needed to a medium level when adding food to the pan Always use pots and pans with a proper lid Reduce the selected power in the cooking area in time in the case of water do not let it boil unn...

Страница 47: ...ost P The element that is not set for Boost will change to a lower power level This is called Power Sharing The latest set cooking level has priority IMPORTANT Automatic Switch OFF The induction hob h...

Страница 48: ...hey can be made of enamaled steel cast iron or special pans of stainless steel for induction To make sure a pan is suitable try using a magnet to see if it sticks to the bottom of the pan Never use no...

Страница 49: ...13 9 3 19 17 18 7KH HQWLUH RYHQ FDQ EH VDIHO FOHDQHG ZLWK D VRDS VSRQJH ULQVHG DQG GULHG I VWXEERUQ VRLO UHPDLQV IROORZ WKH UHFRPPHQGHG FOHDQLQJ PHWKRGV EHORZ OZD V XVH WKH PLOGHVW FOHDQHU WKDW ZLOO G...

Страница 50: ...KH VSHFLDO EXUQLVKLQJ HIIHFW RQ WKH EXUQLVKHG EUDVV GHWDLOV LQ RUGHU WR DYRLG VSRLOLQJ WKH EHDXW RI WKH EUDVV ZLWK DQ DUWLILFLDO SDWLQD 7KH DQWLTXH ILQLVK RI WKH VXUIDFH LV WKH UHVXOW RI QDWXUDO R LGD...

Страница 51: ...if smudge remains rinse Apply a small amount of the Cooktop Cleaning Cream When dry buff surface with a clean paper towel or cloth CAUTION Do not use any kind of cleaner on the glass while the surface...

Страница 52: ...bration if necessary see To Set Temperature Page 23 Refer to cooking charts for recommended rack position Always reduce recipe temperature by 25 F 15 C when baking with Convection Bake mode Oven tempe...

Страница 53: ...e Cooktop Operation section of this manual Glass ceramic surface is seethrough or appears to be red in color Under direct or bright lighting you will sometimes be able to see through the glass and int...

Страница 54: ...g service please check Troubleshooting It may save you the cost of a service call When calling please know the purchase date and the complete model and serial number of your appliance This information...

Страница 55: ......
Страница 56: ...en international V 18 Via Della Torricella 29 Antella Bagno a Ripoli 50012 Florence Italy Tel 39 055 65 60 3324 39 055 62 18 07 Fax 39 055 62 06 70 RI FLQHJXOOR FRP _ LQIR RI FLQHJXOOR FRP...

Отзывы: