CHAPTER 5: COLLIMATION
The purpose of collimation is to bring the optical axes of all optical elements to coincide – and
bring them as close as possible to the
mechanical
axis.
Collimation is important for any optical system, but it is really
essential
for a telescope. The best
telescope of the world will produce horrible and useless images if it is not collimated.
As a general rule, the faster (i.e. with a
low
f/ratio) the telescope, more critical is the collimation.
This procedure is similar, but not identical, to the procedure for the “Veloce” series of
astrographs . For the “Veloce” collimation please read also Chapter 7.
Every telescope is shipped from our plant perfectly collimated. We use several dedicated tools and
some time to achieve this. But vibrations or little shocks during transport may move a bit some
parts. A movement of any optical element of less than a quarter of a millimeter (less than 1/100 if
an inch) will require the scope to be collimated. Sorry, nobody's fault – it's the laws of optics. The
good news is that since every
Officina Stellare
telescope has a very good mechanics, once you
have a good collimation, the telescope will stay collimated for a long time.
5.1) Some notes about collimation
The first, obvious, step in collimation is to check if your telescope needs collimation at all. All you
need is a bright star, high in the sky (45° or more above horizon) and some eyepieces, or a
camera that shows images quickly (we suggest at least one image per second; a webcam or a
DLSR with LiveView is a perfect choice). Leave your telescope reach the ambient temperature
before to proceed with collimation, say 90 minutes after sunset. The cooling fans will help a lot.
You can also use an artificial star, available by astronomical equipment retailers, but a real star is
much better. Start looking at the star with the lowest power (i.e. longest focal length) eyepiece you
have. DO NOT USE 90° PRISMS.
If the secondary mirror has an electric motor to change the
BFL (Back Focus Length),
turn “ON” the scope electronic
control and set it to the “factory zero”.
The command is
"FIND OPTIMAL BFL". Turn off the scope when done. This
will set the mirror spacing for best performance, as
established by the optical design.
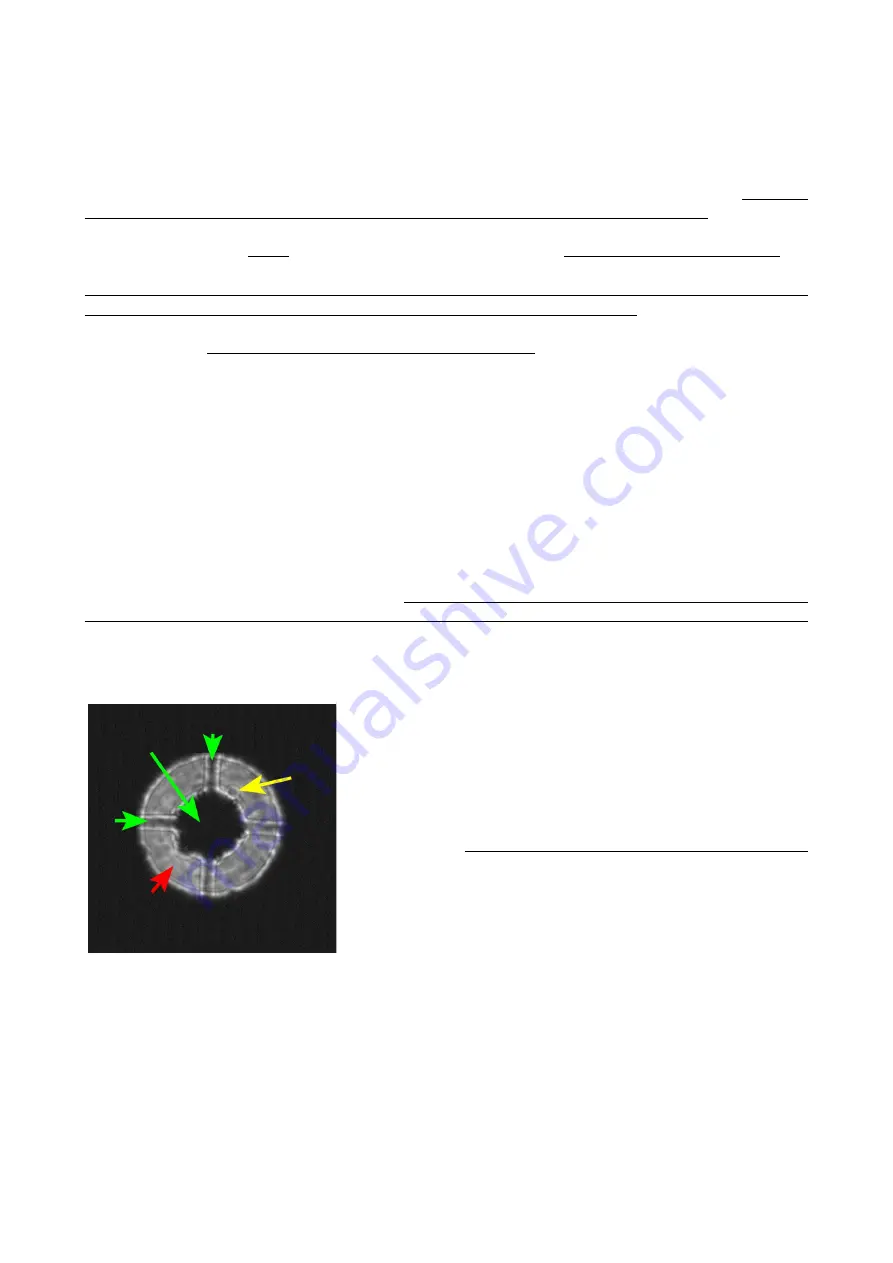
Point the star, bring it in the very center of the field of view
and bring it out-of focus. It is not important if you go in-focus
or out-focus. You should see something like the image at left:
The white disk is the out-of focus image of the star.
The "shadow" of the secondary mirror and its supports are
clearly visible (green arrows). Here also a cable protruding
from the secondary mirror assembly is visible (the “bump” in the direction of the red arrow).
All the white area (red arrow) will change continuously, because of the turbulence in the
Earth's atmosphere (in astronomy the stability of the atmosphere is called the "seeing").
A grain of dust somewhere on the optic may show a circular pattern (yellow arrow). Just ignore
it, this has no effect on collimation, and has no effect on telescope's performance.
15


