
3
Operating Instructions and Parts Manual
24482
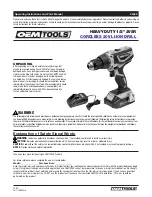
HEAVY DUTY 1/2” 2VSR
CORDLESS 20V LI-ION DRILL
10/15
2015 OEMTOOLS
4. Select the correct transmission speed. Use the slower speed for
drilling large holes.
5. Set the torque adjusting collar to the drilling position (drill icon on tool).
6. Slide the fully charged battery pack onto the base of the handle.
7. Mark the drilling point with a center punch when drilling in metal to
prevent the drill bit from slipping off center as you begin drilling.
8. Place the drill bit at the location of the hole to be drilled and squeeze
the trigger. The harder you squeeze, the faster the drill turns.
DRIVING SCREWS
1. Install the correct screwdriver bit in the chuck. Use the largest bit size
that will properly fit the screw. Make sure the flat sides of the bit are
gripped by the chuck.
2. Set the transmission speed to low speed.
3. Set the rotation directions to clockwise.
4. Set the torque collar to #10.
5. Place the screwdriver bit into the screw and hold the bit firmly into
the screw to prevent slippage and drive a test screw.
6. After driving a test screw, adjust the torque setting up or down so
the screw is driven to the desired depth without being over driven.
7. Release the trigger immediately when the torque clutch begins
to “rattle”.
8. Driven screws can be removed by reversing the direction of
the rotation.
CHARGE THE BATTERY:
NOTE:
A discharged battery pack will be fully charged in approximately
one hour. Remove the battery pack from the tool when not in use.
WARNING
Always charge the battery pack indoors in a well-ventilated area. The
charger must never be subjected to wet conditions.
ELECTRICAL WARNING
POWER SOURCE CONNECTION POWER REQUIREMENTS
This product is designed to operate on a properly grounded
120 volt, 60Hz, single-phase alternating current (AC) power source
fused with a time delayed fuse or circuit breaker. It is recommended
that a qualified electrician verify the ACTUAL VOLTAGE at the
receptacle into which the product will be plugged and confirm that
the receptacle is properly fused and grounded.
DO NOT OPERATE THIS PRODUCT if the ACTUAL power source voltage
is less than 105 volts AC or greater than 132 volts AC. Contact a
qualified electrician if this problem exists. Improper performance
and/or damage to the product will result if operated on inadequate
or excessive power.
CONNECT TO POWER SOURCE
Consult a qualified electrician for proper installation of receptacle
at the power source. This product must be grounded while in use to
protect the operator from electrical shock. If you are not sure if your
outlet is properly grounded, have it checked by a qualified electrician.
Do not cut off the grounding prong or alter the plug in any way and
do not use any adapters between the product’s power cord and the
power source receptacle. Make sure the POWER switch is OFF then
connect the power cord to a properly grounded 120V, 60Hz, single
phase, 20 Amp power source.
Do not abuse cord. Never use the cord to carry tools or pull the plug
from an outlet. Keep cord away from heat, sharp edges or moving
parts. Replace damaged cords immediately. Damaged cords increase
the risk of electric shock.
1. Place the charger in a dry location near a 120V/60 Hz
electrical outlet.
2. Plug the charger into the electrical outlet.
3. The green LED light will turn on.
4. Turn the battery pack upside down and slide it onto the
charger.
5. The green LED light will turn off and the red LED light will
begin to flash indicating the battery pack is charging.
6. The red LED light will turn off and the green LED light will turn
on when fully charged.
7. Once the battery pack is fully charged, remove the charger
plug from the power source and remove the battery pack from
the charger.
NOTE:
Do not charge batteries when the work area or the battery
temperature is at or below 32° F (0° C) or above 113° F (45° C).
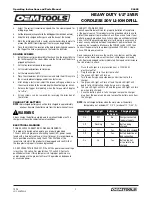
Green Light
Red Light
Battery on
the Charger
Charging Status
On
Off
No
Charger connected
to power supply
Off
Flashing
Yes
Battery being
charged
On
Off
Yes
Battery fully charged
Off
On
Yes
Battery defective or
bad connection
On
On
Yes
Battery too hot
or too cold to be
charged


