3
Operating Instructions and Parts Manual
24667
11/18
2018 OEMTOOLS
™
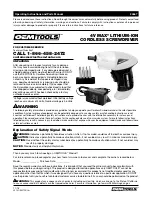
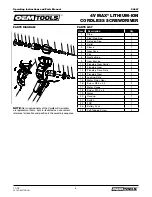
4V MAX* LITHIUM-ION
CORDLESS SCREWDRIVER
PRODUCT SPECIFICATIONS
Spindle Speed:
230 RPM (no-load)
Drive:
1/4" Hex
Battery:
4V Li-ion
Rotation:
Right or Left
Weight:
13 Oz.
Charge Time:
3-5 Hours
Charger Input:
100-240V AC, 50-60Hz, 8W
Charger Output:
6V DC, 300 mA
INSTRUCTIONS
CHARGING THE BATTERY
The battery pack for this driver is contained within the main
housing of the tool. Never attempt to open the battery
housing for any reason. If the battery housing breaks or
cracks, immediately discontinue use and DO NOT recharge.
1. Place the Cordless Screwdriver near a 120 V, 60 Hz
electrical outlet.
2. Insert the battery charger plug (1) into the charger
receptacle (2) in the handle of the Cordless Screwdriver
(3) (Fig. 1).
3. Plug the battery charger (4) into a 120 V 60 Hz wall
receptacle.
NOTES
:
a) The red indicator light (5) in the handle will turn ON,
indicating the battery is being charged.
b) The red indicator light will remain ON until the battery is
fully charged.
c) A new battery or one that is completely exhausted
should be charged for 5 hours or until the charger shuts
down and the RED indicator light goes OFF. After normal
use, a battery should be fully charged in about 3 hours.
d) If the battery does not charge properly, check to
make sure the electrical outlet is “live” and that the
temperature range in the work area is between 0–40° C
(32–104° F).
Fig. 1
Figure 1
INSTALLING SCREWDRIVER BITS
WARNING
: Never hold the body of the Cordless
Screwdriver with your fingers near the switch while
changing screwdriver bits. Accidentally touching the
switch may start the tool and possibly cause an injury.
1. Select an appropriate screwdriver bit that fits the head
of the screw being driven.
NOTES
:
a) Use the largest size screwdriver bit that will properly fit
the screw head.
b) Make sure the screwdriver bit is in good condition and
is neither damaged nor worn.
2. Insert the screwdriver bit (1) fully into the screwdriver
collet (2) (Fig. 2).
NOTE
: Make sure the screwdriver bit is fully inserted into
the collet.
Fig. 2
Figure 2
RIGHT/LEFT SWITCH
The Cordless Screwdriver is equipped with a convenient
switch that functions as both an ON/OFF switch and a
RIGHT/LEFT switch.
1. To drive screws, press the upper part of the switch (1)
(Fig. 3). To turn the switch OFF, release the switch.
2. To remove screws, press the lower part of the switch (2).
Fig. 3
Figure 3
SCREWDRIVER LIGHT
The Cordless Screwdriver is equipped with a LED light (1)
(Fig. 4). The light will automatically turn ON when the switch
is pressed. It will also turn OFF when the switch is released.
Fig. 4
Figure 4


