Install OS2 Upgrade Kit in MX-1
Installing New Components
OS2 Upgrade Kit Installation Guide
33
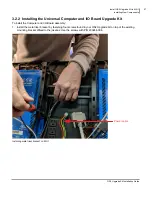
7. Using your fingers, push in and then tighten the thumb screw (clockwise) on the hard drive tray until the thumb
screw is
securely
tightened.
8. Test whether the hard drive is firmly seated by pulling out firmly on the handle of the hard drive tray. The hard
drive is secured properly when:
•
The thumb screw is completely compressed and covered by the cowl head of the thumbs screw, that is, the
spring is not visible.
•
There is no gap between the edge of the hard drive tray and the computer.
•
There is no play between the hard drive and the computer when you pull outward on the handle of the hard
drive tray. If you detect any play in the hard drive tray, using a slot-head screwdriver, tighten the thumb screw
firmly into the computer and test again until no play is detected.
CAUTION:
Using a screwdriver applies significantly more torque than
hand-tightening. Do
not
over-tighten.
WARNING:
Do not, under any circumstances, attempt to force the wrong type of hard
drive into the HD slot of the new computer. By doing so, you risk serious damage to
the hard drive and the computer.
Содержание TouchTunes Allegro
Страница 1: ...OS2 Upgrade Kit Installation Guide MX 1 Allegro...
Страница 2: ......
Страница 16: ...OS2 Upgrade Kit Installation Guide Prepare to Install OS2 Upgrade Kits Workflow 10...
Страница 40: ...OS2 Upgrade Kit Installation Guide Install OS2 Upgrade Kit in MX 1 Installing New Components 34...
Страница 81: ......
Страница 82: ......
Страница 84: ...OS2 Upgrade Kit Installation Guide 901107 001 Rev 01...

