


90
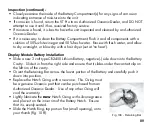
Display Module Battery Installation (continued) -
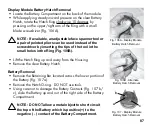
• Carefully place the clear Battery Hatch (with O-ring) into
position on the rim of the Battery Compartment, then press it
evenly and completely down into place with your same
thumb.
• Maintain the Battery Hatch securely in place and, using your
other hand, slide the Hatch Ring down off your thumb and
into position around the Battery Compartment. The tabs on
the Ring fit down into the slots located at the 2 and 9 o'clock
positions.
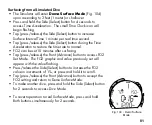
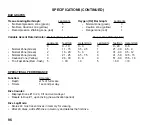
• Using your fingers, turn the Ring counter clockwise 5 degrees
until the tabs engage, then tighten it 5 more degrees by
turning it counter clockwise with the aide of a small blade
screwdriver or spanner tool, pressing against the upper/left
arm of the Ring (Fig. 109).
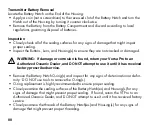
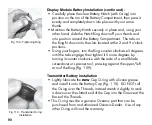
Transmitter Battery Installation
• Lightly lubricate the
new
Cap O-ring with silicone grease
and install it onto the Battery Cap (Fig. 110). DO NOT roll
the O-ring over the Threads, instead stretch it slightly to work
it down over the slotted end of the Cap into the Groove at the
Base of the Threads.
• This O-ring must be a genuine Oceanic part that can be
purchased from an Authorized Oceanic Dealer. Use of any
other O-ring will void the warranty.
Fig. 109 - Tightening Ring
Fig. 110 - Transmitter O-ring
Installation
Содержание VT Pro
Страница 1: ...VT Pro dive computer operating manual OCEANIC...
Страница 82: ...82 R E S P O NSIBLE D I V E R Be a RESPONSIBLE DIVER at all times...
Страница 101: ...101 NOTES...


