MNL-1007 REV A
28
3.
Click on the
Add New
button.
4.
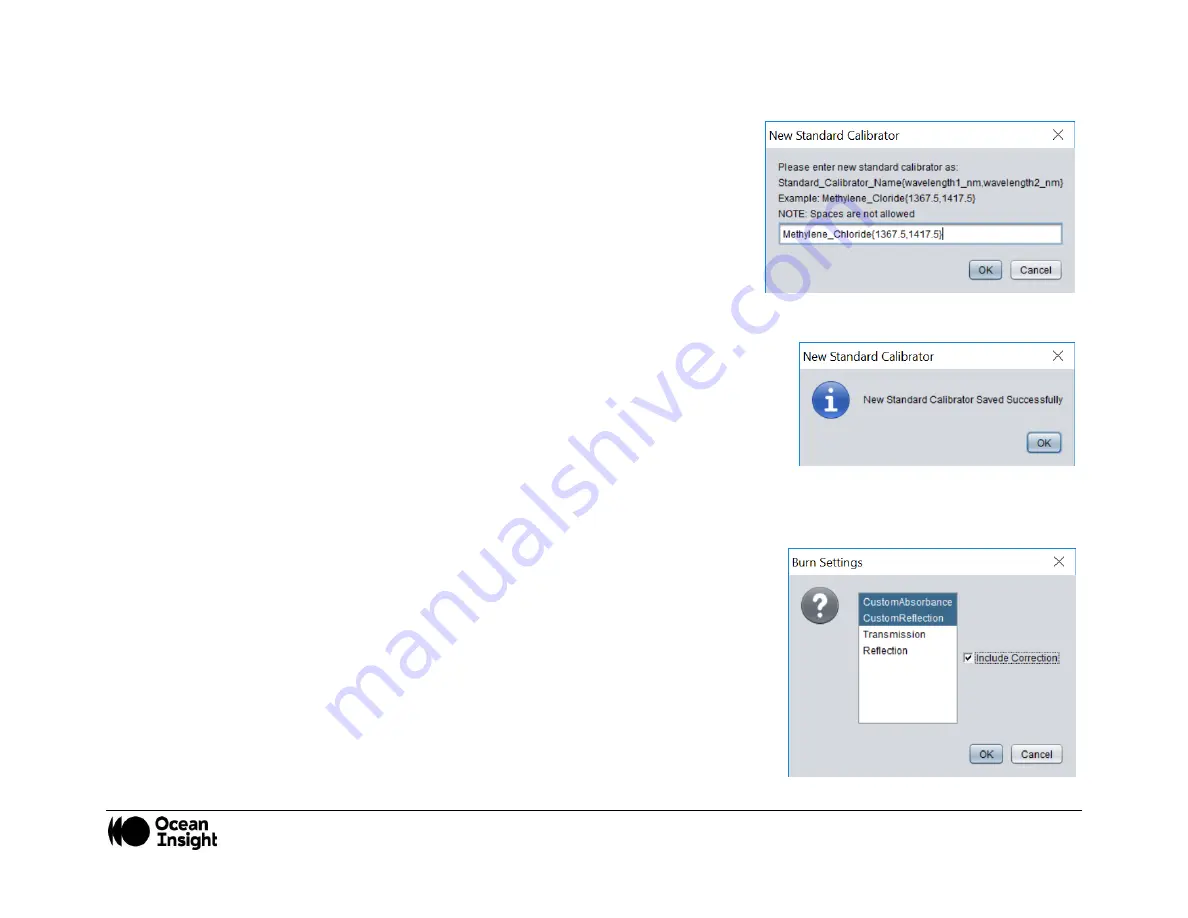
A new window will pop-up:
•
In the text box insert the name of the material and two distinctive
wavelength points in nanometer units using the following format:
i.
Standard_Calibrator_Name
{
<1
st
value in nm>
,
<2
nd
value in nm>
}
.
(For example: NewMaterial{1367.5,1417.5}).
•
The chosen wavelength values are the ones that the software will use for
the wavelength correction.
5.
Click
OK
.
6.
If your entry is correct, a new window will popup stating the creation of the new
reference has been completed. The newly created reference material should now
appear in the dropdown menu.
Burning Settings into the NanoQuest
The gain settings and wavelength correction will not be transported with the NanoQuest to another computer unless the new settings
are burned into the NanoQuest. To burn custom optical gain settings and/or wavelength correction to the NanoQuest follow the
steps below:
1.
Click on the
Burn Settings
button.
2.
In the wizard, select from the list of the optical gain settings that you would like to
burn to the module. To select multiple settings, hold the
CTRL
button while clicking
on the settings names.
3.
Check the
Include Correction
checkbox, if needed.
4.
Click on the
OK
button.
At any time, you can restore the module to factory settings by clicking on
Restore Default
Settings
. You can choose which settings to restore from the dropdown menu of the wizard.
Содержание NANOQ-2.5
Страница 1: ...NanoQuest MEMS Based FT IR Sensor Installation and Operation Manual For Product NANOQ 2 5...
Страница 2: ......
Страница 12: ...MNL 1007 REV A 10 Mechanical Drawing...


