background image

9

       Please make sure your computer laptop is on the same Wi-Fi network as the Radio 
before you start using this function.

1. If your PC is running Microsoft Windows XP, then you can use Windows Media Player 
    11(WMP11) to act as your UPnP (Universal Plug and Play) media server. (For Windows 7 or 
    above, please download the correspond version of Windows Media Player). The latest 
    Windows Media Player may be downloaded from Microsoft's website and install by following 
    the instructions detailed in its installation wizard.
2. Once installed, Windows Media Player will create a library from all the media files available 
    to it on your PC. 


2.1 Windows XP / Windows Media 11

    2.1.1 To add new media files to the library, select' File > Add to Library…> Advanced   
              Options', Click 'Add' and choose the files you wish to add and click' OK'. 
    2.1.2 Now you need to connect your Internet radio to Windows Media Player 11 and 
              configure it to allow the radio to access your media library. In order to this, you will 
              need to do the following:
    a. On the radio, go to the main menu and select <Media Centre> <UPnP>. 
    b. It will scan for all available UPnP servers. Note, this may take a few seconds for the radio 
        to complete its scan and before the scan has completed, the radio will display '[Empty]'.  
        The radio will continue to display '[Empty]' if no UPnP servers and found.
    c. After a successful scan. Select your UPnP server, by rotating the dial if there is more than 
        one UPnP server, and then press SELECT.
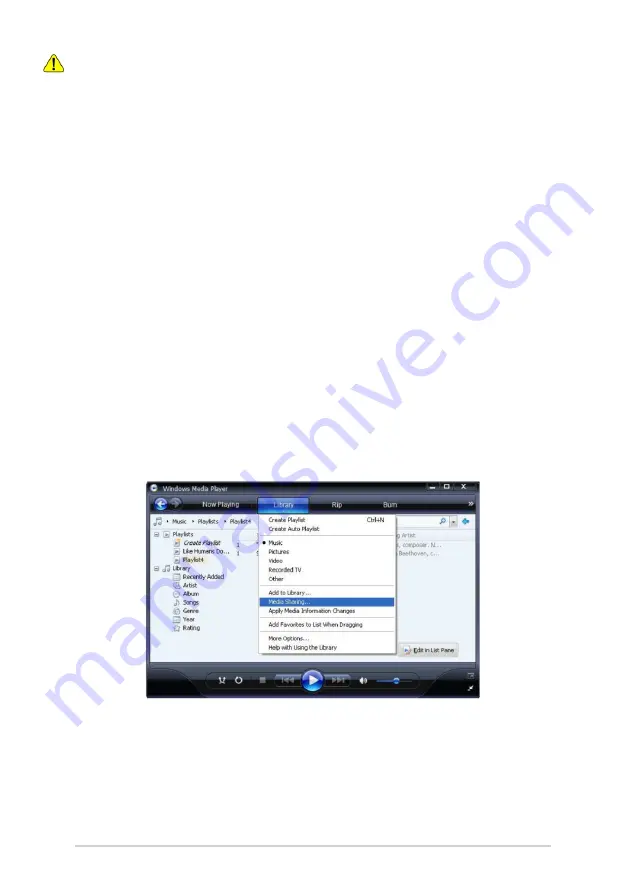
    2.1.3 Your PC will now prompt you that a device has attempted to connect to your UPnP 
              server. In order to allow the radio to have access to the media files, you will need to 
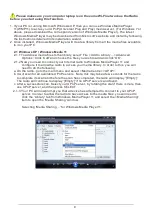
              click the 'Library' tab from Windows Media Player 11 and select the <Media Sharing> 
              item to open the 'Media Sharing' window.

              Selecting 'Media Sharing…' for Windows Media Player11:


Содержание WR-233

Страница 1: ...Internet Radio User Manual WR 233 Please read this user manual carefully before using the receiver...

Страница 2: ...ote control character list 5 Connecting to your WiFi Network 6 Start using internet radio 7 My Favorite 7 Internet Radio 7 AUX in 8 Media Centre 8 Configuration 13 Manage my media U 13 Alarm Setting 1...

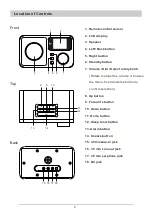
Страница 3: ...5 Right button 6 Standby button 7 Volume Dial Select rotary knob Rotate to adjust the volume or browse the menu Push down the button to confirm selection 8 Up button 9 Favourite button 10 Down button...

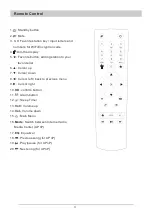
Страница 4: ...ing station to your favorite list 6 Cursor up 7 Cursor down 8 t Cursor left back to previous menu 9 u Cursor right 10 OK confirm button 11 Alarm button 12 Sleep Timer 13 Vol Volume up 14 Vol Volume do...

Страница 5: ...technician who set up the router network for you The radio supports Wireless network connection Wi Fi connection Precautions The radio should not be used in a high temperature or high humidity enviro...

Страница 6: ...e radio Plug the connector pin of the mains adaptor into the DC jack on the unit Connect the other end of the adaptor to the wall socket Caution Use only the main adaptor supplied with the radio Conne...

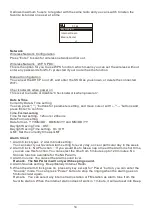
Страница 7: ...atically Note The encryption code would have been set up by the person who set up and configured your network Please refer to the Remote control character list for you to enter the passwords Press the...

Страница 8: ...ation is added to the radio preset The presets will be stored in ascending order You can store up to 250 presets You can edit your Favorite list with the following options Delete To delete the selecte...

Страница 9: ...add to your favorite list When the radio station is playing the display will show a color image transmitted from the radio station Aux In You can enjoy the music from other audio devices by connecting...

Страница 10: ...nd click OK 2 1 2 Now you need to connect your Internet radio to Windows Media Player 11 and configure it to allow the radio to access your media library In order to this you will need to do the follo...

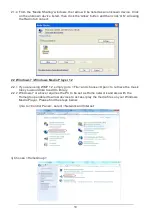
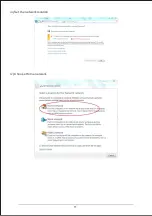
Страница 11: ...Media Player 12 2 2 1 If you are using WMP 12 simply go to File and choose Open to retrieve the music files you would like to add to library 2 2 2 Windows 7 or above requires the PC to be set as Home...

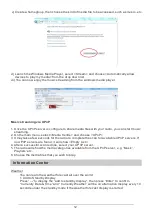
Страница 12: ...11 iii Set the network location iv Choose Home network...

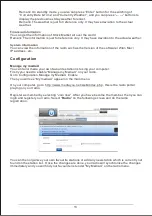
Страница 13: ...may take a few seconds for the radio to complete the scan for available UPnP servers If no UPnP servers are found it will show Empty List 4 After a successful scan is done select your UPnP server 5 Th...

Страница 14: ...e my mediaU You can tailor made your own favourite station list using your computer Firstly you need to enable Manage my MediaU on your radio Go to Configuration Manage my MediaU Enable Then you will...

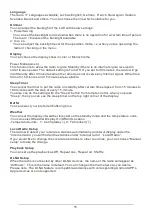
Страница 15: ...MM YY and MM DD YY Daylight Saving Time DST Daylight Saving Time setting On Off GMT Set the currently time as GMT Alarm Clock 1 Alarm Clock types 2 Alarm Clock setting You can select your favorite Ala...

Страница 16: ...ndby after certain time elapsed from 15 minutes to 180 minutes with the step of every 15 minute You also can do the setting with the Sleep button from remote control when you press Sleep then you can...

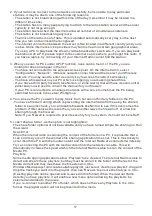
Страница 17: ...tic IP address on the radio Check that you firewall is not blocking any outgoing ports Some access points may be set so that only equipment with registered MAC addresses can connect to them This is on...

Страница 18: ...ched for needs to be server Workgroup 4 You can see the PC you want to play music from but cannot find any folders on the PC You have a firewall running which is preventing the internet radio from see...

Страница 19: ...ng If a stream gets blocked or experiences Internet congestion while transferring it may stop interfere with the quality of play If this happens check your internet connection speed it must be faster...

Отзывы: