


1. Select a time period Ð when you press OaktonLogÕs right
button, the LCD will start displaying the number of hours.
When you reach the desired time period (ranging from 1 to 24
hours), release the right key.
2. After releasing the right key, the OaktonLog will display the
Min and Max values of the selected sensors, for the selected
time period.
3. (Optional) After releasing the right key, the OaktonLog will
send an IR signal of the Min and Max values for the time
period selected in step 1. To receive a printout for these data,
point the OaktonLog to the IR printer (HP portable printer Ð
model No. 82240B).
NOTE: You cannot enter a time period greater than the time
elapsed since entering Run mode.
Viewing Min/Max Values in the last 1 to 30 Days
You can view the minimum and maximum values measured
during a specific time period up to 30 days by using the
OaktonLog's right key. To view those values, you need to perform
the following 3 steps:
1. Select a time period Ð When you press the OaktonLogÕs left
key, the LCD will start displaying the number of days. When
you reach the desired time period (ranging from 1 to 30 days)
release the left key.
2. After releasing the left key, the OaktonLog will display the Min
and Max values of the selected sensors, for the selected time
period.
3. (Optional) After releasing the left key, the OaktonLog will send
an IR signal of the Min and Max values for the time period you
selected in step 1. To receive a printout for these data, point
the OaktonLog to the IR printer (HP portable printer Ð model
No. 82240B).
You can also find a scheme of this procedure on your mini-
manual reference card.
NOTE: You cannot enter a time period greater than the time
elapsed since entering Run mode.
Viewing the OaktonLogÕs Status
The OaktonLog is always in one of the 4 possible modes:
Stop
Ð The OaktonLog is idle and not recording.
Run
Ð The OaktonLog is recording data. It will stop recording
when the memory is full.
Cyclic Run
Ð Same as
Run
, but the OaktonLog overwrites the
old measurements (starting with the oldest one) when the
memory is full.
Timer Run
Ð You can configure the OaktonLog to start recording
at a predetermined time. When the OaktonLog is set for such a
delayed run, the OaktonLogÕs status will is set to
Timer Run
.
Once the OaktonLog starts recording, the status changes to either
R u n
or
Cyclic Run
, depending on your configuration. The
following diagram indicates how to view the status of the
OaktonLog:
When you press both keys simultaneously, the OaktonLogÕs LCD
will display the status of the OaktonLog. It will also Òwake upÓ the
OaktonLog device for communication with a computer.
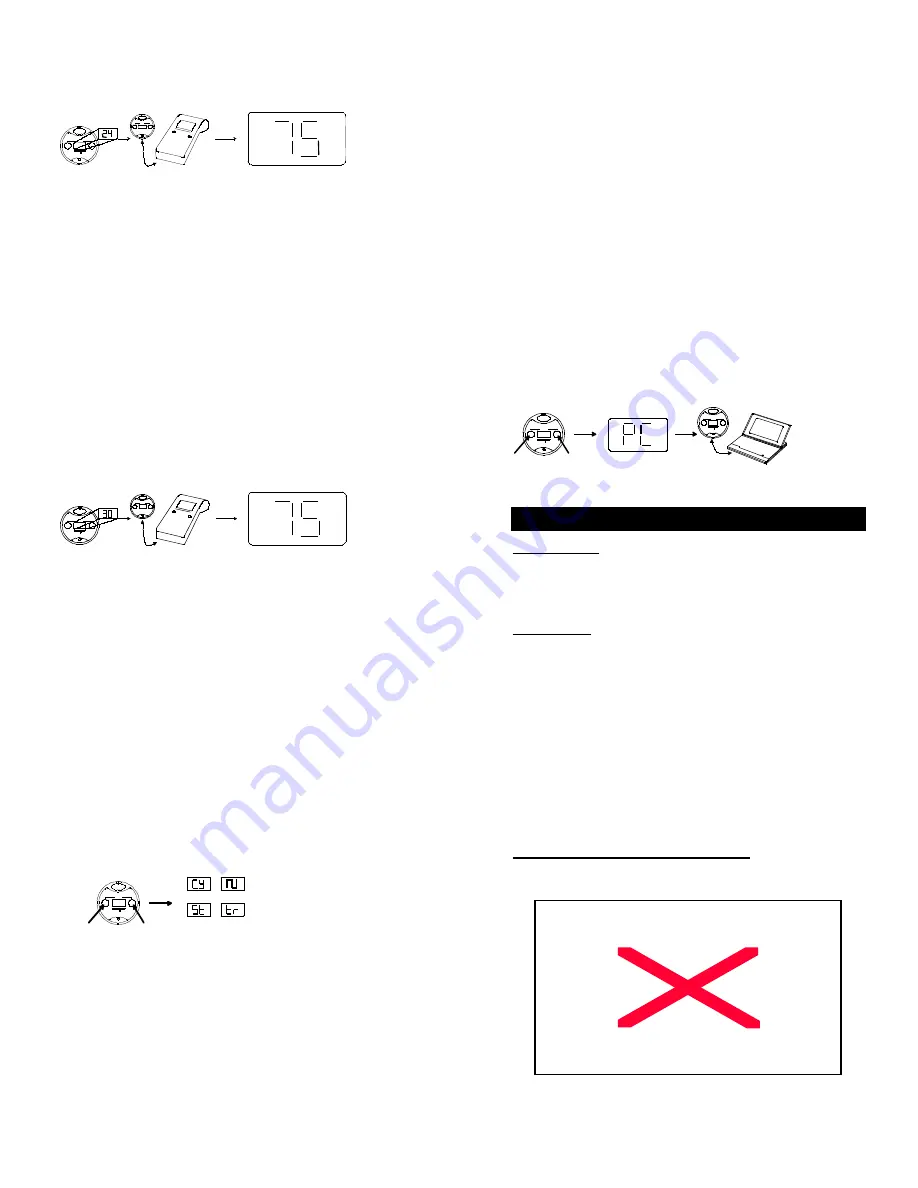
Downloading Data to a computer via IRDA Port
The OaktonLog is equipped with an infrared transmitter. Using the
OaktonLogÕs keys you can transmit the data stored in the
OaktonLogÕs memory to your computerÕs IRDA port. To perform
this function you need to perform the following 4 steps:
1. Open the MicroLab software on your computer.
2. Point the OaktonLog towards the computerÕs IRDA port.
3. Hold both keys down for 2 seconds. The OaktonLogÕs LCD
will change to PC.
4. The OaktonLog downloads all the data to the computer and
displays a graph of them.
The following scheme shows how to download the data:
The MicroLab Software
Introduction
To set the OaktonLog up for recording data, you have to use the
MicroLab software. The MicroLab software is also required for
downloading, viewing and saving recorded data. This section
provides you with a detailed guideline for the MicroLab.
Installation
Windows 3.X Installation
1. Insert the MicroLab diskette into your 3.5" drive.
2. From the
File
menu in the
Program Manager
, choose
Run
.
3. Type in the full path to the installation program in the
command line Ð setup.exe (e.g.,
a:\setup
), and press Enter.
4. Follow the simple instructions outlined in the setup program.
Windows 95 Installation
1. Insert the MicroLab diskette into your 3.5" drive.
2. Choose
Run
from the
START
menu.
3. Type the full path to the installation program in the command
line Ð setup.exe (e.g.,
a:\setup
), and press E
NTER
.
4. Follow the simple instructions outlined in the setup program:
The MicroLab Software: Overview
The following diagram provides you a brief description of
MicroLab's screen:
Min/Max
Day(s)
Min/Max
Hour(s)
mode/send
TempLog
OAK ON
Press both keys
and release
The LCD displays
the current status of
the OaktonLog
Cycle run
Run
Stop
Timer run
Min/Max
Day(s)
Min/Max
Hour (s)
m ode/send
Tem pLog
OAKON
Press right key and hold
Min/Max
Day(s)
Min/Max
Hour(s)
m ode/send
%RH
MAX
MIN
¡F
to select between
1-24 hours
When released, point towards
IR printer to print report
The LCD will also display
the min. and max.values
of the selected period


