Technology Made Easy ...
Instruction Manual
pH 300/310
Waterproof Hand-held pH / mV / Temperature Meter
68X248901
rev 5 11/02
Страница 1: ...Technology Made Easy Instruction Manual pH 300 310 Waterproof Hand held pH mV Temperature Meter 68X248901 rev 5 11 02...
Страница 2: ...doubts in the use of the meter please do not hesitate to contact the nearest Authorized Distributor Eutech Instruments Oakton Instruments cannot accept any responsibility for damage or malfunction to...
Страница 3: ...Compensation 14 4 2 Manual Temperature Compensation 15 4 3 Taking Measurements 16 5 HOLD FUNCTION 17 6 MEMORY FUNCTION 18 6 1 Memory Input 18 6 2 Memory Recall 19 7 ADVANCED SETUP FUNCTIONS 21 7 1 Ad...
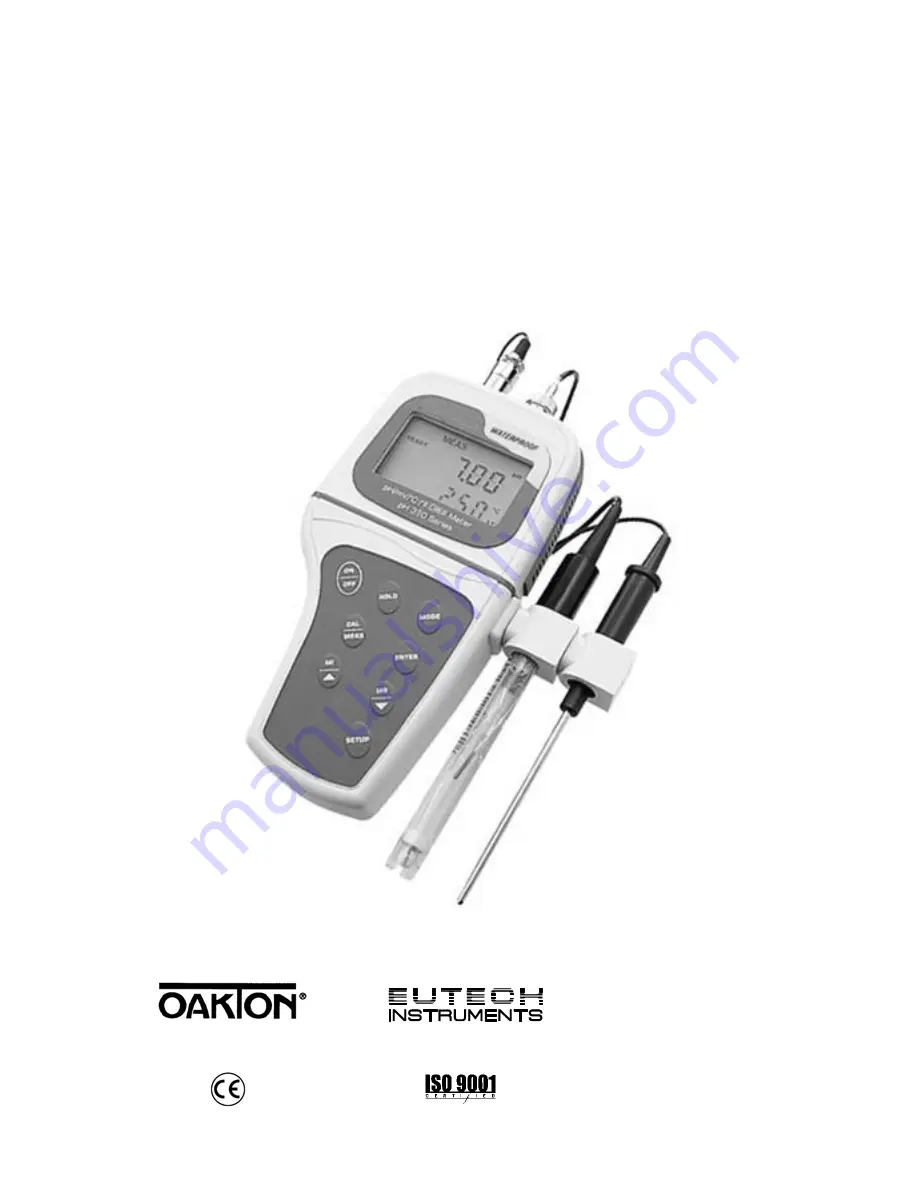
Страница 4: ...completely WATERPROOF and it FLOATS This meter has many user friendly features all of which are completely accessible through the water resistant membrane keypad Your meter includes a temperature prob...
Страница 5: ...ON OFF 8 8 8 8 1 8 8 8 1 2 3 4 5 6 7 8 9 10 11 12 13 14 15 16 17 18 Figure 1 Full LCD Screen 1 SETup mode indicator 7 Temperature indicator F available on pH 310 meter only 13 Low battery indicator 2...
Страница 6: ...MODE to toggle between pH mV or relative mV and date time date time feature available on pH 310 model only CAL MEAS Toggles between Calibration and Measurement mode 1 If you were in pH Measurement mod...
Страница 7: ...o screws holding the battery cover See Figure 3 below 2 Remove battery cover to expose batteries 3 Insert batteries Follow the diagram inside the cover for correct polarity 4 Replace the battery cover...
Страница 8: ...H ORP or ISE electrode 1 Slide the BNC connector of the probe over the BNC connector socket on the meter Make sure the slots of the connector are in line with the posts of the socket Rotate and push t...
Страница 9: ...6 Figure 4 Connection for pH Electrode BNC and Temperature probe 6 pin connector...
Страница 10: ...with the slot of the first holder 5 Slide the flange of the second holder into the slot of the first holder until the tops of the holders are aligned and secure See figure 7 2 6 Inserting the Electrod...
Страница 11: ...ng the Meter for Calibration Before starting calibration make sure you are in the correct measurement mode When you switch on the meter the meter starts up in the units last used For example if you sh...
Страница 12: ...310 meter features three separate internationally recognized buffer standards Select the buffer standard you require in SETUP mode Program 4 0 see pages 27 34 for more information The pH 310 meter is...
Страница 13: ...water or a rinse solution Do not wipe the probe this causes a build up of electrostatic charge on the glass surface 3 Dip the probe into the calibration buffer The end of the probe must be completely...
Страница 14: ...he Unit Configuration Setup menu press CAL MEAS to return to pH measurement mode NOTES To exit from pH calibration mode without confirming calibration DO NOT press ENTER in step 6 Press CAL MEAS inste...
Страница 15: ...splay is the same as the absolute mV value NOTE R annunciator will appear once mV calibration is performed an indication of mV offset 3 Press the MI or MR keys to enter the relative mV value that matc...
Страница 16: ...enter temperature calibration mode The primary display shows the temperature reading with last set offset and the secondary display shows the factory default temperature value 5 Dip the ATC probe or e...
Страница 17: ...automatically 25 C You can manually set the temperature to match your working conditions using a separate thermometer 4 1 Automatic Temperature Compensation For automatic temperature compensation ATC...
Страница 18: ...ows the current temperature setting and the secondary display shows the default value 25 C 4 Check the temperature of your sample using an accurate thermometer 5 Press the MI or MR keys to set the tem...
Страница 19: ...the sample to create a homogeneous sample 4 Allow time for the reading to stabilize Note the reading on the display 5 To toggle between pH and mV or Rel mV readings press the MODE key Taking measurem...
Страница 20: ...er shuts off automatically 30 minutes after last key is pressed If the meter is shut off either automatically or manually the HOLD value will be lost For longer storage use the Memory functions descri...
Страница 21: ...ter can store up to 50 sets of data in any combination of values In addition to the standard data set the pH 310 meter also stores the date and time the reading was stored To store a reading 1 During...
Страница 22: ...h on the display 2 Press the ENTER key to recall the reading stored under that memory number For pH 300 meter only Press the ENTER key again to return to the memory location screen See Figure 18 For p...
Страница 23: ...to review additional stored data sets 6 To exit Memory Recall press the MEAS key to return to the Measurement mode NOTES Readings stored in memory are retained even if the units are turned off To eras...
Страница 24: ...ps that organize all setup parameters The sub groups are 1 P1 0 Memory clear CLr 2 P2 0 Viewing calibration data CAL 3 P3 0 Viewing electrode data ELE 4 P4 0 Unit configuration COF 5 P5 0 pH 300 only...
Страница 25: ...22 Figure 22 pH 310 Advanced Setup Subgroups Figure 21 pH 300 Advanced Setup Subgroups...
Страница 26: ...w second calibration point pH 4 01 P2 3 View third calibration point pH 7 00 P2 4 View fourth calibration point pH 10 01 P2 5 View fifth calibration point pH 12 45 P3 0 Viewing electrode data In pH me...
Страница 27: ...e P2 6 Sixth calibration point plus time and date only for DIN buffer set P3 0 Viewing electrode data In pH measurement mode P3 1 pH electrode offset P3 2 pH electrode slope In mV or relative mV measu...
Страница 28: ...surement mode 1 Press the SETUP key to enter Set Up mode 2 Press the MI or MR keys to scroll through subgroups until you view the parameter P1 0 3 Press the ENTER key to enter parameter P1 0 4 Press t...
Страница 29: ...previous calibration data See Figure 24 pH 310 meter only Press the ENTER key repeatedly to view previous calibration data The meter will first display the calibration point and then display the date...
Страница 30: ...to scroll through subgroups until you view parameter P3 0 3 Press the ENTER key to select parameter 3 1 4 The display shows the electrode offset value It is the mV offset at pH 7 00 If you have not c...
Страница 31: ...P key to enter Set Up mode 3 Press the MI or MR keys to scroll through subgroups until you view parameter P3 0 4 Press the ENTER key to select parameter 3 1 5 The display shows the electrode offset va...
Страница 32: ...function on or off 2 Select the number of pH calibration points 3 Select between three standard calibration buffer sets for pH 310 meter only 4 Select between C and F units for temperature readings f...
Страница 33: ...ode 1 Press SETUP key to enter Set Up mode 2 Press the MI or MR keys to scroll through subgroups until you view parameter P4 0 3 Press the ENTER key to select parameter 4 1 4 Press the MI or MR keys t...
Страница 34: ...de 1 Press SETUP key to enter Set Up mode 2 Press the MI or MR keys to scroll through subgroups until you view parameter P4 0 3 Press the ENTER key twice to select parameter 4 2 4 Press the MI or MR k...
Страница 35: ...R keys to scroll through subgroups until you view parameter P4 0 3 Press the ENTER key three times to select parameter 4 3 4 Press the MI or MR keys to select the buffer set you require USA buffers pH...
Страница 36: ...2 Press the MI or MR keys to scroll through subgroups until you view parameter P4 0 3 Press the ENTER key four times to select parameter 4 4 4 Press the MI or MR keys to toggle between C and F 5 Pres...
Страница 37: ...Up mode 2 Press the MI or MR keys to scroll through subgroups until you view parameter P5 0 3 Press the ENTER key to enter parameter P5 0 See Figure 33 4 Press the MI or MR keys to toggle between NO a...
Страница 38: ...o the correct century 5 Press ENTER key to confirm the century and move to year selection The year digits will flash 6 Press the MI or MR keys to toggle to the correct year See Figure 34 7 Press ENTER...
Страница 39: ...rm the minutes and move to second digits will flash See Figure 35 16 Press the MI or MR keys to toggle to the correct seconds 17 Press the ENTER key to confirm the seconds and return to century select...
Страница 40: ...Up mode 2 Press the MI or MR keys to scroll through subgroups until you view parameter P6 0 3 Press the ENTER key to enter parameter P6 0 4 Press the MI or MR keys to toggle between NO and YES NO reta...
Страница 41: ...the manufacturer 3 Prior to next use rinse the liquid junction with de ionized water and tap dry never wipe electrode NOTE If this does not restore electrode to normal response see Reactivating the pH...
Страница 42: ...d waste disposal Safety goggles and protective clothing must be worn while performing this procedure If possible replace with another electrode instead of performing this re activation procedure 1 Dip...
Страница 43: ...attach optional AC adapter Unstable readings a Air bubbles in probe b Dirty probe c Probe not deep enough in sample d External noise pickup or induction caused by nearby electric motor e Broken probe...
Страница 44: ...0 years Hardware failure Turn meter on and off again If message persists return unit Err 2 in primary display Memory checksum error Hardware failure Turn meter on and off again If message persists ret...
Страница 45: ...ion points 1 to 5 up to 6 for pH 310 using DIN Yes Yes Number of calibration buffers USA 1 68 4 01 7 00 10 01 12 45 Yes Yes NIST 1 68 4 01 6 86 9 18 12 45 No Yes DIN 1 09 3 06 4 65 6 79 9 23 12 75 No...
Страница 46: ...C PHWP KIT with 3 pH buffer solution pH 4 01 7 00 10 01 in 60 ml bottle and 1 empty rinse waste water bottle 480 ml 35614 79 Includes five of each pH buffer pouch Waterproof pH 300 Hand held pH meter...
Страница 47: ...H 10 01 buffer sachets 20 ml x 20 pcs EC BU 10BS 35653 03 pH De ionized water rinse sachets 20 ml x 20 pcs EC RIN WT 35653 00 pH sachet assortment pack 5 each of pH 4 01 pH 7 00 pH 10 01 and de ionize...
Страница 48: ...45 Carrying Case Kit for pH 300 310...
Страница 49: ...rd buffer P2 4 Calibration data for 4th buffer P2 5 Calibration data for 5th buffer only in pH 310 meter P2 6 Calibration data for 6th buffer DIN only ELE View electrode offset P3 1 0 00 mV No offset...
Страница 50: ...urn freight pre paid and correction will be made without charge Eutech Instruments Oakton Instruments will determine if the product problem is due to deviations or customer misuse Out of warranty prod...
Страница 51: ...tems are to be returned For your protection items must be carefully packed to prevent damage in shipment and insured against possible damage or loss Eutech Instruments Oakton Instruments will not be r...
Страница 52: ...ruments P O Box 5136 Vernon Hills IL 60061 USA Tel 1 888 462 5266 Fax 1 847 247 2984 E mail info 4oakton com Web site www 4oakton com www oaktoninstruments com Eutech Instruments Pte Ltd Blk 55 Ayer R...