


TIXU_MX6Y
Rev. A1_02
7
4
SETTING UP THE SYSTEM
Below are the steps need to followed for setting up the system
1.
Fix the M3 screws and Spacers to the EVAL board
2.
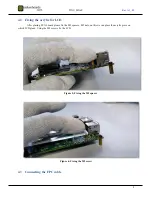
Fix the M2 spacer and nut for mounting the LCD
3.
Place the LCD on the acrylic and connect the FPC cable to the receptacle (J9) and lock the cable
4.
Fix the M2 screws.
5.
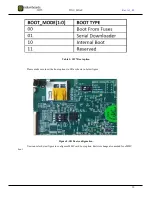
Configure the required boot option using DIP switches.
6.
Insert the coin cell to the battery holder
7.
Connect the SD card
8.
Connect the Debug UART .
9.
Connect the required peripherals
10.
Using the DC jack( J1) Power the board from a 5V, 5A adapter.
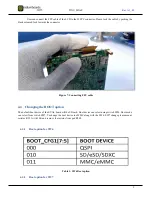
4.1
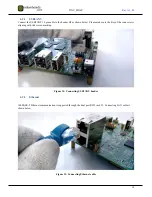
Fixing the EVAL Board on M3 spacers
Fix the EVAL board on four M3 spacer and screw as shown below
Figure 4 :Fixing the M3 spacers