background image

Inno3D GeForce Graphics Card User Manual 

Page 2 of 16 

4. Inno3D GeForce Graphics Card Installation 


i. Uninstall old graphics card driver


It is recommended that you uninstall your existing display card driver before replacing your 
old VGA card. Make sure your current graphics card is in your computer: 

1.  Close all applications  
2. Click [

Start]

, select 

[Control Panel]

, then double click


[

Add/Remove Programs]

3.  Select your current graphics driver and click [

Add/Remove…]

4.  *The wizard will guide you to remove your current display driver. 
5.  The system should be restarted after the driver has been removed. 

*If there is any software bundled with the previous graphics card that is installed, it is 
suggested to remove them before installing the new card.  (For example DVD player 
software, multimedia applications etc.) 


ii. Hardware installation 

Make sure you have discharged any static electricity from your body by touching any metal 
surface. 

1.  Power-off the computer and monitor 
2.  Disconnect the monitor cable from the back of your computer 
3.  Remove the computer cover 
4.  Remove any existing graphics card from your computer.  

If your computer has an onboard display capability, you may need to disable it on 
the motherboard. For more information, please refer to your motherboard 
documentation. 

5.  Insert the card firmly into the slot until the card is fully seated. 
6.  Fasten the screw to make sure the card is properly aligned. 
7.  Replace the cover on your system. 
8.  Connect the monitor cable to the card and switch on the computer and monitor. 


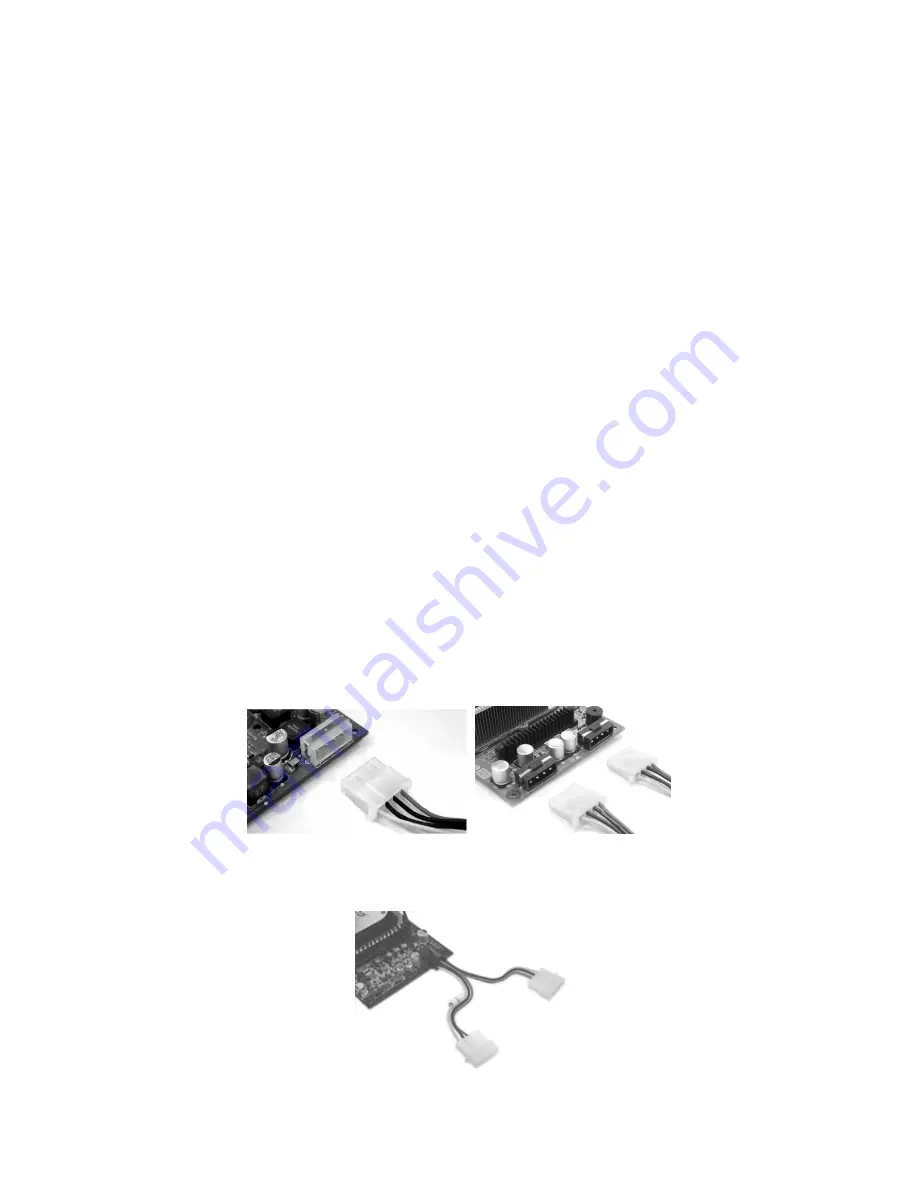
iii. Connect external power supply to graphics card 

For Inno3D GeForce AGP graphics card, connect 4-pin hard disk drive power connector 
when applicable.  


For GeForce PCI-Express graphics card, connect PCI-Express power connector when 
applicable. If power supply unit does not have PCI-Express power connector, use a 2x4-
pin to 6-pin PCI-Express power adaptor instead. 


Содержание Inno3D

Страница 1: ......

Страница 2: ...Installation 5 8 Using TV Out nView Multi Display and HDTV Out 8 A Using TV Out 8 B Advanced Setting for TV out 9 Adjust the size and position of the screen on TV 9 Set Video Format 10 Force the dete...

Страница 3: ...SLI Ready nForce motherboard with NVIDIA SLI Connector Two NVIDIA SLI Ready add in cards with matching GPUs Minimum Power Supply Requirement of SLI PC Ultra High End SLI PC You must have a power suppl...

Страница 4: ...ve discharged any static electricity from your body by touching any metal surface 1 Power off the computer and monitor 2 Disconnect the monitor cable from the back of your computer 3 Remove the comput...

Страница 5: ...r Inno3D SLI PC Building your SLI system 1 Install the NVIDIA SLI Ready Motherboard per instructions in the accompanying manual 2 Install both of the NVIDIA SLI Ready graphics cards 3 Connect the PCI...

Страница 6: ...o graphics cards The NVIDIA SLI connector is not used with some mainstream graphics card models such as the GeForce 6600 and Geforce 7300 series 5 Once the new NVIDIA SLI certified components have bee...

Страница 7: ...00 XP you must have administrative right to perform this operation This installation guide is demonstrated by GeForce 6800 Ultra 1 Turn on your computer 2 After entering to Windows the newly installed...

Страница 8: ...rted click Next to continue 6 The graphics card will be detected If Windows warns you that the driver has not passed Windows Logo testing ignore the warning and click Continue Anyway to continue the i...

Страница 9: ...ooted up your system you will see an SLI Capable System message i Click on the SLI capable system message to open the following window ii Select the checkbox Enable SLI technology and then click Apply...

Страница 10: ...n desktop and open NVIDIA Control Panel 2 Enter Display category 3 Select Change Display Configuration option Note The option of nView Display Mode is only available when TV or second monitor has been...

Страница 11: ...anual Page 9 of 16 B Advanced Setting for TV out Adjust the size and position of the screen on TV 1 Right click on desktop and open NVIDIA Control Panel 2 Enter Video Television category 3 select Adju...

Страница 12: ...SIGNAL OR HD FORMAT option 2 In the dialog select a signal format depending on your local and one of connection types then click Apply to complete the setting Force the detection of connected TV When...

Страница 13: ...e on both display Clone Clone mode indicates that both displays in the display pair show images of the same desktop 2 As one large horizontal desktop Horizontal span Horizontal Span mode indicates tha...

Страница 14: ...by centering a lower resolution on the HDTV screen the dimensions of which you can further adjust with sliders in the current release of the driver For the component out NVIDIA determined through mark...

Страница 15: ...ontinuing this section it is important to ensure that your graphics card has built in Video In Video Out VIVO function Do not install the Video in Drivers if your card does not support VIVO function 1...

Страница 16: ...lays the Found New Hardware Wizard You are going to go through 4 Found New Hardware screen for 4 WDM drivers that include WDM Video Capture WDM TVTuner WDM TVAudio Crossbar and WDM A V Crossbar Click...

Страница 17: ...ar purpose merchantability or otherwise in respect of the product No other representations warranties or conditions shall be implied by statute or otherwise In no event shall InnoVISION be responsible...

Страница 18: ...on against harmful interference in a residential installation This equipment generates uses and can radiate radio frequency energy and if not installed and used in accordance with the instructions may...

Отзывы: