0
• DETECT AREA
:
Specific areas of the frame can be monitored for movement. A grid of
64 blue squares will appear. Each square can be individually turned active or inactive for
motion detection. Using the navigation keys (LEFT/RIGHT/UP/DOWN) on the remote, turn
specific areas on the screen ON (Orange) or OFF (Green) for movement monitoring.
For more detailed programming instructions, refer to section 6.3 BMB Menu Mode.
Important:
Please program the DETECT AREA in the color mode.
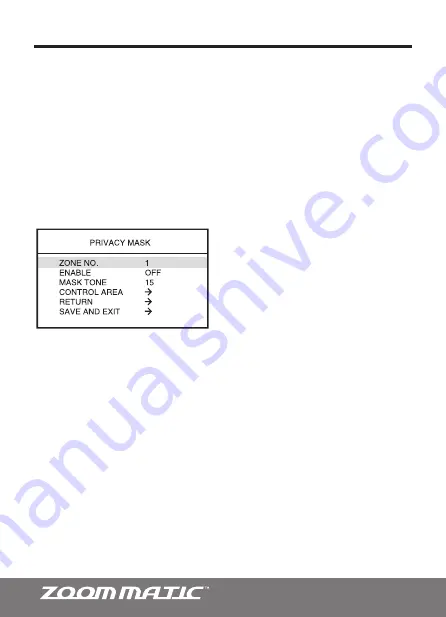
8.5 PRIVACY MASK (ZONE NO., ENABLE, MASK TONE, CONTROL AREA)
- Specific
areas of the camera frame can be masked, or concealed for privacy. The Integrated
camera offers masking of up to 8 unwanted areas.
OSD Menu Terms & Settings
• CONTROL AREA:
Adjust the size and location of the mask.
To setup the Privacy Zone masks, follow the simple instructions below.
1.
Highlight the CONTROL AREA, then press the RIGHT Key to enter sub-menu screen.
2.
Adjust the size and location by using the corresponding arrow keys on the remote.
The location should be determined first before size can be adjusted.
Adjusting the Location of Mask:
Mask can ONLY be moved at its smallest size. If the
dimension of the mask is affected by pressing the desired arrow key, then press the
[MENU] button once then try again.
Adjusting the Size of Mask:
Press the corresponding arrow key makes the concealed
area wider/narrower, or longer/shorter. If you wanted the mask wider but gets narrower,
then press the [MENU] key once then try again.
3.
Repeat steps 1-2 many times as necessary to conceal all the unwanted areas.
• ZONE NO.:
Assign a ZONE number 1-8.
• ENABLE:
Activate the PRIVACY MASK
ON/OFF.
• MASK TONE:
Designate the desired mask
tone (Transparency). 0 indicates completely
transparent and 15 at solid color.


