background image

AXIS 8


PROGRAM 

FUNCTIONS 

     PLEASE 

READ!!!! 


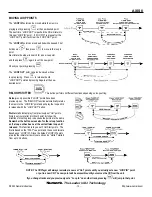
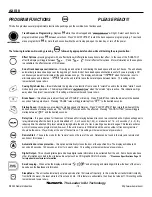
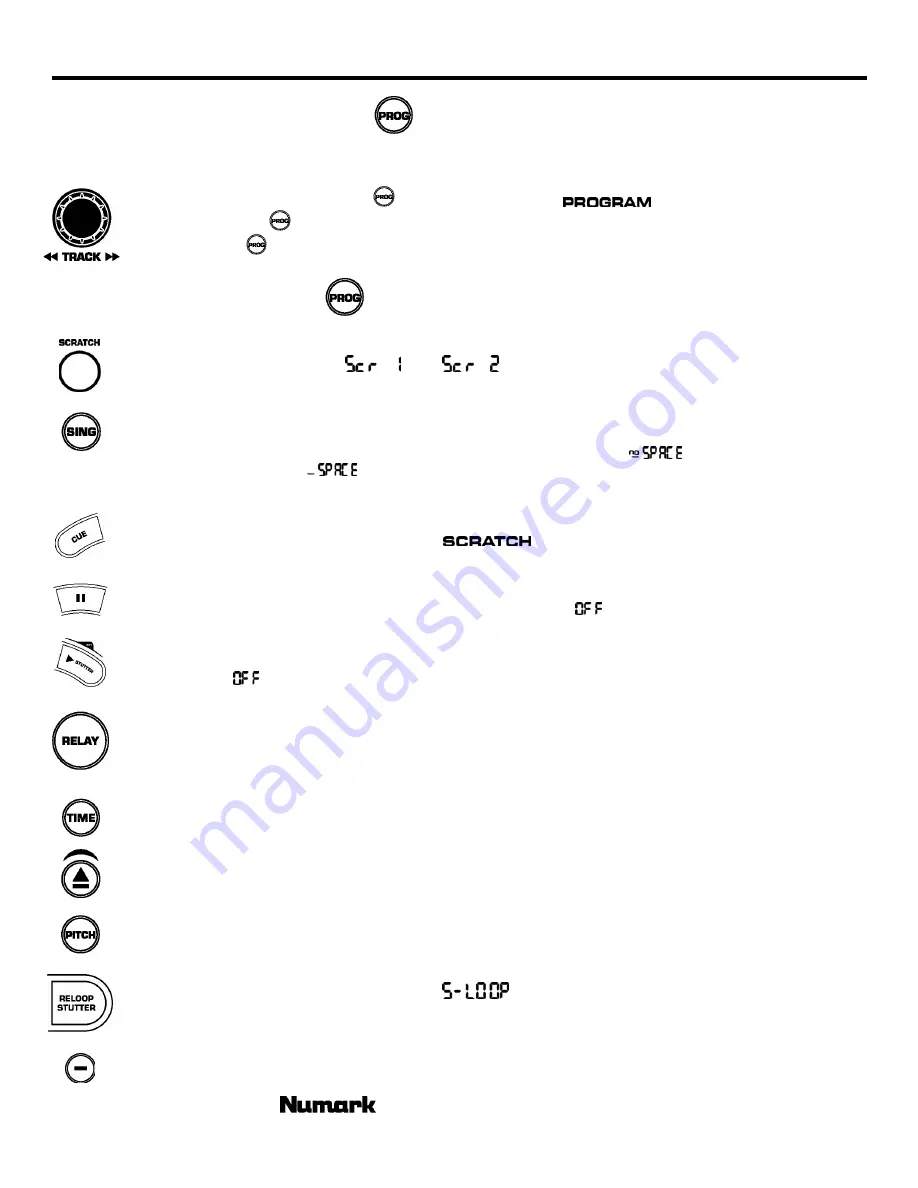
This button provides several programmable functions depending upon the combination of buttons used.  

Track Sequence Programming

 - Depress 

 while the unit is stopped and “ 

 ” will light.  Select each track to be 

programmed then press 

 between selections.  Press “PLAY/STUTTER” to start the track sequence program playing.  To exit and 

erase program hold 

 for more than 2 seconds while the unit is stopped, open the disc tray, or turn off the power. 

The following functions will work by pressing 

 followed by appropriate function while still holding the program button: 

Effect Options - 

pressing program with an effect button will offer alternative options to that effect.  In the case of the “SCRATCH” 

effect the display will toggle between “ 

 ” and “ 

 ”.  Not all effects offer options.  More information on these options 

is available in the effects section of this manual.


End of track dead space elimination

 – this will give and option for eliminating the dead space at the end of tracks.  The unit already 

automatically removes dead space at the beginning of tracks. End of track dead space elimination is useful if you are playing a CD 

continuously and want to eliminate all the gaps between songs.   The display will indicate “ 

 ” when the function is set to 

eliminate space and indicates “ 

 “ when the unit is left to leave the natural space between tracks.  

This setting will be 

remembered at power down.


Cueing Style Selection

 – this will alternate the jog wheel cue function from a smooth “scratch” sound to the tradition “stutter” sound 

modes during cue operations.  The display will indicate “ 

 ” when the “scratch” style is active.  This indication will go 

away when the style of cue is stutter. 

This setting will be remembered at power down. 

Brake Speed 

– this allows you to adjust the speed of ‘PAUSE”, or braking.  Press “PAUSE” then rotate the wheel until the desired 

seconds of startup are shown.  Pressing “PAUSE” twice will toggle startup from “ 

 ” to the desired seconds. 

Startup Speed

 – this allows you to adjust the startup speed of initial play.  Press “PLAY/STUTTER” then rotate the wheel until the 

desired seconds of startup are shown.  The “STUTTER” function will not be affected.  Pressing “PLAY/STUTTER” twice will toggle 
startup between “ 

 ” and the desired seconds. 

Relay time

 – this gives options for the amount of time used for relaying between tracks on two connected units. Options will appear to 

relay immediately after the track (0), with time added of 1, 2, or 3 seconds (1,2,3), or a reduction of 1,2, or 3 seconds (-1,-2,-3).  By 

reducing time the attached CD player will start playing before the end of a track, creating an automatic segue. 

This feature will also 

work in track sequence program mode; however, if the units are also in SINGLE mode the same number of tracks programmed 

should be the same.  Play will stop at the end of the last track.  This setting will be remembered at power down. 

Remote Start 

– The sets the mode for the “remote” jack on the rear of the unit.  Details can be found in the relay and remote start 

sections of this manual.


Automatic door close protection

 – this option automatically closes the door at the specified time. The display will indicate 30 

seconds, 60 seconds, 120 seconds, and (no) for no auto close.  

This setting will be remembered at power down.


Digital Output

 – This actives digital output and allows digital audio information to be extracted from the unit.  Some tracks also have 

other information encoded in the original audio output such as CDG graphic CDs for Karaoke.    

– 

*Please see Specifications Page 19 

for important manufacturer information

.    

Smart Looping

 – When active the display will indicate “ 

 ” and all looping and stuttering will follow the beat of the music 

based upon the Beatkeeper information. 

Sleep Mode 

– The unit will automatically enter sleep mode after 15 minutes of inactivity.  In this mode the unit will still start instantly 

from buffer, however, the laser will turn off to extend it’s life.  If this feature is undesirable, then it can be turned off. 

This setting will be 

remembered at power down.


- The Leader in DJ Technology 

©2002 Numark Industries 

- 16 - 

http://www.numark.com 

Содержание AXIS 8

Страница 1: ...AXIS 8 Premium CD Player Owner Manual 2002 Industries R33 http www numark com ...

Страница 2: ...rce and uneven surfaces may cause the appliance and cart combination to overturn SERVICE INSTRUCTIONS Disconnect power cord before servicing Replace critical components only with factory parts or recommended equivalents For AC line powered units Before returning repaired unit to user use an ohmmeter to measure from both AC plug blades to all exposed metallic parts The resistance should be no more ...

Страница 3: ...ration Play Pause Cue Pitch General CD control 8 Advanced Operations Pitch Change Key Change 10 Beatkeeper 10 Matching Beats 11 Looping 12 Stuttering Hot Starts 13 Special Effects 14 Program Functions A MUST READ 16 Fader Start Relay 17 Cue Point Storage 18 Updating your Software 19 MIDI IN OUT 20 Specifications 23 Warranty 24 The Leader in DJ Technology 2002 Numark Industries 3 http www numark co...

Страница 4: ...m master tempo With master tempo the pitch only locks at the 0 point So often a DJ is in the middle of a pitched mix and determines they need to make rapid and drastic changes in speed to bring in a record or change the mood With KEY LOCK you can lock on right in at your current position no returning to 0 On top of that we took it one step further Because we developed our own technology for this f...

Страница 5: ...lectronics store or you can use the fader start cable instead for this purpose 5 Check the voltage selection switch is set to correctly match your local power supply 6 Connect IEC power cord to the back of the unit then to your power source DIGITAL OUTPUTS This CD player is specially equipped with digital outputs The format is type 2 form 1 also known as S PDIF Sony Phillips Digital Interface Form...

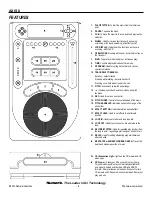
Страница 6: ...s key control 14 PITCH SLIDER Controls the overall speed of the music 15 PITCH RANGE LED Indicates current pitch range of the pitch slider 16 EFFECT BUTTON Used to determine desired effect 17 EFFECT HOLD Used to set effects to an alternate position 18 LOOP IN Used to set stutter and loop in points 19 LOOP OUT Used to set loop out points and release the loop 20 RELOOP STUTTER Used for repeated play...

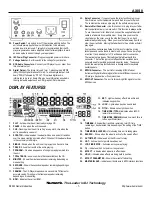
Страница 7: ...s 32 MIDI IN Connector The port is for receiving MIDI Musical Instrument Digital Interface signals from other MIDI devices such as CD players Keyboards or Drum machines 33 MIDI OUT Connector The port is for sending MIDI signals to other MIDI devices DISPLAY FEATURES 1 PLAY Active while the unit is actually playing a CD 2 PAUSE Active when the unit is paused 3 CUE Flashing when the unit is setting ...

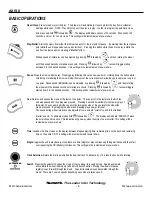
Страница 8: ...ting will be remembered at power down Cue Returns and pauses the music at the last set cue point The cue point is the last place in which the unit was paused and then play was pressed Pressing a second time allows for temporary play of this point You can easily edit the cue point by turning the wheel As you rotate the wheel the music will sound By stopping the wheel and pressing play a new point i...

Страница 9: ...er of times This function is called back cue PLAY PAUSE and CUE Pressing Play to start then pressing Pause and then Play again a new cue point will be set Pressing Cue will return to the last pause position and will be the new cue point EDITING CUE POINT When the jog wheel is turned while paused a new cue point can be located By pressing PLAY while paused that point will be set By pressing PLAY ag...

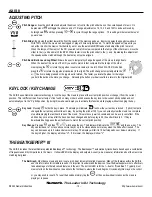
Страница 10: ...ically set to the 0 pitch position By doing this we have allowed you to activate this function while playing without changing the key Key Lock Pressing holds the key in place The display will indicate to show the current key is locked If pitch tempo is changed the current key will continue to play By putting the pitch at 100 you can actually slow the music to a complete stop while playing the last...

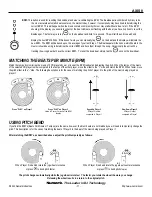
Страница 11: ...he BPM readout and adjusting the pitch When the tempo of the music of the selected CD player is slow compared to the tempo of the other player move the slider to the side and match the BPM When faster move the pitch slider to the side The following description is for the case of matching the pitch of player 2 to the pitch of the music being played on player 1 Press PLAY on Player 1 Press PLAY on P...

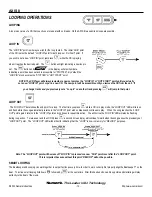
Страница 12: ...e end point for a loop The first time you press while a CD is in play mode the LOOP OUT LED will turn on and flash while the song automatically returns to the LOOP IN point with no breaks and continues to play When the song reaches the LOOP OUT point again it returns to the LOOP IN point and continues to repeat this action You will notice the LOOP IN LED will also be flashing during loop action To...

Страница 13: ...ically returns the music to the LOOP IN point and will play the loop until it is released with the LOOP OUT button Stutter starts instant play from previously set Hot points Simply set your stutter Hot Start point by follow the directions for setting loop in because the points are the same Remember the button serves also for the reloop function so if a loop out has been set the unit will also loop...

Страница 14: ...In Scratch 2 when the wheel is brought to a stop the music will stop and when you push the wheel forward the unit will automatically play In Scratch 3 the unit scratches from the current buffer until the unit is released When released the unit jumps ahead to the point where the music would have been if not interrupted This essentially allows a bleep of dirty lyrics through scratch In Scratch 4 the...

Страница 15: ...s the parts to 1 4 1 2 and 1 1 Rotating to the right makes faster changes of 1 16 1 32 1 64 then smaller increments making for another interesting effect If you deactivate the effect then turn it on again it remembers the last set parameter Isolate This isolation filter lets you play only a specific frequency of the music Rotation of the wheel moves the frequency played through the audio spectrum ...

Страница 16: ...red seconds Startup Speed this allows you to adjust the startup speed of initial play Press PLAY STUTTER then rotate the wheel until the desired seconds of startup are shown The STUTTER function will not be affected Pressing PLAY STUTTER twice will toggle startup between and the desired seconds Relay time this gives options for the amount of time used for relaying between tracks on two connected u...

Страница 17: ...t will cue or pause depending upon CD player setting To select start stop mode hold the time button for 2 seconds If the display shows then the CD will pause when the crossfader is moved away If the display shows then the CD will CUE when the crossfader is moved away REMOTE SWITCH START Remote switch start is achievable by attaching your CD player to a switch like a foot switch found in most music...

Страница 18: ...then the LCD will show NO FETCH All cue loop in and loop out points are restored along with the BPM and downbeat for immediate access to beatkeeper functions To TRANSFER stored cue points from another unit No Disc should be in the player The CD Player needing cue points Player A should be looped via MIDI to another CD player with the cue points already stored Player B Press on Player A to retrieve...

Страница 19: ... slowest speed possible to ensure an accurate burn If you have a disc at once option it should be used 6 You should set the program to finalize the CD 7 Burn the disc Programming 8 Power up your CD player with no CD inside 9 Place in the CD in the tray and close the drawer with the OPEN CLOSE button Do not close the drawer by pressing PLAY 10 Wait until the display indicates time remaining 11 Pres...

Страница 20: ...djust to match to the nearest beat of the master If is pressed the slave will now start with the next beat of the master If is pressed during INTERLOCK the slave will automatically start the next time the master matches the beat of the slave SLAVE TO MIDI CLOCK When the AXIS 8 is hooked up to receive another clock device through it s MIDI input such as a drum machine beat synchronization can be ac...

Страница 21: ...er Set your keyboard to transmit on Channel 6 Add a foot pedal to the keyboard for added control The chart below details key reaction MIDI IMPLEMENTATION CHART note further MIDI Specs can be found at our web site http www numark com The Leader in DJ Technology 2002 Numark Industries 21 http www numark com ...

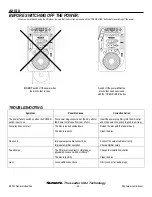
Страница 22: ... IEC Power cord loose from rear of unit Insert the power plug firmly into the AC outlet and make sure connection is good in unit rear Disc play does not start The disc is loaded upside down The disc is too dirty Reload the disc with the label side up Clean the disc No sound Improper output cable connections Improper amplifier operation Connect the output cables correctly Check amplifier setup Soun...

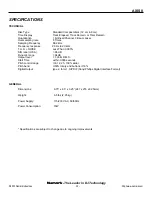
Страница 23: ...A 96 dB Dynamic range 94 dB Output level 1 3 Volts R M S Start Time within 0 006 seconds Pitch control range 6 12 25 100 slider Pitch bend 50 rotary and buttons 16 Digital Output type 2 form 1 S PDIF Sony Phillips Digital Interface Format GENERAL Dimensions 9 75 x 8 5 x 3 25 247 x 216 x 82 5mm Weight 6 5 lbs 2 95 kg Power Supply 115 230V AC 50 60Hz Power Consumption 15W Specifications are subject ...

Страница 24: ...K SHALL NOT BE LIABLE FOR ANY SPECIAL INCIDENTAL CONSEQUENTIAL INDIRECT OR SIMILAR DAMAGES LOSS OF PROFITS DAMAGES TO PURCHASER S PROPERTY OR INJURY TO PURCHASER OR OTHERS ARISING OUT OF THE USE MISUSE OR INABILITY TO USE ANY NUMARK MIXER BREACH OF WARRANTY OR NEGLIGENCE INCLUDING BUT NOT LIMITED TO NUMARK S OWN NEGLIGENCE EVEN IF NUMARK OR ITS AGENT HAS BEEN ADVISED OF SUCH DAMAGES OR FOR ANY CLA...

Отзывы: