background image

14

Eng

lish

MENU INFORMATION

3. System Setup
1. Press OK key or              key to move the cursor to the right menu.
2. Press PR+, PR- keys to move the cursor up or down.
3. Press EXIT key or               key to move the focus to the left menu.

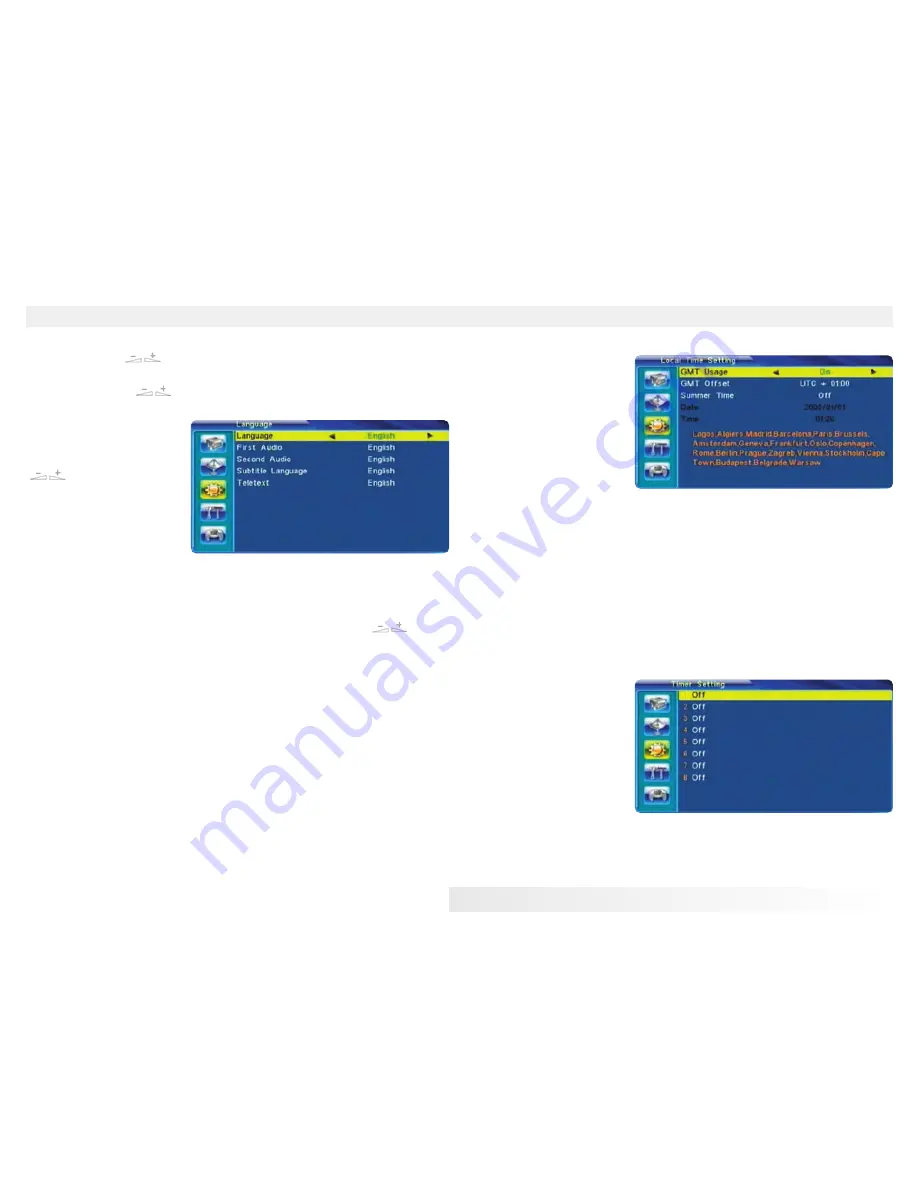
3.1 Language
1. Press OK key to enter into
the Language window. Press

keys to select the lan-

guage  in  circle,  while  press
PR+, PR- keys to move the cur-
sor up or down in circle.
2. Press MENU key or EXIT key
to save and exit.
3. The types of the language, pleaser refer to the configuration of the customer.

3.2 TV System
Press PR+, PR- key to move the cursor up or down, while press           keys to
change the setting and the setting will take effect immediately.
1. Display Mode: Select among Auto,PAL, PAL-M, PAL-N, NTSC.
2. Aspect Mode: Select among 4:3 LetterBox, 4:3PanScan, 16:9.
3. Video Output: Select between RGB and CVBS.If you select the mode of RGB,the
VCR Loopthrough will turn grey below.
4. RF System,RF Channel: PAL:21~29,NTSC:14~83

3.3 Local Time Setting
1.  Summer  Time: Select  bet-
ween ON and OFF. "OFF" dele-
gates  the  normal  time.  If
select ON,  time will add one
hour.
2.  GMT  Offset:  When  select
"ON"  in  GMT  Usage  item,
system  will  get  the  date  and
time  information  from  the
screen automatically. Date and Time two items will turn grey.  Select the proper
option in the GMT Offset item. The default setting is GMT ON.
3.Date, Time: When select "OFF" in GMT Usage, Date and Time two items take ef-
fect, while GMT Usage turns grey. Use numeric keys to input the desired value.5.
After setting, press MENU key or EXIT key to exit and save. If the value is invalid,
system will inform "Invalid input! Continue to edit?". Press OK key at the Yes button
to continue the modification, or press OK key at the No button to exit without sa-
ving.

3.4 Timer Setting
If there is no program, you can
not  enter  into  this  window.
There are 8 timers that can
be  set.  Select  Timer  up  or
down,  and  press  OK  key  to
enter into the setting window.
1.  Timer  mode:  The  default
mode  is  off.  You  can  set  the
timer  once,  daily,  weekly,
monthly and yearly.

Содержание DSR 4008 A

Страница 1: ...nglish Personal Grand Technology S A Pol Ind De las Monjas C Ecuador 14 28850 Torrej n de Ardoz Madrid TEL 902 931 457 sat npgtech com www npgtech com USER MANUAL DSR 4008 A DIGITAL SATELLITE RECEIVER...

Страница 2: ...Antenna Setup 11 2 4 Single Satellite Search 12 2 5 Multi Satellite Search 13 2 6 TP List 13 3 System Setup 14 3 1 Language 14 3 2 TV 14 3 3 Local Time setting 14 3 4 Timer Setting 14 3 5 Parental Con...

Страница 3: ...gh RS 2 3 2 port Plug and play data transfer system DSR to DSR Timer function automatically turns On Off by setting function daily monthly ye arly Automatic reserved channel moving system Provide Elec...

Страница 4: ...d you experience any difficulties with the operation of your receiver please consult the relevant section of this manual including the Problem Shooting or al ternatively call your dealer or a customer...

Страница 5: ...NECT TO THE OTHER RECEIVER RF IN CONNECT TO CABLE SINGAL RF OUT CONNECT TO TV ANT INPUT CONNECT VIDEO TO TV USING RCA JACK CONNECT TO AUDIO R L TO TV OR AUDIO TUNER CONNECT TO A DIGITAL AMPLIFIER CONN...

Страница 6: ...he object as the standard Connecting to TV using SCART support Connecting to TV using SCART support Connecting to TV using RCA support Satellite D i s h DSR TV TV TV DSR DSR Satellite D i s h Satellit...

Страница 7: ...password is 0000 2 Press PR PR keys to move the cursor up or down 3 Press EXIT key or key to move the focus to the left menu n During the installation the OK key confirms a selection and LIST key sho...

Страница 8: ...he program and press OK key to mark this program with the Lock mark You can cancel this mark by pressing OK key once more Press red colour key again to exit from the lock mode and you will find the Lo...

Страница 9: ...ter on the cursor press keys to move the cursor left or right press numeric keys 0 9 to input the character please refer to the down table Press yellow colour key to save and exit or press blue key to...

Страница 10: ...een east longitude and west longitude After pressing OK key you can use numeric keys to edit the longitude press EXIT key or the PR PR keys to exit editing mode The range of the longitude is from 1 to...

Страница 11: ...satellite list are displayed in this item Press keys to select the satellite in circle Or press OK key to pop up the drop down list then select the desired satellite in the list and press OK key to c...

Страница 12: ...Limit Limit Setup Move cursor to the Limit Setup button You can press key to turn west or press key to turn east Go to Reference Press OK key to go to reference If you select Disable Limit in the abo...

Страница 13: ...and Preset Scan Auto Scan is Blind scan while Preset Scan is to search the preset frequencies 6 Search Press OK key to start searching 2 6 TP List 1 Press PR PR keys to select the proper satellite 2 P...

Страница 14: ...Channel PAL 21 29 NTSC 14 83 3 3 Local Time Setting 1 Summer Time Select bet ween ON and OFF OFF dele gates the normal time If select ON time will add one hour 2 GMT Offset When select ON in GMT Usag...

Страница 15: ...u can not view the locked channel set in Chanel List Edit window until you have inputted the correct password 3 New Password User numeric key 0 9 to input the new password 4 Confirm Password Input the...

Страница 16: ...n to start checking serial port 5 Game 1 Press OK key or key to enter into the game 2 Press PR PR keys to move the cursor up or down 3 Press EXIT key or key to move the focus to the left menu 4 Select...

Страница 17: ...cific satellite only can select channel in the satellite group 6 7 Left Righ Volume Press keys to change the volume Press keys to decrease the volume by step 1 while press keys to add the volume by st...

Страница 18: ...n nected by RF leads Check the UHF channel fixed in your system and tune the UHF channel properly There is interference on your digital satellite channels an existing te rrestrial channel or video sig...

Страница 19: ...cal and electronic equipment should be disposed at the end of life separately from your household waste There are separate collection systems for recycling in the EU For more in formation please conta...

Страница 20: ......

Отзывы: