Bottom-up Roller Blind Fitting Instructions
4
1
2
3
. Cording th
cord breakway device
e blind (for right hand controlled blinds)
5. To re-tension the blind (
should
not be necessary)
The spring in the headbox should already be tensioned.
If adjustment is required, follow these instructions.
If the blind rolls down too quickly,
remove the
LH
cassette end
cap and you will see a hole in the centre of the bracket with a cross
in a plastic pin
use a screwdriver
in an anti clockwise direction
to
decrease the tension
. If the blind rolls down too slowly or not far
enough, press and turn the screw in a clockwise direction.
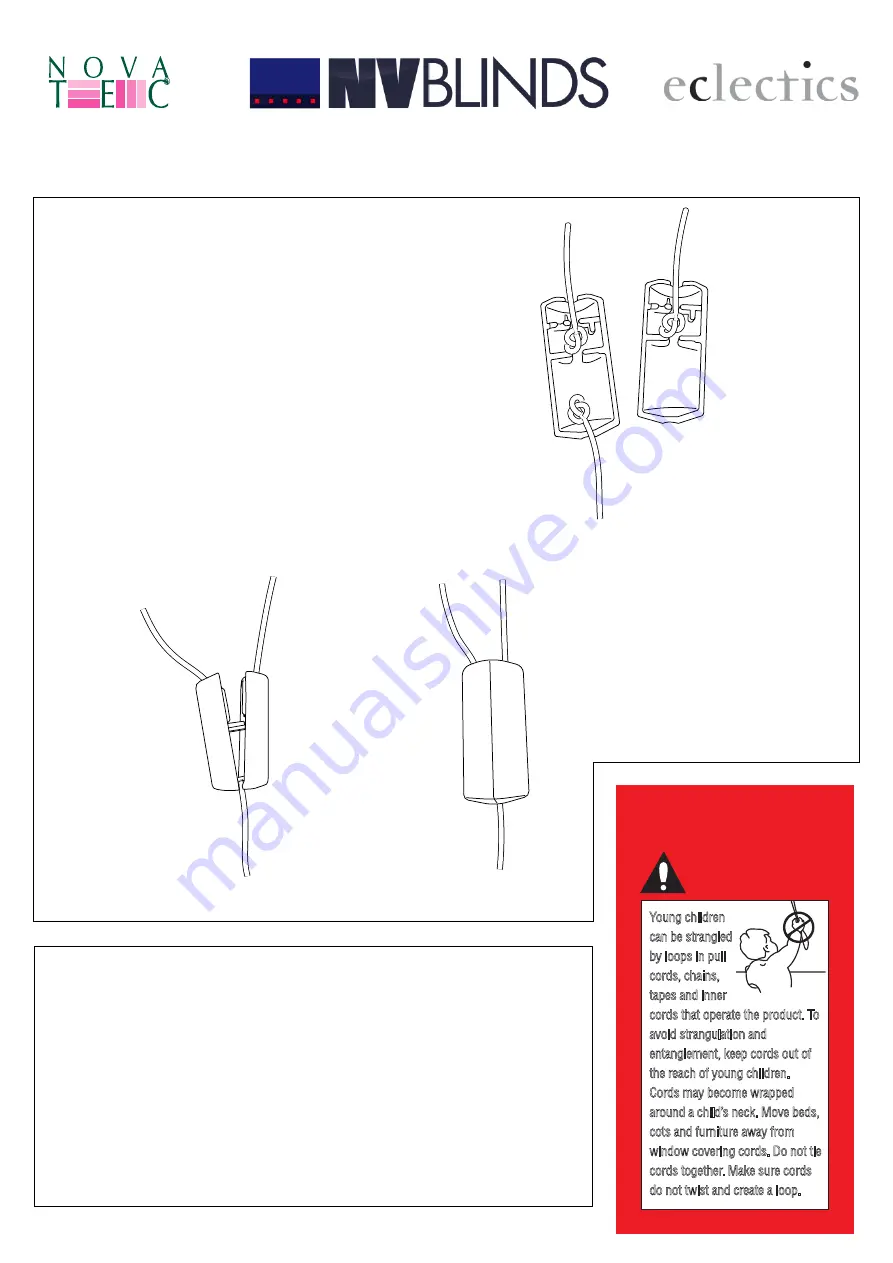
The blind will come with the pull cords attached the to the
blind within the knotholders. To cord up the blind pass the
left hand cord through the left hand pulley and across and
through the Right Hand pulley.
O
nce this is th
r
ough connect
to one half of the cord breakaway device as per diagram 1.
Then pass the right hand cord through the right hand pulley
and connect to the other half of the break away device. Now
clip the two halves together, see diagram 2
.
N
ow you should
be able to pull the blind up and down. If the blind is not level
when it goes up and down alter the cord lengths by moving
the position of the knot within the breakaway device.
Cording the blind (for LH controlled blinds).
Follow the instructions for a right hand blind but cord the
blind in the opposite direction,
r
eplacing the word left with
right and vice versa.
WARNING
Young children
can be strangled
by loops in pull
cords, chains,
tapes and inner
cords that operate the product. To
avoid strangulation and
entanglement, keep cords out of
the reach of young children.
Cords may become wrapped
around a child’s neck. Move beds,
cots and furniture away from
window covering cords. Do not tie
cords together. Make sure cords
do not twist and create a loop.


