5
2. Assembly Instructions
1.Unpack all items carefully and check everything has been included. Some extras may be in
small packages so do not throw anything away until all has been checked.
2. Place the frame structure (one piece) on soft and clean floor and ensure that you do not
scratch the frame on a hard surface.
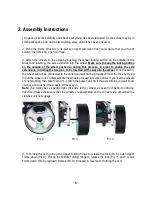
3. Attach the wheels to the axles by pushing the wheel locking button on the outside of the
wheel and inserting the axle extension into the wheel.
Make sure to keep the locking button
on the outside of the wheel pushed in during this process, in order to enable the axle
extensions, including the two pins, to be inserted all the way into the wheel
. If not locked in,
the wheel will not be connected to the clutch and will not be propelled!!! Test the lock by trying
to pull the wheel out. To disassemble the wheels proceed in reverse order. If you feel the wheels
are not working then take them off – switch the power on and if the axle rotates you will know
you have not pushed the wheels all the way in.
Note:
This trolley has a specific right (R) and a left (L) wheel, as seen from behind in driving
direction. Please make sure that the wheels are assembled on the correct side, otherwise the
clutches will not engage.
Pic 2
Pic 3
Pic 4
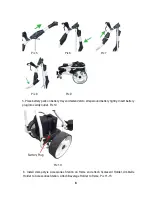
4. To Folding the cart, pull up the Upper Folding Hinge to release the lock (Pic 5), push Upper
Frame down (Pic 6). Pull up the Middle Folding Hinge to release the lock (Pic 7), push Lower
Frame down (Pic 8), laydown frames (Pic 9). Proceed in reverse for folding the cart.
Содержание P1D3
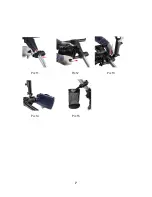
Страница 7: ...7 Pic 11 Pic 12 Pic 13 Pic 14 Pic 15...


