Page of 8
4
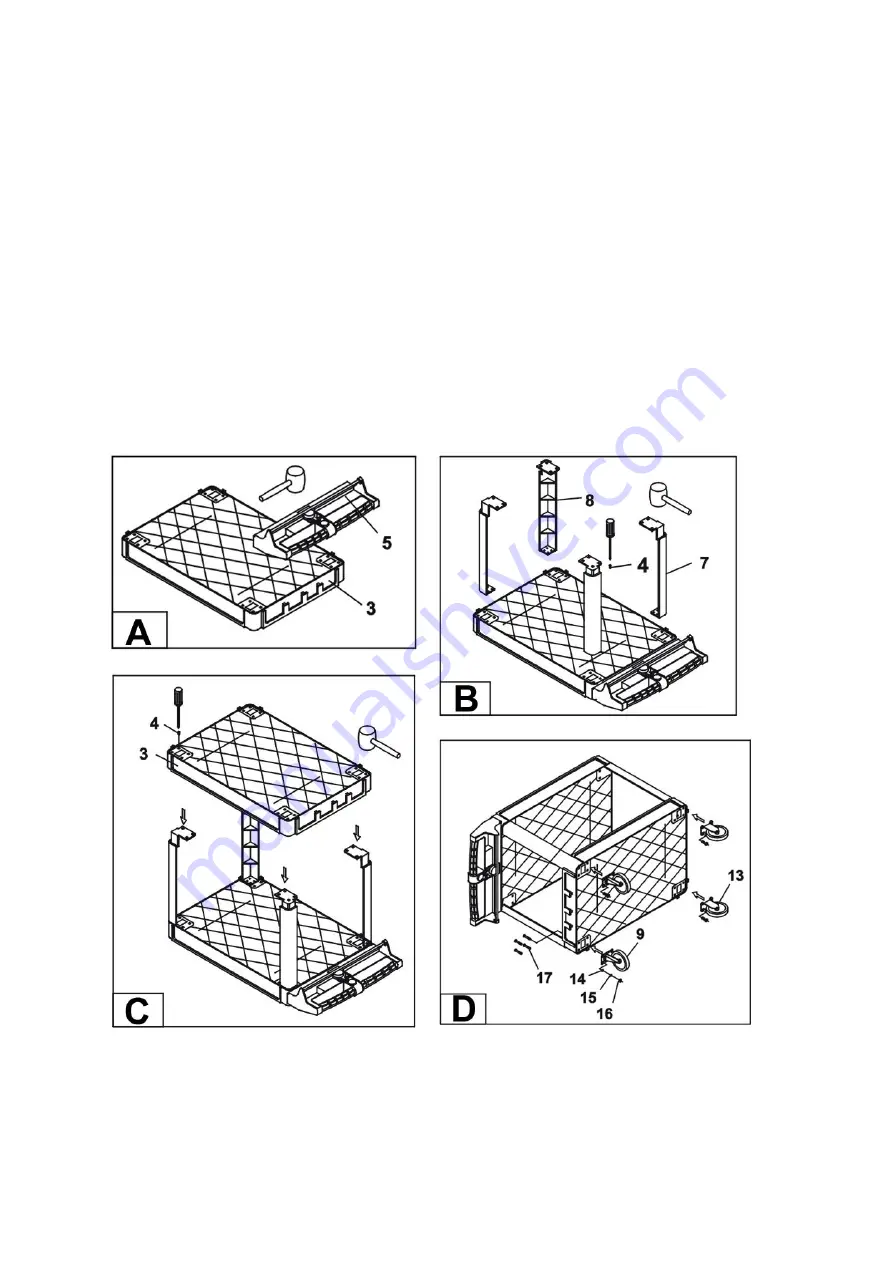
5. Locate the second Tray and turn it upside down. Set the second Tray (3) onto the Beams (7
& 8) making certain that both Trays (3) are facing the same way. Inserts Screws (4) down
through the Tray (3) into each Beam (7) and Beam (8) - see Figure C.
6. Turn the Service Cart right-side up. Set the Corner Covers (1 and 2) down onto each corner
of the top Tray (3) - see Assembly diagram.
7. Turn the Service Cart upside down again. As necessary, attach one Caster (11) to each of
the two Brackets of Swivel Caster (9) using one Bolt (12) and secured in place with Nut (10)
– see Assembly diagram.
8. As necessary, attach one Caster (16) to each of the two Brackets of Fixed Caster (13) with
Bolt (12), and Nut (10).
9. Place the two Brackets of Swivel Caster on the same side of the Tray as the Handle (5),
and place the two Fixed Casters on the rest side of the Tray- see Figure D.
10. Thread Bolts (17) down through the Tray (3) and into the Casters (9 and 13). Slide on Split
Washer (14) and thread on Nuts (16).
11. Turn the Service Cart upright. Make certain that all hardware is tight. Make certain that the
Fixed Casters and Swivel Casters roll properly.
For 3-SHELF SERVICE CARTS, Item# Item# 143211, 143213
1. Place one Tray (3) upside down on the work surface. Locate the Handle (5). Turn it upside


