7
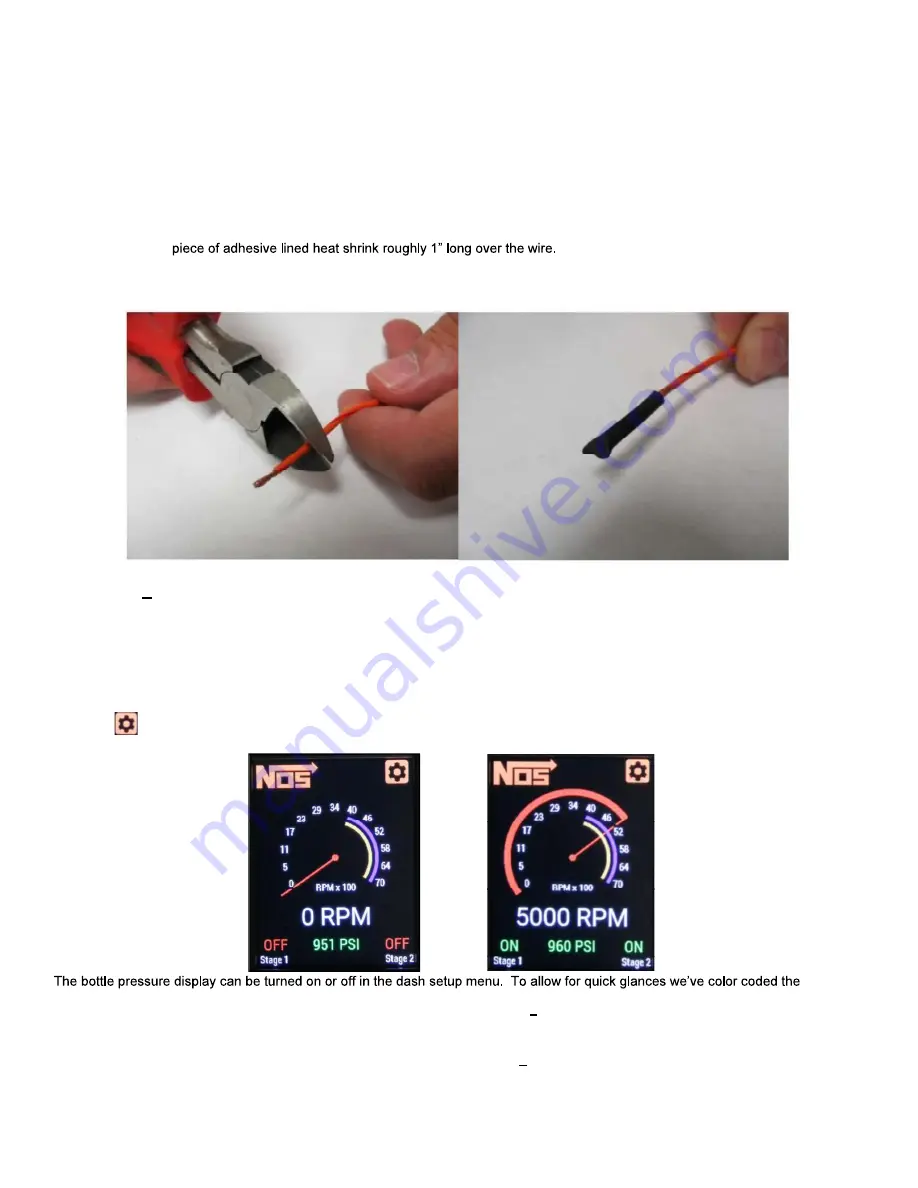
Option 2: Trim and Wrap Wire
Required tools:
Wire cutters
Adhesive heat shrink tubing
Heat source (heat gun or other)
Procedure:
1. Disconnect the battery terminals.
2. Cut the end of the wire so there are no bare copper wires showing.
NOTE: Make sure you leave enough length on the
wire that you will have room to crimp or solder it at a later date should the need arise.
3. Place a
4. With the heat shrink tubing placed so it is covering the wire with two thirds of its length, apply heat to shrink the tubing.
5. Give the heat shrink a small pull to verify that it is solidly attached.
Chapter 3 Hand-Held Setup
3.1 Home Screen
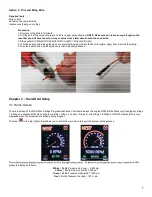
The main screen of the NOS Mini 2-Stage Progressive Nitrous Controller displays the engine RPM, Bottle Pressure (if equipped), Stage
1 & Stage 2 activation RPM via colored bars (Blue = Stage 1, Yellow = Stage 2), and Stage 1 & Stage 2 ON/OFF display (ON is only
displayed when the solenoids are actively being trigged).
The Gear
to the top right corner allows you to enter the main menu to begin the system setup process.
bottle
pressure display as follows:
White
= Bottle Pressure Very Low 0-800 psi
Yellow
= Bottle Pressure Low 801-900 psi
Green
= Bottle Pressure Optimal 901-1000 psi
Red
= Bottle Pressure too High 1001+ psi


