


Northstar
Explorer 650
Installation and Operation Manual
46
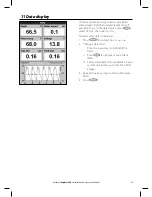
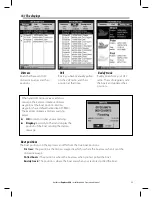
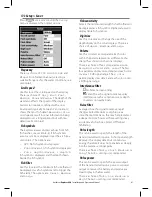
12 Fuel functions and display
The Fuel functions require optional fuel sensors to be installed.
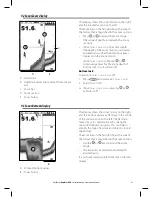
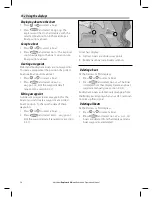
12-1 When you add or remove fuel
When you add or remove fuel in a boat with no
SmartCraft fuel tank level sensors, you must tell
the Explorer, otherwise
REMAINING
,
RANGE
and the low fuel alarm will be meaningless.
A When you completely fill the tank
1
Fill the tank.
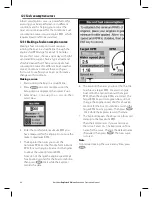
2 Press
one or more times until the
Setup
menu is displayed, then select
Fuel
.
3 Select
Tank full
.
Note
: Underfloor fuel tanks are often difficult to
refill to the same level twice, due to air pockets.
With underfloor fuel tanks:
Trim the boat to the same angle in the water
each time you follow procedure A.
Mostly use procedure B below when adding
fuel, but completely fill the tank and follow
procedure A about every tenth time you add
fuel.
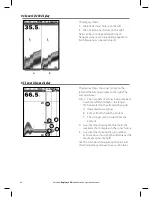
B When you part fill the tank
1
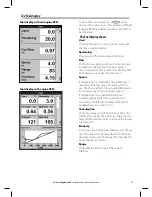
Before adding fuel, go to the fuel display and
write down the value of
Remaining
, which
is the amount of fuel now in the tank.
2
Add fuel to the tank, writing down how much
you add.
3
Add together the two figures you have
written down, to calculate the amount of fuel
now in the tank.
4 Press
one or more times until the
Setup
menu is displayed, then select
Fuel
.
5 Set
Remaining
to the amount of fuel that
you calculated was now in the tank.
Note:
If you follow procedure B every time you
add fuel, then a small error will accumulate,
because it is hard to measure exactly how much
fuel you add. To avoid this, completely fill the tank
and follow procedure A about every tenth time
you add fuel.
C When you remove fuel
Repeat procedure B, but subtract the fuel you
have removed from the original amount of fuel
in the tank to calculate the amount of fuel now
in the tank.