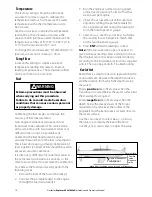
background image

Note:


Refer  to Section 3-2 Setup > Sonar, for information about 

customizing features on the sonar displays.

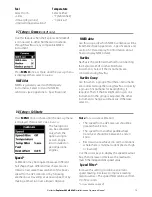
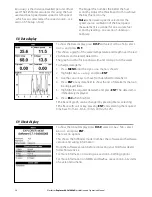
Sonar display at a single or mixed frequency (section 5-1)

Sonar split display with 83 and 200 frequencies (section 5-4)

Sonar flat bottom trace in zoomed section (section 5-3)

Show perspective view of sonar (section 5-6)

Sonar split display with zoomed section (section 5-2)

5 The Displays

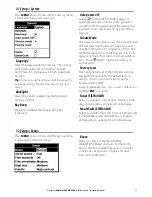
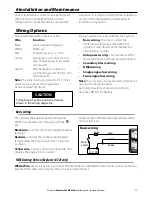
Press 

DISP 

to show the Display menu. Use   or 

 to select display tab,  then select a particular 

display using the   or   cursor keys.

The Display menu is summarized here and each 
display is shown in the following sections.

Most displays have an Options menu so that 
relevant features can be changed quickly.

5-1 Sonar display 

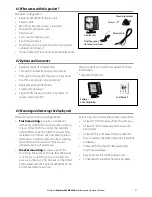
To show the Sonar display, press 

DISP

  and select 

Sonar

 Tab, 

select 

Sonar

 and press 

ENT.

This display scrolls from right 
(most recent echoes) to left 
(oldest echoes) at the selected 
frequency (see section 3-2 Setup 
> Sonar). 

To change items, press 

MENU

 until the 

Options

 menu is shown. 

Gain

 is explained in 

section 4-4 Gain. 

Range

 is explained in 

section 4-5 Range.

A-scope

 is 

explained in section 
5-5 Sonar A-Scope 
display.

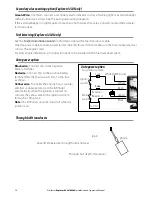
Data header 

The data header can 
be selected on or off.  

When selected, it is a 
customizable feature 
that can be used to 
display up to 9 data 
items, such as alarms 
or water temperature.

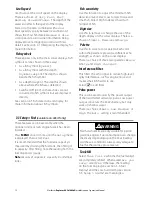
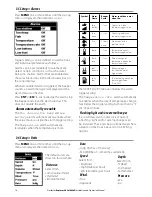
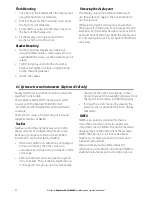
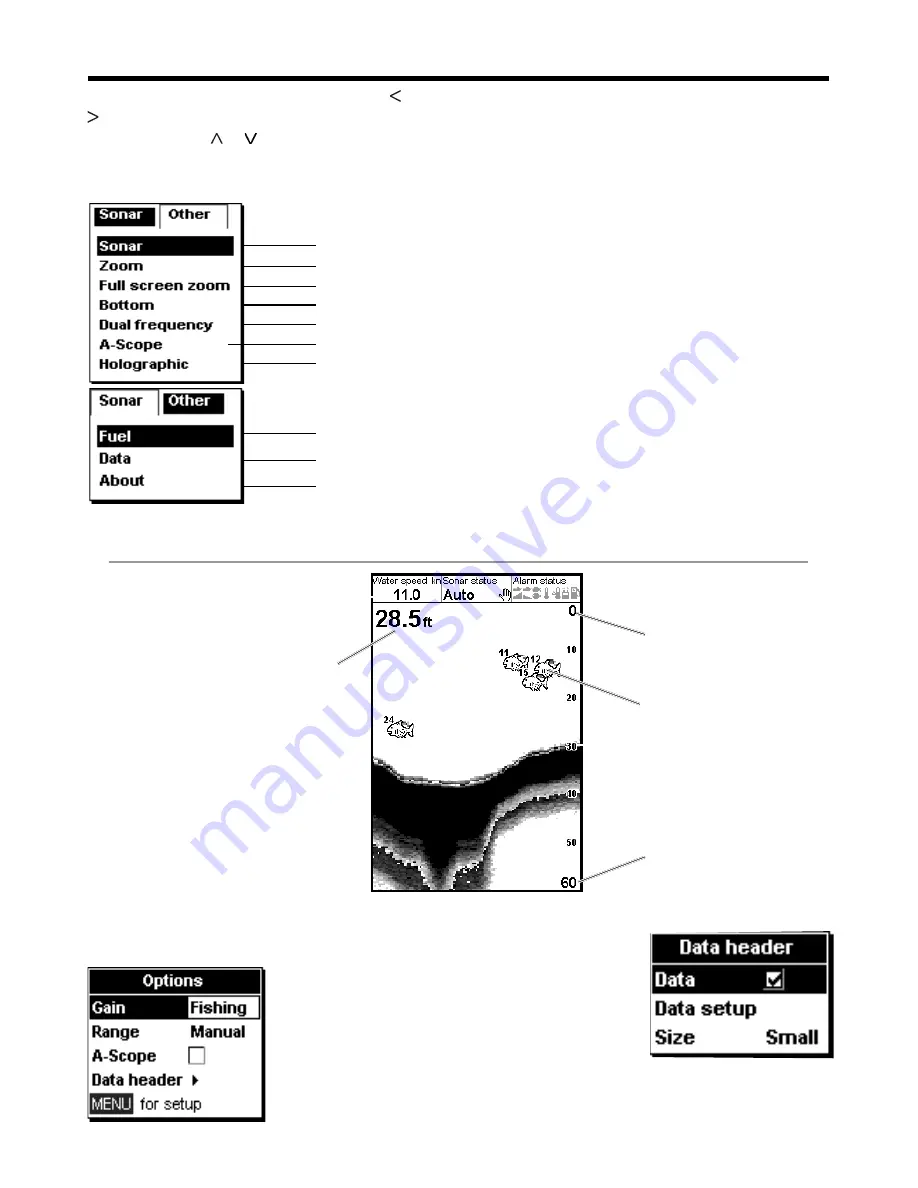
Data header, set up to show the 
boat speed, sonar status etc.

Depth (medium size digits)

Range

Bottom

Surface

Fish symbols with depth

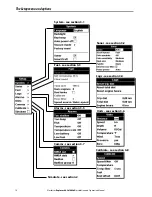
The Display menu

Fuel data (section 5-7)

Water temperature and depth history and boat data (section 5-8)

Product and wiring information (section 5-9)

Show zoomed section of sonar

Sonar split display with echo strength (section 5-5)

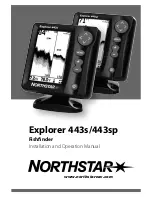
Northstar

 Explorer 443d/443df 

Installation and Operation Manual

24

Содержание EXPLORER 443D

Страница 1: ...www northstarnav com Explorer 443d 443df Fishfinder Installation and Operation Manual ...

Страница 2: ......

Страница 3: ...to avoid possible injury or death WARNING WARNINGindicatesapotentiallyhazardoussituationwhich ifnotavoided could result in death or serious injury CAUTION CAUTIONindicatesapotentiallyhazardoussituationwhich ifnotavoided could result in minor or moderate injury CAUTION CAUTION used without the safety alert symbol indicates a potentially haz ardous situation which if not avoided may result in proper...

Страница 4: ...df only 15 3 8 Setup Calibrate 15 4UsingtheExplorer443d 443df 17 4 1 Interpreting the display 17 4 2 Single and Dual frequency fishfinding 19 4 3 Fish detection and display 21 4 4 Gain 22 4 5 Range 23 5TheDisplays 24 5 1 Sonar display 24 5 2 Sonar Zoom display 25 5 3 Sonar Bottom display 26 5 4 Sonar 83 200 display 26 5 5 Sonar A Scope display 26 5 6 A Scope perspective view 27 5 7 Fuel display 44...

Страница 5: ...epth display can be affected by many factors including the type and location of the transducer and water conditions Ensure that the transducer is located and used correctly Fuel Computer Do not rely on the fuel computer as the sole source of information regarding available fuel onboard Fuel economy can change drastically depending on boat loading and sea conditions Fuel Computer information should...

Страница 6: ... or wrecks and to help recognize favourite fishing spots from the bottom profile The Northstar fishfinder can also assist with navigation by providing depth information to help identify the depth contours marked on 1 1BenefitsoftheExplorer443d 443df Important It is vital to the performance of the fishfinder that the transducer is installed in the best location Please follow the installation instru...

Страница 7: ...ally disappearing off the display The scroll speed depends upon the water depth and scroll speed setting See section 3 2 Setup Sonar and section 4 1 Interpreting the display for more information The appearance of echoes displayed are affected by the fishfinder settings frequency selected range and gain settings echoes different fish types different bottom types wrecks and seaweed noise water clari...

Страница 8: ... Press ENT to select the item To change a number word or setting 1 Use the cursor keys to highlight the number word or setting and to make the change s 2 Press ENT to confirm ESC to cancel PowerOff To turn the fishfinder off hold A countdown box appears Continue to hold for 3 seconds until the fishfinder turns off Note If the unit is wired for Auto Power section 6 5 Wiring options the fishfinder c...

Страница 9: ...TO to select one of the three following operating modes Cruise mode Use this when on the move The Explorer 443d 443df prominently displays the water depth and automatically adjusts Range and Gain so that the bottom trace is displayed Depth is displayed in large digits Fishing mode Use this when fishing The Explorer 443d 443df prominently displays fish the bottom profile wrecks rocks and all the de...

Страница 10: ...Simulate see section 2 Comms see section 3 7 Alarms see section 3 5 Fuel see section 3 3 Logs see section 3 4 Units see section 3 6 Calibrate see section 3 8 System see section 3 1 Northstar Explorer 443d 443df Installation and Operation Manual 10 ...

Страница 11: ...sounding rate time between each ultrasonic pulse to a user specified interval from 5 minutes to 2 hours The fishfinder appears to turn off however all alarms operate normally To return to normal operation press Power button Ideal to be used as an anchor alarm Factoryreset This option returns all of the fishfinder settings except the language to the default factory settings shown in section 3 Setti...

Страница 12: ...cho strength as shown on the sonar displays There is a choice of three color palettes Black White and High Contrast Interference filter This filters the echo signal to reduce high level spiky interference such as engine noise and makes small fish harder to see Select to add filter Pulse power This can be used to specify the power output of the transmitted ultrasonic pulse Low power output conserve...

Страница 13: ...owest value which gives a stable flow Usually a value of 5 to 10 seconds will give a satisfactory result for two stroke carburettor engines Fuel injected or four stroke engines may require a larger value This setting affects the Fuel flow and Fuel economy reading on the Fuel display see section 5 6 Fuel display but it does not affect the Fuel used reading SpeedSource Select speed input from water ...

Страница 14: ...o matches the profile of a fish Temp 1 2 sec Temperature equals the alarm trigger value Temp rate 1 2 sec Rate of change of temperature equals the alarm trigger value Low battery 1 2 sec Battery voltage is less than the alarm trigger value Low fuel 1 2 sec Fuel remaining equals the alarm trigger value Only 4432 3 6Setup Units 3 5Setup Alarms Press MENU one or more times until the Setup menu is dis...

Страница 15: ...tions where there is minimal current best at high or low tide Use the cursor keys to display the speed readout box then increase or decrease the readout to match the independent speed value Speed Filter Increase this setting to stabilise an erratic speed reading Decrease to improve reading responsiveness The speed filter can be set from 0 to 30 seconds only available on 443df 3 7Setup Comms 443df ...

Страница 16: ...sducer s 3 Run the engine at normal cruising speed until at least 4 gallons 15 litres of fuel has been used per engine 4 Check the actual amount of fuel used per engine by refilling the portable tank s to the original level and noting the reading s from the fuel dispenser s gauge 5 Select Fuel Use the cursor keys to change the reading for each engine to match that on the fuel dispenser s gauge 6 P...

Страница 17: ...ences in the strength of the echo The strength varies with several factors such as the Size of the fish school of fish or other object Depth of the fish or object Location of the fish or object The area covered by the ultrasonic pulse is a rough cone shape and the echoes are strongest in the middle Clarity of water Particles or air in the water reduce the strength of the echo Composition or densit...

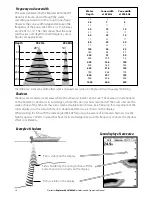
Страница 18: ...idth The pulse generated by the Explorer 443d 443df transducer travels down through the water spreading outwards to form a rough cone shape However the cone width is dependent upon the frequency of the pulse at 83 kHz it is 20 whereas at 200 kHz it is 14 The chart shows how the cone width varies over depth for each frequency used Figures are approximate Water Cone width Cone width Depth at 83 kHz ...

Страница 19: ...ined in detail at 200kHz Autofrequency This shows 200kHz detail on screen but uses 83kHz beam for locating fish further from boat Wide angle less detailed 83 kHz cone Narrow angle more detailed 200 kHz cone 4 2SingleandDualfrequencyfishfinding 1 minute ago 30 seconds ago Now Comparisonofthesamefishscenariodisplayedatdifferentfrequencies Northstar Explorer 443d 443df Installation and Operation Manu...

Страница 20: ...zdisplay Dual screen 200kHzdisplay 200 83Khzdisplay Note the wider bottom trace Note the smaller defined fish arches and more bottom detail Northstar Explorer 443d 443df Installation and Operation Manual 20 ...

Страница 21: ...ymbol depth FishsymbolsOff For experienced users this always provides the best information as every echo is displayed whether it is surface clutter a thermocline or a fish The picture in section 4 1 Interpreting the display shows the Sonar display with the Fish symbols Off The fish appear as arches Fisharches In good conditions and with Fish symbols Off a fish passing through the cone shaped ultra...

Страница 22: ...dsettings The gain settings and the threshold settings can be adjusted independently for each frequency 83kHz and 200 kHz Use threshold to eliminate colors in the sonar display 1 From any Sonar display press ENT 2 Use the or cursor keys to highlight the desired setting then use the cursor key to change it Note The Gain mode automatically changes to Manual Gain if the gain or threshold settings are...

Страница 23: ...on the display ChangingtheRangeMode Press the or key to change to Manual Range mode and to increase or decrease the range to the desired depth Values can be set between 10 ft 3 m to 1000 ft 300 m To change from the current mode 1 From any Sonar display press MENU to display the Options menu 2 Highlight Range then use the cursor keys to select Auto or Manual 3 Press ENT to confirm Tip To quickly en...

Страница 24: ... Tab select Sonar and press ENT This display scrolls from right most recent echoes to left oldest echoes at the selected frequency see section 3 2 Setup Sonar To change items press MENU until the Options menu is shown Gain is explained in section 4 4 Gain Range is explained in section 4 5 Range A scope is explained in section 5 5 Sonar A Scope display Dataheader The data header can be selected on ...

Страница 25: ...in the zoom section regardless of changes in depth If Bottom lock is not selected the bottom will not be displayed in the zoom section when it is outside the range covered by the zoom bar Using the Bottom Lock and the A Scope features together can be a powerful aid in recognising the type of bottom SplitRatio Use this to change the split ratio between the zoom and the sonar history sections displa...

Страница 26: ...e display The zoom bar is fixed in the middle of the display See section 4 5 Range for information about adjusting the Zoom Range and Zoom Offset To change items press MENU until the Options menu is shown Gain is explained in section 4 4 Gain Range is explained in section 4 5 Range A scope is explained in section 5 5 Sonar A Scope display Data header is explained in section 5 1 Sonar display Botto...

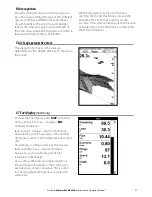
Страница 27: ...y 443df only Fishrecognition The echo strengths shown on the A scope can be useful in recognising the type of fish Different species of fish have different sizes and shapes of swim bladders The air in the swim bladder reflects the ultrasonic pulse so the strength of the echo varies between fish species according to the size and shape of the swim bladder When fishing among a school of fish and catc...

Страница 28: ...ess ENT 3 Use the cursor keys to move from data field to data field 4 Press ENT at any data field to show the list of data items that can be displayed there 5 Highlight the required data item and press ENT The data item is immediately displayed 6 Press ESC when finished Time base of graph can be changed by pressing Menu selecting Time Base with cursor key pressing ENT and selecting the required ti...

Страница 29: ...t disables the engine hours counter Auto power wiring This must be used for the engine hours and fuel computer options Secondary Alarm wiring NMEA wiring Single engine fuel wiring Twin engine fuel wiring Note If a wire color is not specifically mentioned it is not used in that wiring option Section 6 5 Systems of several instruments describes NMEA and NavBus Wiring Options Fuse Red Yellow Black Ma...

Страница 30: ... the fuel transducer cable Fuse Fuse White NMEA out Green External Beeper or Red Yellow Black Main switch 12 V DC Ignition switch To ignition system Autopoweroption Throughhulltransducers Speed Temperature through hull transducer phono 8 pin Through hull depth transducer Fuelkitwiring Explorer443dfonly Black wire Connect this to the negative battery terminal Red wire Connect this to the positive b...

Страница 31: ...ny unwanted glare or reflections Carefully select the best viewing position before installation This would generally be in a shaded area Bracket mounting requires a panel for mounting the bracket Ensure that the panel is not likely to deform and is not subject to excessive vibration The bracket can be tilted and rotated and the Explorer 443d 443df can be removed after each use Explorer 538 chartpl...

Страница 32: ...ularly suited to work with the Explorer 538 3 8 color Northstar s GPS chartplotters with worldwide coverage There are two ways of connecting instruments together NavBus or NMEA NavBus NavBus is a Northstar proprietary system that allows systems of multiple instruments to be built using a single set of transducers When instruments are connected by NavBus If the units alarms or calibration are chang...

Страница 33: ...cables and connectors Keep the transducer free of weed paint and debris Do not use a high pressure water blast on a speed sensor paddlewheel as it may damage the bearings When not in use the Explorer 443d 443df can be removed from the installation bracket and stored in the Northstar carry bag or left on the installation bracket and securely covered with the sun cover supplied Repeater for depth sp...

Страница 34: ...Transomtransducercable length 33ft 10m 26ft 8m Temperaturemeasurement range 32 to 99 9 F 0 to 37 7 C Resolution of 0 1 unit Speedrange 1 to 50 kn 57 5 mph 96 6 kph Communications NMEA 0183 Ver 2 0 4800 baud NavBus NMEA Output NMEA 0183 is a standard for interfacing marine electronic devices The Northstar fishfinder can output the following sentences DBT Depth Below Transducer DPT Depth and Keel of...

Страница 35: ...rt Appendix C Troubleshooting b Check that the power cable connector at the back of the display unit is securely plugged in and the collar is locked in place The collar must be secure for watertight connection c Measure the battery voltage while the battery is under load turn on some lights radio or other electrical equipment connected to the battery If the voltage is less than 10 volts the batter...

Страница 36: ... Electrical noise from the boat s engine or an accessory may be interfering with the transducer s and or the Northstar fishfinder This may cause the fishfinder to automatically decrease the Gain unless using Manual Gain The fishfinder thus eliminates weaker signals such as fish or even the bottom from the display This may be checked by switching off other instruments accessories e g bilge pump and...

Страница 37: ...eset after every refuelling see section 3 3 Setup Fuel d The fuel tank may not refill to the same capacity each time due to air pockets This is particularly noticable with underfloor tanks e Fuel transducers wear out over time and should be replaced after every 5000 litres of fuel 10 Flow indicates no fuel or low fuel a Check that the number of engines is set to 1 See section 3 3 Setup Fuel b Chec...

Страница 38: ...ucer is spinning freely and that the two magnets in the paddlewheel are still in place 14 There is a double bottom trace displayed a The boat may be in an area that generates shadows See section 4 1 Interpreting the display b In shallow water the echoes may bounce Reduce the gain setting see section 4 4 Gain and or reduce the sonar pulse power see section 3 2 Setup Sonar c Decrease the Range 15 No...

Страница 39: ......

Страница 40: ...5QY ENGLAND Ph 44 2380 339922 Fax 44 2380 330345 northstaruk northstarnav com AUSTRALIA PO Box 479 Gladesville NSW 2111 AUSTRALIA Ph 61 2 9879 9060 Fax 61 2 9879 9009 northstaraus northstarnav com NEW ZEALAND PO Box 68 155 Newton Auckland Auckland NEW ZEALAND Ph 64 9 481 0500 Fax 64 9 481 0590 northstarnz northstarnav com www northstarnav com Made in New Zealand MN000620A G ...

Отзывы: