


,QVXODWLQJ3LSH
Indoor Unit Installation
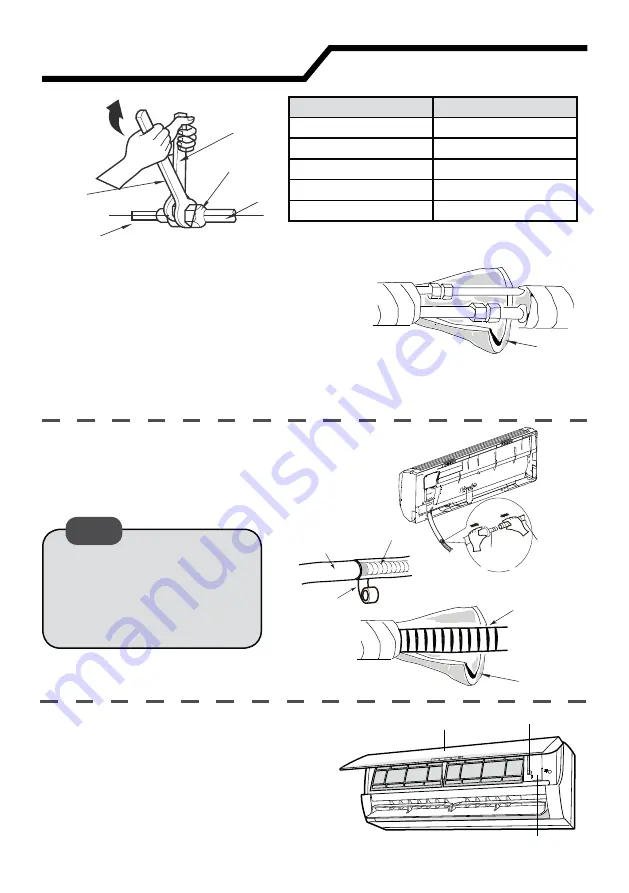
4.
:UDSWKHLQGRRUSLSHDQGMRLQWRIFRQQHFWLRQ
SLSHZLWKLQVXODWLQJSLSHDQGWKHQZUDSLW
with tape.
5.
,IDNNNLQGRRUXQLWLVWREHFRQQHFWHG
to a Flex Match outdoor unit, a transitional
SLSHMRLQWSURYLGHGVKRXOGEHDGGHGDWWKH
LQGRRUXQLWSLSHMRLQWHYDSRUDWRUDVVHPEO\7KHSLSHMRLQWVRIHYDSRUDWRUDV
-
VHPEO\KDYHDSLSHGLDPHWHURIĭĭĭ3OHDVHUHIHUEDFNWRVWHS
Step seven: connect wire of in-
door unit
1. Open the panel, remove the screw on
WKHZLULQJFRYHUDQGWKHQWDNHGRZQ
the cover.
$GGLQVXODWLQJSLSHLQWKH
indoor drain hose in order
to prevent condensation.
The plastic expansion
anchors are not provided.
Note:
Open-end
Wrench
Union Nut
Pipe
Torque
Wrench
Indoor Pipe
Step six: install drain hose
1. Connect the drain hose to the outlet
pipe of indoor unit.
2.
6HFXUHWKHMRLQWZLWKWDSH
Outlet pipe
Tape
Outlet
Pipe
Drain Hose
Drain
Hose
,QVXODWLQJ3LSH
Drain Hose
Panel
Screw
:LULQJ&RYHU
Hex Nut Diameter
7LJKWHQLQJ7RUTXH1P
PPLQ
15~20
PPLQ
30~40
PPLQ
45~55
PPLQ
60~65
PPLQ
70~75
3DJH
Содержание GHH092.6KSK4DH
Страница 50: ...3DJH ...
Страница 51: ...3DJH ...


