Norstar Doorphone Installation Guide
9
Installation
Step 3: Wire and Mount the Doorphone (cont’d)
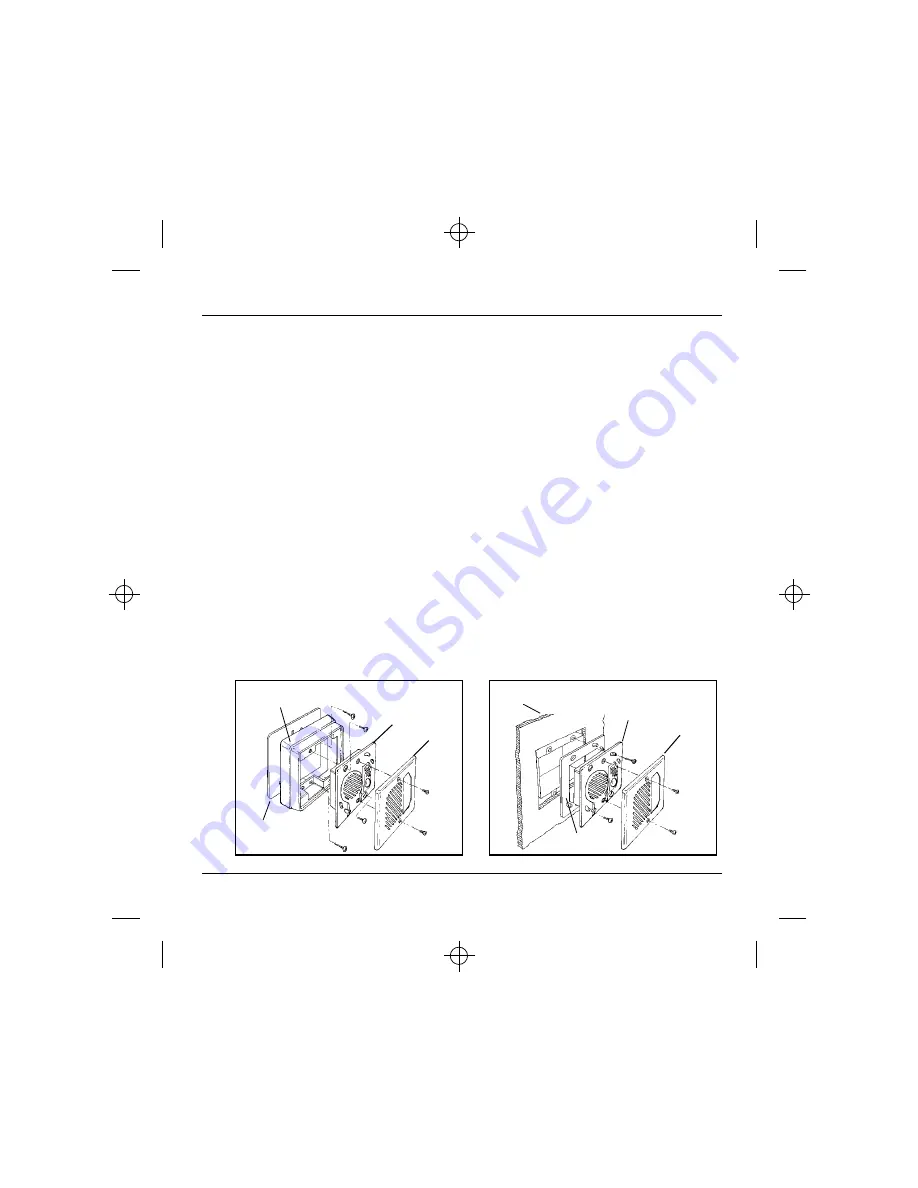
3. Surface Mounting/Flush Mounting Options:
If the Doorphone is mounted in a location that is unprotected from precipitation
then moisture must be prevented from entering between the Doorphone and wall
surface. Gaskets are supplied for both flush and wall mount installations. No
gasket is required between the Doorphone and surface mount bracket.
For Surface Mounting, first verify the correct orientation of the gasket, thread the
wires through the center hole, then through the surface mount bracket and fasten
the surface mount bracket at the desired location on the wall. Discard the flush
mount gasket.
For Flush Mounting (into an electrical box embedded in the wall), discard the
surface mounting gasket and the surface mount bracket. Slide the flush mounting
gasket onto the main housing assembly.
Wall
Face
Plate
Main
Housing
Assembly
Figure 5 – Flush Mount
Figure 4 – Surface Mount
Surface Mount
Gasket
Surface Mount
Bracket
Flush Mount
Gasket
Face
Plate
Main
Housing
Assembly
Содержание NT8B79FDE6
Страница 1: ...Doorphone Installation Guide ...
Страница 2: ......
Страница 4: ...Norstar Doorphone Installation Guide ii ...
Страница 25: ......
Страница 26: ......


