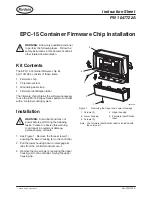
EPC-15 Container Firmware Chip Installation
2
Part 1047722A
E
2004 Nordson Corporation
Installation
(contd)
CAUTION:
Static sensitive devices. Put
on the supplied grounding wrist strap and
secure it to a true earth ground before
touching any internal components of the
EPC-15 controller or handling the new
firmware chip.
4. See Figure 2. Locate the existing firmware
chip (1) on the main control board. Use the
supplied chip removal tool (2) to carefully
remove the chip from the socket (3):
a. Insert the small, hooked end of the tool into
the extraction slot in the lower left corner of
the socket. Carefully push the the tool into
the slot until it bottoms out.
b. Carefully push the large, hooked end of the
tool down until the chip pulls out of the
socket.
c. Remove the tool from the socket. Repeat
steps a and b in the slot on the upper right
corner of the socket.
d. Lift the chip off the board.
5. Remove the new firmware chip from its
packaging. Orient the new chip as illustrated
and carefully push it into the socket.
6. Install the upper and lower housings.
7. See Figure 1. Place the supplied firmware
identification label (5) on the top, left side of the
upper housing as illustrated.
1200456A
1
2
1
3
Figure 2
Firmware Chip Removal and Installation
1. Firmware chip
2. Chip removal tool
3. Socket
Note:
The firmware chip and chip removal tool are included with the service kit.
Issued 1/04
Original copyright date 2004. Nordson and the Nordson logo are registered trademarks of Nordson Corporation.
Eclipse is a trademark of Nordson Corporation.


