12
13
9
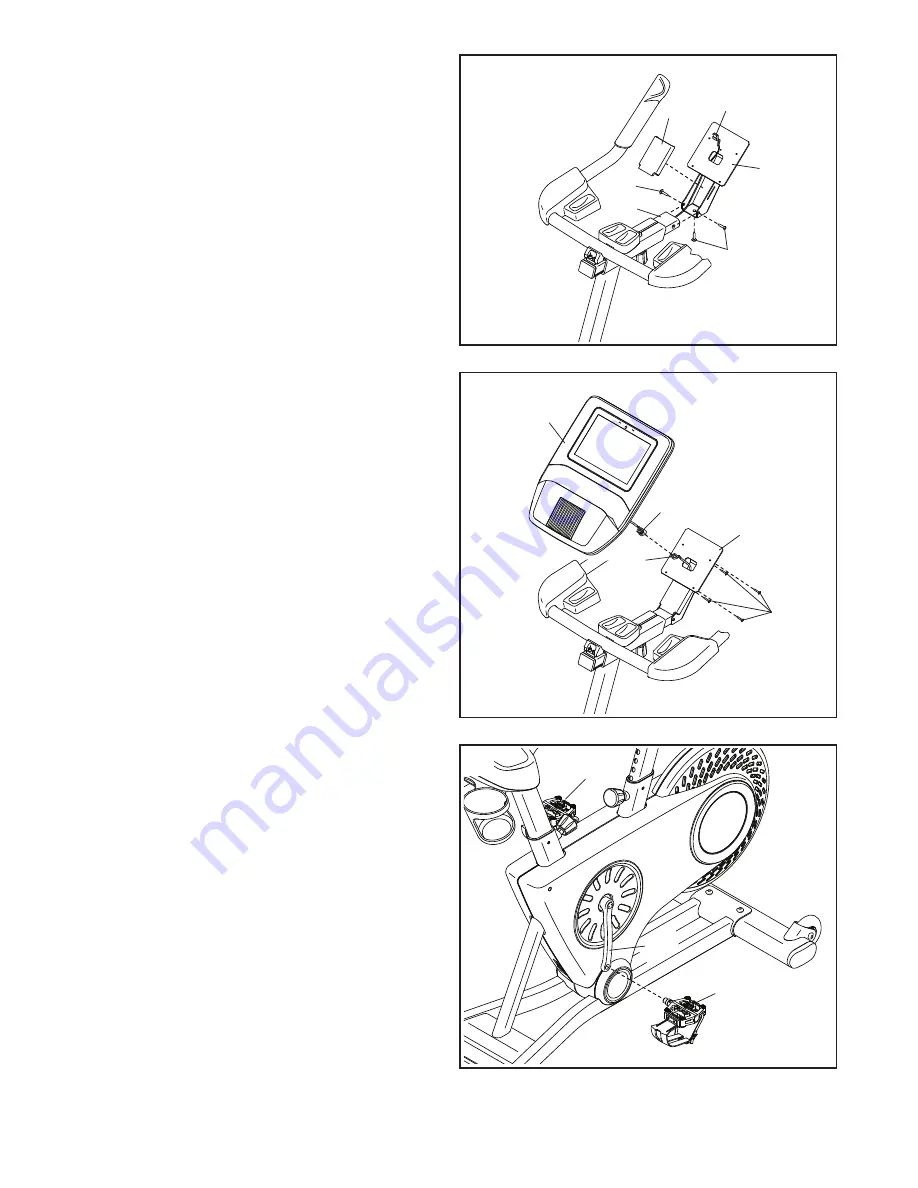
13. Have a second person hold the Console (9) near
the Console Bracket (33).
Connect the console wire (H) to the Main Wire
(68).
Tip: The wire connectors should slide
together easily and snap into place with an
audible click. If they do not, turn one connec-
tor and try again.
Insert the excess wire into the Console
Bracket (33).
Tip: Avoid pinching the wires.
Attach the
Console (9) to the Console Bracket (33) with four
M4 x 16mm Screws (34);
start all the Screws,
and then tighten them.
Avoid pinching
the wires
33
68
H
34
12. Hold the Console Bracket (33) near the
Handlebar Carriage (16). Insert the Main Wire
(68) upward through the Console Bracket as
shown.
Tip: Avoid pinching the Main Wire (68).
Attach
the Console Bracket (33) to the Handlebar
Carriage (16) with three M6 x 16mm Screws
(72);
start all the Screws, and then tighten
them.
Then, press the Wire Cover (32) onto the
Console Bracket (33).
12
33
16
72
72
32
68
Avoid pinching the
Main Wire (68)
62
61
14. Identify the Right Pedal (62). Using your fingers,
turn the Right Pedal about halfway into the Right
Crank Arm (64). Then, use an adjustable wrench
or the included tool to fully tighten the Right
Pedal.
Repeat this step with the Left Pedal (61).
IMPORTANT: You must turn the Left Pedal
COUNTERCLOCKWISE to attach it.
14
64
Содержание NTEX91022.0
Страница 4: ...4 all STANDARD SERVICE PLANS...


