background image

22

HOW TO USE AN IFIT LIVE WORKOUT

Note: To use an iFit Live workout, you must have ac-

cess to a wireless network (see HOW TO USE THE 

WIRELESS NETWORK MODE on page 25). An iFit 

Live account is also required.  

1.    Insert the key into the console. 

    See HOW TO TURN ON THE POWER on page 

16.

2.  Select the main menu. 

   See step 2 on page 18.

3.  Log in to your iFit Live account.

    If you have not already done so, touch the Login 

button to log in to your iFit Live account. The 

screen will ask for your iFit.com username and 

password. Enter them and touch the Submit but-

ton. Touch the Cancel button to exit the login 

screen.

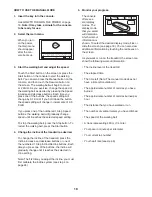
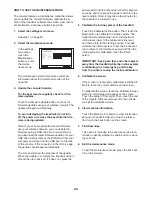
4.  Select an iFit Live workout.

    To select an 

iFit Live demo 

workout or 

download a 

workout in 

your schedule, 

touch the Map, 

Train, Video, 

or Lose Weight 

button to download the next workout of that type in 

your schedule. Note: You may be able to access 

demo workouts through these options, even if you 

do not log in to an iFit Live account.

   To compete in a race that you have previously 

scheduled, touch the Compete button. To view 

your Workout History, touch the Track button. To 

use a set-a-goal workout, touch the Set A Goal but-

ton (see page 21). Note: You can also press one of 

the iFit Live buttons on the console.

   To switch users within the account, touch the user 

button near the lower right corner of the screen.

   Before some workouts will download, you must 

add them to your schedule on iFit.com. 


For more information about the iFit Live work-

outs, please see www.iFit.com.

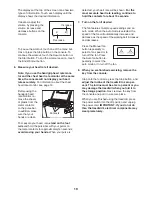
   When you select an iFit Live workout, the screen 

will show the name, duration, and distance of the 

workout. The screen will also show the approxi-

mate number of calories you will burn during the 

workout. If you select a competition workout, the 

display will count down to the beginning of the 

race.

5.  Start the workout.

  See step 4 on page 20.

   During some workouts, the voice of a personal 

trainer will guide you through your workout. 

 6.    Monitor your progress. 

   See step 5 on pages 18 and 19. The screen may 

also show a map of the trail you are walking or  

running.

   During a competition workout, the screen will show 

the speeds of the runners and the distances they 

have run. The screen will also show the numbers 

of seconds that the other runners are ahead of you 

or behind you.

7.  Measure your heart rate if desired.

    See step 6 on page 19.

8.  Turn on the fan if desired.

  See step 7 on page 19.

9.   When you are finished exercising, remove the 

key from the console.

  See step 8 on page 19.

For more information about the iFit Live mode, go 

to www.iFit.com.

Содержание NETL25711.1

Страница 1: ...rom Ireland 053 92 36102 Website www iconsupport eu E mail csuk iconeurope com Write ICON Health Fitness Ltd c o HI Group PLC Express Way Whitwood West Yorkshire WF10 5QJ UK AUSTRALIA Call 1 800 237 1...

Страница 2: ...PARTS Back Cover RECYCLING INFORMATION Back Cover This drawing shows the locations of the warning decals If a decal is missing or illegible call the telephone number on the front cover of this manual...

Страница 3: ...treadmill with bare feet wearing only stockings or in sandals 11 When connecting the power cord see page 14 plug the power cord into an earthed circuit No other appliance should be on the same circui...

Страница 4: ...22 Never insert any object into any opening on the treadmill 23 Inspect and properly tighten all parts of the treadmill regularly 24 DANGER Always unplug the power cord immediately after use before cl...

Страница 5: ...you have questions after reading this manual please see the front cover of this manual To help us assist you please note the product model number and serial number before contacting us The model numbe...

Страница 6: ...to identify the assembly hardware The number in parentheses below each drawing is the key number of the part from the PART LIST near the end of this manual The number after the parentheses is the quan...

Страница 7: ...d Screw 9 Press the Grommet 81 into the square hole in the Base 97 84 2 Hole 9 94 97 81 4 Hold the Left Upright 89 against the Base 97 Be careful not to pinch the wires If neces sary position the Base...

Страница 8: ...om each side of the handrail as sembly The Handrail Brackets will be used in step 7 and the Bolts will be used in step 9 3 85 Handrail Assembly 6 5 Identify the Left and Right Base Covers 92 93 Slide...

Страница 9: ...HEN YOU TURN ON THE POWER Then remove the wire tie from the Upright Wire Handrail Assembly Wire Tie 89 84 86 84 86 8 7 Remove the four 3 8 x 1 Screws 2 from the Uprights 89 90 Orient each Handrail Bra...

Страница 10: ...metal frame inside the handrail assem bly Be careful not to pinch the wires Attach the console assembly with two 3 8 x 2 1 2 Screws 4 and two 3 8 Star Washers 12 Start both Screws and then tighten th...

Страница 11: ...7 until they snap into place 11 93 8 92 97 7 12 Raise the Frame 56 to the position shown Have a second person hold the Frame until step 14 is completed Orient the Storage Latch 53 so that the large ba...

Страница 12: ...material from the bottom of the Frame 56 See the inset drawing Make sure that the 1 2 Rear Leveling Foot Nuts 30 are threaded all of the way onto the Rear Leveling Feet 60 Then turn the two Rear Level...

Страница 13: ...tures above 122 F 50 C or below 14 F 10 C Do not excessively bend or stretch the sensor when using or storing the heart rate monitor To clean the sensor use a damp cloth and a small amount of mild soa...

Страница 14: ...ord into the socket on the treadmill 2 Plug the power cord into an appropriate outlet that is properly installed and earthed in accordance with all local codes and ordinances DANGER Improper connectio...

Страница 15: ...y controls the speed and incline of the treadmill as it guides you through an effective exercise session In addition you can set a time distance calo rie or pace goal When you use the manual mode you...

Страница 16: ...sition of the clip HOW TO USE THE TOUCH SCREEN The console features a tablet with a full color touch screen The following information will help you become familiar with the device s advanced technolog...

Страница 17: ...password and your e mail address Enter the activation code from the iFit Live flier that came with the treadmill Touch the Place of Purchase drop down menu for a list of options then touch the locatio...

Страница 18: ...utton 4 Change the incline of the treadmill as desired To change the incline of the treadmill press the Incline increase and decrease buttons or one of the numbered 1 Step Incline Decline buttons Each...

Страница 19: ...for approximately ten seconds avoid moving your hands When your pulse is detected your heart rate will be shown For the most accurate heart rate reading continue to hold the contacts for about 15 seco...

Страница 20: ...ent The workout will continue in this way until the last segment ends The walking belt will then slow to a stop and a workout summary will appear on the screen After you view the workout summary touch...

Страница 21: ...the button the walking belt will begin to move Hold the handrails and begin walking The workout will function in the same way as the manual mode see pages 18 and 19 The workout will continue until yo...

Страница 22: ...an also press one of the iFit Live buttons on the console To switch users within the account touch the user button near the lower right corner of the screen Before some workouts will download you must...

Страница 23: ...into the reset position and insert the key into the console However when you remove the key the screen will show a demo presentation To turn on or turn off the display demo mode first touch the Demo...

Страница 24: ...power switch into the off position Wait for several seconds and then press the power switch into the reset position Note It may take a few minutes for the console to be ready for use 4 Calibrate the...

Страница 25: ...know your network name SSID If your network has a password you will also need to know the password An information box will ask if you want to connect to the wireless network Touch the Connect button t...

Страница 26: ...USE THE INTERNET BROWSER Note To use the browser you must have access to a wireless network including an 802 11b n router with SSID broadcast enabled hidden networks are not sup ported To open the br...

Страница 27: ...lockwise until the number of the desired firmness level appears next to the cushion adjuster To decrease the firmness step off the treadmill and use a hex key to turn the cushion adjusters counter clo...

Страница 28: ...g the treadmill may require two people 1 Hold the frame and one of the handrails and place one foot against a wheel 2 Pull back on the handrail until the treadmill will roll on the wheels and carefull...

Страница 29: ...r switch see the drawing above If the switch has tripped wait for five minutes and then press the switch back in b Make sure that the power cord is plugged in If the power cord is plugged in unplug it...

Страница 30: ...needed use only a 3 con ductor 14 gauge 1 mm2 cord that is no longer than 5 ft 1 5 m b If the walking belt is overtightened treadmill per formance may decrease and the walking belt may become damaged...

Страница 31: ...ller screws clockwise 1 4 of a turn When the walking belt is correctly tightened you should be able to lift each edge of the walking belt 2 to 3 in 5 to 7 cm off the walking platform Be careful to kee...

Страница 32: ...c Exercise If your goal is to strengthen your cardiovascular system you must perform aerobic exercise which is activity that requires large amounts of oxygen for prolonged periods of time For aerobic...

Страница 33: ...lles Stretch With one leg in front of the other reach forward and place your hands against a wall Keep your back leg straight and your back foot flat on the floor Bend your front leg lean forward and...

Страница 34: ...Base 41 1 Left Frame Cover 42 4 Platform Bracket 43 1 Latch Warning Decal 44 1 Walking Platform 45 1 Walking Belt 46 2 Belt Guide 47 2 Front Isolator 48 4 Wire Tie 49 1 Drive Roller Pulley 50 1 Magne...

Страница 35: ...sher 112 2 3 8 Flat Washer 113 2 Bumper 114 1 UK Power Cord 115 1 Receptacle 116 2 Motor Bushing 117 1 Filter Bracket 118 1 Filter 119 1 Motor Isolator 120 1 8 x 3 4 Machine Screw 121 1 8 Nut 122 1 Gr...

Страница 36: ...60 69 27 38 58 66 65 13 35 35 42 42 41 46 21 23 47 35 1 1 60 66 27 30 28 29 26 42 27 42 35 27 27 27 25 27 13 15 15 15 13 13 13 13 13 15 15 15 15 5 5 5 5 5 5 104 104 105 105 30 56 110 110 111 111 113 3...

Страница 37: ...37 72 1 1 79 34 74 73 76 17 34 75 73 76 71 14 33 33 78 1 83 24 24 78 1 1 13 13 1 36 1 1 1 36 36 54 55 9 77 80 114 82 115 119 122 9 9 125 126 EXPLODED DRAWING B Model No NETL25711 1 R0811A...

Страница 38: ...8 1 100 18 18 96 34 98 98 7 12 8 90 81 7 12 84 84 92 13 98 8 1 34 9 94 13 13 13 34 34 7 7 91 93 91 53 6 11 3 11 2 12 2 12 85 85 12 3 3 12 12 3 3 12 101 112 101 112 EXPLODED DRAWING C Model No NETL2571...

Страница 39: ...39 64 95 99 102 9 109 10 1 1 1 1 15 1 1 1 124 1 1 1 1 1 1 1 1 9 1 1 1 103 32 1 1 1 1 1 1 19 19 15 4 4 12 12 123 123 124 124 124 EXPLODED DRAWING D Model No NETL25711 1 R0811A...

Страница 40: ...t s see the PART LIST and the EXPLODED DRAWING near the end of this manual RECYCLING INFORMATION This electronic product must not be disposed of in municipal waste To pre serve the environment this pr...

Отзывы: