background image

4

BEFORE YOU BEGIN

Thank you for selecting the revolutionary

NordicTrack

®

FREESTRIDER 35 S elliptical strider.

The FREESTRIDER 35 Selliptical strider provides a

wide array of features designed to make your work-

outs more effective and enjoyable.

For your benefit, read this manual carefully before

you use the elliptical strider.

If you have questions

after reading this manual, see the front cover of this

manual. To help us assist you, note the product num-

ber and serial number before contacting us. The

model number and the location of the serial number

decal are shown on the front cover of this manual.

Before reading further, please familiarize yourself with

the parts that are labeled in the drawing below.

Handrail

Wheel

Pedal

Console

Accessory Tray

Leveling Foot

Handlebar

Handgrip Pulse Sensor

Fan

Содержание Freestrider 35 S Elliptical

Страница 1: ...rence www nordictrack com QUESTIONS As a manufacturer we are commit ted to providing complete customer satisfaction If you have questions or if parts are damaged or missing DO NOT CONTACT THE STORE please contact Customer Care IMPORTANT You must note the product model number and serial number see the drawing above before contacting us CALL TOLL FREE 1 888 825 2588 Mon Fri 6 a m 6 p m MT Sat 8 a m ...

Страница 2: ... 21 PART LIST 23 EXPLODED DRAWING 25 ORDERING REPLACEMENT PARTS Back Cover LIMITED WARRANTY Back Cover NordicTrack is a registered trademark of ICON IP Inc WARNING DECAL PLACEMENT This drawing shows the location s of the warning decal s If a decal is missing or illegible see the front cover of this manual and request a free replacement decal Apply the decal in the location shown Note The decal s m...

Страница 3: ...t Make sure that there is at least 3 ft 1 m of clearance in the front and rear of your elliptical strider and 2 ft 0 6 m on each side 5 Inspect and properly tighten all parts regu larly Replace any worn parts immediately 6 Keep children under age 12 and pets away from the elliptical strider at all times 7 The elliptical strider should not be used by persons weighing more than 300 lbs 136 kg 8 Wear...

Страница 4: ... use the elliptical strider If you have questions after reading this manual see the front cover of this manual To help us assist you note the product num ber and serial number before contacting us The model number and the location of the serial number decal are shown on the front cover of this manual Before reading further please familiarize yourself with the parts that are labeled in the drawing ...

Страница 5: ...low to identify small parts The number in parentheses below each drawing is the key number of the part from the PART LIST near the end of this manual The number following the parentheses is the quantity needed for assembly Note Some small parts may have been pre assembled If a part is not in the hardware kit check to see if it has been preassembled 3 8 x 1 Patch Screw 122 4 3 8 x 3 4 Patch Screw 1...

Страница 6: ...he top of the Upright 26 Next tie the lower end of the other wire tie to the end of the Power Cable 81 Pull the other end of the wire tie upward out of the top of the Upright 26 Then untie and discard the wire ties 1 81 5 1 Wire Ties 77 26 77 81 Wire Ties 2 Tip Avoid pinching the wires Attach the Upright 26 to the Frame 1 with four 3 8 x 1 Patch Screws 122 Note Two of the Patch Screws may be preat...

Страница 7: ...eft Shields 6 7 Attach the Shield Cap 5 with a 8 x 35mm Screw 125 and two 8 x 3 4 Screws 86 Tip Start all the Screws before tightening any of them 3 86 86 6 125 5 7 4 Orient the Accessory Tray 18 as shown Press the Accessory Tray into the Shield Cap 5 4 5 18 ...

Страница 8: ... the Right Handrail 69 with a 3 8 x 3 4 Patch Screw 123 and an M10 Split Washer 128 Do not tighten the Patch Screw yet Repeat this step for the Left Handrail 70 5 69 128 123 79 26 70 78 30 6 IMPORTANT To prevent damage do not allow the elliptical strider to tip to either side during this step While another person lifts the rear of the Frame 1 in the location shown by the arrow attach each Handrail...

Страница 9: ...res 78 Insert the excess wire downward into the Upright 26 Tip Avoid pinching the wires Attach the Console 4 to the Upright 26 with four 1 4 x 3 4 Patch Screws 127 7 127 77 81 82 26 78 Pulse Wires Console Wires 4 8 Identify the Front and Rear Shields 10 13 and orient them as shown Attach the Front and Rear Shields 10 13 around the Upright 26 with six 8 x 3 4 Screws 86 8 26 13 10 86 Avoid pinching ...

Страница 10: ...x 1 Tek Screws 126 Repeat this step for the other side of the elliptical strider 10 20 126 126 23 22 11 Plug the AC power adapter into the jack on the front of the elliptical strider see HOW TO PLUG IN THE AC POWER ADAPTER on page 12 IMPORTANT If the elliptical strider has been exposed to cold temper atures allow it to warm to room temperature before plugging in the AC power adapter If you do not ...

Страница 11: ... dry place Do not store the chest pulse sensor in a plastic bag or other container that may trap moisture Do not expose the chest pulse sensor to direct sun light for extended periods of time or to temperatures above 122 F 50 C or below 14 F 10 C Do not excessively bend or stretch the sensor unit when using or storing the chest pulse sensor Clean the sensor unit using a damp cloth never use alcoho...

Страница 12: ... a properly grounded outlet box cover Whenever the adapter is used it must be held in place by a metal screw Some 2 pole receptacle out let box covers are not grounded Contact a quali fied electrician to determine if the outlet box cover is grounded before using an adapter HOW TO MOVE THE ELLIPTICAL STRIDER Due to the size and weight of the elliptical strider moving it requires two persons Have tw...

Страница 13: ...smount the elliptical strider wait until the pedals come to a complete stop When the pedals are sta tionary hold the handlebars or the handrails and step off the pedals HOW TO LEVEL THE ELLIPTICAL STRIDER If the elliptical strider rocks slightly on your floor during use turn one or both of the leveling feet beneath the rear of the frame until the rocking motion is eliminated Leveling Foot Leveling...

Страница 14: ... System which enables the console to accept iFit cards containing workouts designed to help you achieve specific fitness goals For example lose unwanted pounds with the 8 week Weight Loss work out iFit workouts control the resistance of the pedals while the voice of a personal trainer coaches you through your workouts iFit cards are available sepa rately To purchase iFit cards go to www iFit com o...

Страница 15: ...ed As you stride change the resistance of the pedals by pressing one of the numbered QUICKTOUCH RESISTANCE buttons or by pressing the QUICK TOUCH RESISTANCE increase and decrease but tons Note After you press a QUICKTOUCH RESISTANCE button it will take a moment for the pedals to reach the selected resistance level 4 Set a target stride length as desired The stride length meter in the center displa...

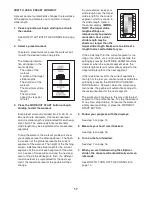
Страница 16: ...the console press the VOL increase and decrease buttons 6 Measure your heart rate if desired To use the included chest pulse sensor see page 11 To use the handgrip pulse sensor follow the instructions below Note If you wear the chest pulse sensor and hold the handgrip pulse sen sor at the same time the console will not dis play your heart rate accurately If there are sheets of clear plastic on the...

Страница 17: ...xt seg ment the resistance level of the pedals will then change As you exercise keep your stride length near the target stride length for the current segment which is shown in the stride length meter in the center display IMPOR TANT The target stride length settings are intended only to provide motivation Your actual stride length may be shorter or longer than the target stride length Make sure to...

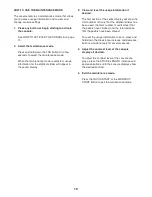
Страница 18: ...se and decrease buttons to adjust the volume level for the voice of the personal trainer 3 When you are finished exercising remove the iFit card Remove the iFit card when you are finished exer cising Store the iFit card in a secure place HOW TO USE THE SOUND SYSTEM To play music or audio books through the consoleʼs sound system while you exercise plug the included audio cable into the MP3 jack on ...

Страница 19: ...ormation if desired The first section of the center display will show the total number of hours that the elliptical strider has been used the total number of vertical feet that the pedals have climbed and the total distance that the pedals have been moved To reset the usage information to zero press and hold down the Resistance increase and decrease buttons simultaneously for several seconds 4 Adj...

Страница 20: ...clean the elliptical strider use a damp cloth and a small amount of mild soap Make sure to regularly clean the rollers and the track frame on which the rollers ride IMPORTANT To avoid damage to the console keep liquids away from the console and keep the console out of direct sunlight HOW TO LEVEL THE ELLIPTICAL STRIDER If the elliptical strider rocks slightly on your floor during use see HOW TO LE...

Страница 21: ...If your goal is to strengthen your cardiovascular system you must perform aerobic exercise which is activity that requires large amounts of oxygen for prolonged periods of time For aerobic exercise adjust the intensity of your exercise until your heart rate is near the highest number in your training zone WORKOUT GUIDELINES Warming Up Start with 5 to 10 minutes of stretching and light exercise A w...

Страница 22: ...lles Stretch With one leg in front of the other reach forward and place your hands against a wall Keep your back leg straight and your back foot flat on the floor Bend your front leg lean forward and move your hips toward the wall Hold for 15 counts then relax Repeat 3 times for each leg To cause further stretching of the achilles ten dons bend your back leg as well Stretches Calves achilles ten d...

Страница 23: ...acket 47 1 Tension Spring 48 1 Tension Pulley 49 1 Tension Bushing 50 1 Resistance Bar 51 1 Magnet Ring 52 4 Small Pulley 53 1 Drive Belt Pulley 54 2 Cable Spool 55 1 Spool Hub 56 2 Spool Bearing 57 1 Magnet Ring Sensor 58 2 Frame Bracket 59 1 Spool Axle 60 2 Front Handgrip 61 1 Hub Key 62 2 Foot 63 2 Leveling Foot 64 1 Bumper 65 1 Wiring Bracket 66 2 Spool Cover 67 1 Pedal Sensor Bracket 68 1 Cab...

Страница 24: ... 2 1 Snap Ring 118 1 3 4 Snap Ring 119 1 6 x 10mm Screw 120 4 3 8 x 3 4 Screw 121 4 3 4 Washer 122 4 3 8 x 1 Patch Screw 123 2 3 8 x 3 4 Patch Screw 124 2 3 8 x 3 Screw 125 1 8 x 35mm Screw 126 8 8 x 1 Tek Screw 127 4 1 4 x 3 4 Patch Screw 128 2 M10 Split Washer 129 1 Sensor Bracket Audio Cable Userʼs Manual Assembly Tool Note Specifications are subject to change without notice See the back cover ...

Страница 25: ... 29 29 32 33 37 38 37 38 79 87 87 87 87 89 89 26 27 27 30 30 31 31 36 36 69 70 71 71 72 72 73 73 73 86 86 86 86 86 86 86 123 123 120 120 120 120 127 127 108 108 108 108 107 107 107 107 104 105 90 91 104 105 90 91 96 96 117 117 60 60 95 95 128 128 121 121 121 121 ...

Страница 26: ...5 66 66 129 74 74 74 74 75 75 76 77 81 82 78 83 83 83 83 39 41 42 43 95 44 45 50 51 56 57 58 58 68 84 84 84 84 85 110 110 95 97 97 112 97 97 97 97 112 95 106 118 95 119 95 112 103 95 98 100 100 102 95 95 95 95 94 91 122 122 91 64 93 113 95 95 95 95 111 111 91 91 109 112 90 99 93 99 114 116 116 92 92 124 124 92 88 101 92 67 95 114 98 2 ...

Страница 27: ...EXPLODED DRAWING C NTSR01909 0 R0309A 6 7 11 13 18 10 12 8 9 14 15 16 17 5 22 22 23 23 86 86 86 86 126 125 126 95 95 95 86 86 86 86 86 86 95 95 86 95 95 86 94 86 86 86 86 86 126 126 115 115 115 94 115 115 ...

Страница 28: ...fically set forth above is authorized by ICON ICON is not responsible or liable for indirect special or consequential damages arising out of or in con nection with the use or performance of the product damages with respect to any economic loss loss of property loss of revenues or profits loss of enjoyment or use or costs of removal or installation or other consequential damages of whatsoever natur...

Отзывы: