©nomics s.a. Tous droits réservés
MU_Somnolter_NS22_REV 5_FR / 06-2017
1/2
nomics
Sleep & Breathing
Liège Science Park
4, Rue des chasseurs Ardennais
4031 Angleur (Belgium)
User Guide
Страница 1: ... nomics s a Tous droits réservés MU_Somnolter_NS22_REV 5_FR 06 2017 1 2 nomics Sleep Breathing Liège Science Park 4 Rue des chasseurs Ardennais 4031 Angleur Belgium User Guide ...
Страница 2: ......
Страница 3: ...of the apios software 8 Warnings and safety notices 9 INSTALLING THE SOFTWARE 11 System requirements 11 Installing the software 11 OPERATING THE RECORDER 12 Preparing a recording 12 battery 12 Calibration 12 Equipment check up 12 Carrying bag 13 Recommandations to be given to the patient 13 Installing the recorder 14 Installation of the mandibular lowering sensor 14 Installation of the nasal cannu...
Страница 4: ...ls 30 Navigator 32 Individual pane 33 Zoom Options 34 Moving 34 Keyboard shortcuts 35 Automatic analysis 35 Manual scoring 38 Analysis report 40 Configuring the software 40 Customizing the display 41 printing 43 Managing the recordings 44 Recharging the battery 44 Setting time of the recorder 45 Calibrating the recorder 45 MAINTENANCE 47 Service 47 Cleaning 47 Environnement 47 Disposal 47 TROUBLES...
Страница 5: ...teristics which permit the detection of respiratory events during sleep Mandibular movements derived from the lower mandible signal band pass filtered signal to display the oscillatory component of the signal Airflow respiration through a cannula connected to an auxiliary flow sensor Snoring inspiratory and expiratory vibratory signal from the nasal cannula Respiratory movements an accelerometer t...
Страница 6: ...try sensor Port for auxiliary sensor Catalogue number Serial number Batch number D Do not reuse Contains or presence of phtalates nasal cannula M Manufacturer Refer to operating instructions IP22 Protected against solid foreign objects of 12 5mm Ø and greater Protected against water droplets up to 15 of the vertical CXXXX Indication of conformity to the requirements of the European Medical Device ...
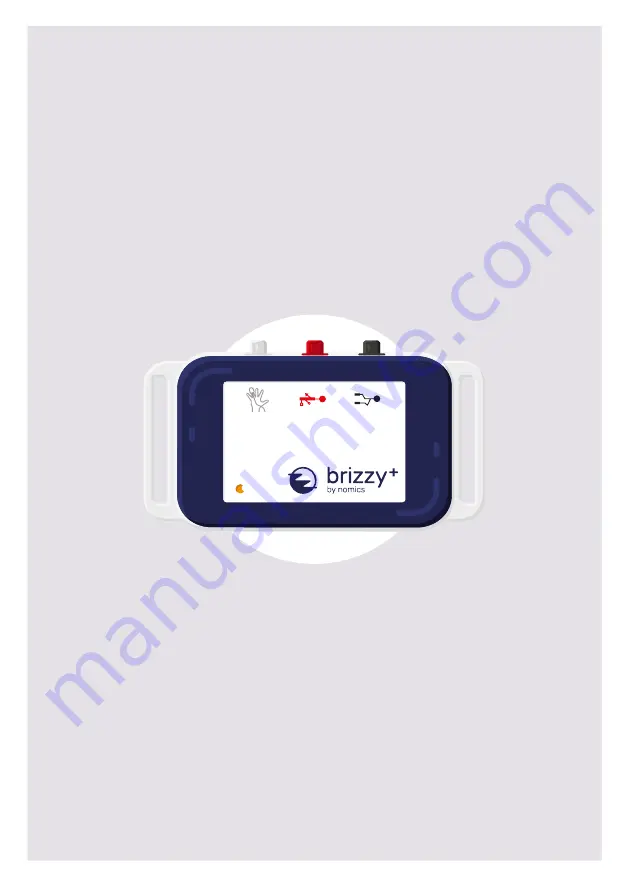
Страница 7: ...VERVIEW AND FUNCTIONAL DESCRIPTION BRIZZY consists of a recording device of sensors as illustrated above and of the APIOS analysis software A USB cable especially designed by Nomics to transfer the recordings onto a computer as well as several accessories completes the set ...
Страница 8: ...recorder NS405 Sensor for measurement of mandibular movement Distance Sensor calibration Tool TegadermTM fixation tape bands pack of 20 NS500 APIOS visualisation and analyse software available on the nomics website NS921 Special USB cable for data transfer NS920 Nonin Xpod pulse oximeter module 8000SM Soft SpO2 reusable sensor Nonin 8000SM NS962 Flow sensor module for nasal cannula connexion 15805...
Страница 9: ...he recorder If need be contact your distributor or the manufacturer who will tell you where to find the necessary documentation NASAL CANNULA Nasal cannulas are used to assess airflow from nasal pressure measurement They must be directly connected to the corresponding protruding endpiece on the flow sensor module connected on the auxiliary input of Brizzy RESPIRATORY MOTION SENSOR Brizzy incorpora...
Страница 10: ...ION OF THE APIOS SOFTWARE The APIOS software allows to program the start and end parameters of a record pre record patient information download the recorded data onto a computer and send it by e mail view the signals and start an automatic analysis of the signals define the beginning and end points of the analysis manually make or change markings generate an analysis report and insert conclusions ...
Страница 11: ... MRI environment The device is not defibrillator proof Do not immerse the device in water or other liquids or splash it Medical electrical equipment needs special precautions regarding electromagnetic compatibility EMC Information relative to EMC are given at chapter Technical Specifications Portable and mobile RF communications equipment can affect medical electrical equipment The equipment shoul...
Страница 12: ...he device to water or to moisture or operate it with wet hands Do not use if liquid has entered the device Do not subject the device to strong impacts Do not attempt to use or charge a damaged device the protective packaging of the battery could be ruptured or pierced and cause the battery to overheat ignite rupture or leak Do not use the device if the battery has leaked If fluid from the battery ...
Страница 13: ... or download it on the company website You will be informed of all the steps of installation by the installer Depending on the configuration of the computer the installation may take several minutes The driver is installed automatically during installation Once the installation is complete it is recommended to restart the computer Once the computer has restarted open the APIOS software and close t...
Страница 14: ...ecording CALIBRATION Calibration of the device should be performed if the device is used for the first time the mandibular movement sensor associated with the device is getting replaced The calibration automatically adjusts the recorder parameters so that they best fit the mandibular movement sensor in use The calibration procedure is described at the Calibrating the Recorder section of this guide...
Страница 15: ...sor from Nonin the recorder fastening belt Additional adhesive tape of hypoallergenic type can be added to hold the cables in place In addition to the diagnosis assistance of sleep apnea syndrome Brizzy authorizes a study under Continuous Positive Pressure CPP to measure the efficiency of a treatment In this case to record the pressure of the mask the nasal cannula is replaced by a pressure tube f...
Страница 16: ...osition the device must be well maintained and positioned at the front at waist level The front panel of the device must be visible with connectors on the top INSTALLATION OF THE MANDIBULAR LOWERING SENSOR Placement of the sensor on the patient s face is illustrated in the patient s leaflet One is simply reminded here that it is important that the probes be parallel and on the same vertical axis T...
Страница 17: ...n children or on pregnant or nursing women INSTALLATION OF THE OXYMETRY SENSOR Installation of the sensor is illustrated in the documents accompanying the sensor It is recommended to run the sensor cable along the arm under the pyjama top The finger on which the oximetry sensor is placed must be free of coloured nail varnish The 8000J and 8000SM SpO2 sensors from Nonin are reusable Consult their d...
Страница 18: ...necting the nasal cannula on the flow sensor has a notch which matches a bump on the corresponding socket on the device Once notch and bump are aligned push the connector in until locked in place Always handle accessories with care by firmly holding the connector between your fingers never pull on the wires ...
Страница 19: ...the treatment under CPP the nasal cannula should be replaced with a tube of pressure from the Luer Lock connector of the flow sensor Nomics reference NS962 to the CPP mask as shown in the figure below When connecting the pneumotachograph auxiliary sensor for flow rate measurement refer to the sensor s operating manual ...
Страница 20: ...mming of the recorder is required in this mode To launch a recording simply connect the mandibular movement sensor to the device The lighting of the LED indicates the correct device startup Throughout the recording period the light flashes To stop a recording simply disconnect the mandibular movement sensor from the device The indicator light will stop flashing and the device will return to sleep ...
Страница 21: ...grammed before recording Number of recordings Several Only one Download on a computer The device can contain several recordings It is strongly recommended to download every record before any new recording Patient s recording must be downloaded before any new recording Jawac sensor The Jawac sensor is used to start a new recording The device starts even if no Jawac sensor is connected Remarks The r...
Страница 22: ...ff The recording does not start Full memory Yellow light flashes 4 times The recording does not start Memory error Yellow light flashes 1 time The recording does not start Recording in process Normal conditions with distance sensor connected Green light flashes briefly once every second if the probes of the distance sensor are in the allowed range 3 to 9 Yellow light flashes briefly once every sec...
Страница 23: ...ns with the software Some operations execute through the USB cable especially designed by Nomics to connect the recorder to a PC For safety reasons it is strictly forbidden to connect the device to a computer while the patient wears the device The patient must be kept at more than 1 50m 5 from the device while the device is connected to the PC Do not hand the USB cable to the patient with the devi...
Страница 24: ...s window containing a list of records that have been downloaded or added manually 2 Import record allows importing data from a device 3 Prepare new record allows configuring the recording mode of the device automatic or scheduled and to record patient s information Remark The buttons are active only if a device is detected by the computer If the device is not recognized by APIOS click on the refre...
Страница 25: ...l recordings that are in the root folder The Default Root Folder is a parameter adjustable by the user Tools menu Options The records that are downloaded on the computer are automatically downloaded in the Default Root Folder The button with the magnifying glass icon in the lower right corner of the Record Window allows searching for records that would be found in a folder other than the Default R...
Страница 26: ...Import function of the File menu allows also access If multiple devices are used simultaneously make sure that effective means of patient device association have been implemented Each device contains an internal number This number appears in the import utility Check the start and stop date time of the recording If several records are present in the device memory select the record using the left an...
Страница 27: ...RD This step is optional By default the device is in automatic mode with starting of the record at the connection of the Jawac sensor and there is no pre recorded patient data If you want to configure your device before a new recording follow the steps described hereunder Disconnect all the sensors from the device Connect the device to the computer through the special USB cable To avoid any confus...
Страница 28: ...this device it will be displayed It is then possible to quit by clicking on the cross upper right corner of the window in order not to modify the data or to click on Start to continue the process and modify the data The first step is to pre register the patient data in the Patient Data window When importing the record this data will automatically be included in the report Once the fields have been...
Страница 29: ...Automatic with starting and stop at the connection disconnection of the Jawac sensor By default this mode is selected Click on Next to continue in this mode Scheduled with automatic start and stop of the record Check Programmed Mode Then choose the starting time and date and the duration of the record and click on Next ...
Страница 30: ...EV 1_EN 09 2019 28 57 The third step is to choose the Examination Type Check the appropriate type and click on Next The fourth step is to choose the auxiliary sensor that will be connected to the device Choose the sensor in the list and click on Save ...
Страница 31: ...S26_REV 1_EN 09 2019 29 57 Check that the programmed data is correct and wait for the data to be recorded in the device The message Device programming successful is dispayed if everything went well If data have to be modified restart the process ...
Страница 32: ...der and gives an indication of the airflow through the nasal cannula Nasal Vibration signal derived from nasal flow dimensionless Respiratory movements respiratory movements from accelerometer included in the device dimensionless SpO2 peripheral oxygen saturation in The SpO2 is measured by pulse oximetry Pulse Rate pulse rate in bpm The pulse rate is measured by pulse oximetry BPM for Beats Per Mi...
Страница 33: ...h finds its zero point in this reference value All you need to do is 1 Redefine the start and end of the analysis correctly 2 Manually move the horizontal line of the jawac s zero point to center it on the signal Note You can also let the analyzer define exclusion zones and manually reset only the zero point of the jawac Zero of the Jawac signal Period of awakening Starting point of analyses to re...
Страница 34: ...textual menu with the following options Right click option in the Navigator Choose the signal displayed into the Navigator Simply click on the signal name Define the start and stop points of the analyse You can place or move the analysis beginning and end points with this option Modify the visualization properties of the displayed signal See below the description of the scaling modes Hide Navigato...
Страница 35: ...ll displayed values in a moment defined by the pointer A double click on the header of the pane displays only the chosen signal A second double click displays all the selected signals Left click option in a pane Modify the visualization properties of the displayed signal By double clicking on a pane you modify the scaling applied to the signal see below description of Zoom Options Add modify delet...
Страница 36: ...der of a signal Magnifying glass or Zoom the signal Sights symbol Allows centring the displayed signal in the pane MOVING At each moment in the Navigator a blue coloured vertical band shows which portion of the recording is displayed in the individual panes below The user can move in the recording Moving Via the Navigator The navigation window which surmounts all panes displays the entire recordin...
Страница 37: ...you can find in the Help menu AUTOMATIC ANALYSIS The results of the automatic analysis of the data form a proposal for the assessment of sleep disordered breathing However the automatic analysis cannot substitute for a doctor s judgment and hence it is the operator s responsibility to evaluate the results and to seek advice from a specialist if necessary The algorithmic principles used by the anal...
Страница 38: ...wake and sleep are proposed to the user via Analysis parameters in the Tools menu These methods are described in the same document which gives the definitions and the algorithmic principles and which you may find in the Help menu of the software Some of these methods base themselves on the Jawac signal in order to detect wake Indeed the mandible behaves differently when the subject is awake or asl...
Страница 39: ...ecording The summary page Patient tab provides information on the validity of the signals used during the automatic analysis It is always important to check that the selected analysis parameters are based on signals with sufficient validity The analysis parameters a set of parameters for adults and another set for children are stored The report is generated according to the parameters defined in t...
Страница 40: ...ss the Delete key on the keyboard You may also right click on the marking to be deleted and then select Delete from the contextual menu To add a marking Open the Marking toolbox window View menu and click on the marking to be applied If the marking to be applied does not appear in the Marking toolbox click on the signal to be marked in order to adapt the list of possible markings to the signal in ...
Страница 41: ...e type of marking to be applied The complete list of possible marking types and the corresponding keys is given in the document that contains all keyboard shortcuts document to be found in the Help menu Note that not all marking types apply to all signals For example a desaturation can only be applied on the SpO2 signal The Marking toolbox window automatically displays the marking types which can ...
Страница 42: ...update the report click on the text in question or go to the Tools menu then Generate report Your contact information and or your logo can be inserted automatically into the header of the analysis report see section Configuring the software It is also possible to add your conclusions at the end of the report In order to do so click on the button with the edition icon located just above the report ...
Страница 43: ... signals Signal display configuration options are accessible through the Tools Options menu or by clicking on the symbol In the General tab of the Tools Options menu the user can choose The default signal displayed in the navigator and the default duration of page the displayed signals their order of appearence their height and colour ...
Страница 44: ...n the display The addition of percentages can be inferior to 100 Signals can also be resized by using the double arrow tool when signals are displayed Automatic resizing of all displayed signals Clearing the list of displayed signals Including or excluding a signal in the display Enabling automatic zoom in a clic ...
Страница 45: ...File menu to send a snapshot of the signals directly to a printer Use the Screenshot item of the Tools menu to save a snapshot of the signals electronically To print the report Select the tab Patient Use the Print item of the File menu to send the analysis report to a printer You may also use the button with the printer icon located just above the report You can obtain a PDF version of your report...
Страница 46: ...data interpretation for which you contact technical support it is recommended to compress the integrality of the patient folder where the recording in question is located and to send the whole folder To archive a recording you have to proceed manually On the computer you have to go to the root folder which contains the patient folder then move the whole patient folder towards an archive directory ...
Страница 47: ...s not necessary to calibrate the device at each use provided a particular recorder is always used with the same mandibular movement sensor However the device must be recalibrated in case a different mandibular movement sensor is associated with it Recalibration of the device can also help if a problem in acquisition of the Jawac signal arises see the Troubleshooting chapter Each time a new mandibu...
Страница 48: ...uring the whole calibration process If a calibration is started when the probes are not in the proper position this will result in incorrect mandibular movement measurement Recalibrate the device in this case During calibration the calibration tool should stand at a distance of at least 20cm 8 from any metallic object and from any other electronic device ex computer If you put the calibration tool...
Страница 49: ...utoclave The reusable sensors which come in contact with the patient must be cleaned disinfected in between each use Please follow the cleaning instructions given in the corresponding directions for use Nasal cannulas are for single use For hygiene reasons do not use cannulas which have already been used Dispose of them immediately after use The other consumables FlexiWrap tape strips must also be...
Страница 50: ...rding via the Send to from the Tools menu If necessary the technical service may ask you a remote access to your computer To allow access go to the Remote Support function from Help menu and contact the technician to communicate the identification code and password If the device needs to be sent to technical services for repair enclose all the sensors and accessories in the package in order to all...
Страница 51: ...cording Battery life depends on usage and several factors such as operating charging and storage temperatures If the battery has worn out contact Nomics or your local distributor There is no more space in memory for new data It is recommended to import the recording stored in memory before starting the next one This will free up memory space for new data On the reporting the Jawac signal appears c...
Страница 52: ...from the computer and replug it If it still does not work restart the computer and try again The date of start of the recording doesn t match what was expected The latest recording hasn t started and the memory of the device still contains the previous recording s Check that recording starts as soon as you plug in the sensor Start the recording again The device must be set to the right time Tools ...
Страница 53: ... that no other application is running On the recording the respiratory flow signal respiratory movement or oximetry has a completely flat profile or non physiological The sensor or cannula was not connected to the recorder Connect the sensor or cannula to the recorder The sensor plug is not fully inserted into the connector Push the plug into the socket The sensor or cannula was not correctly plac...
Страница 54: ...ries have been misused have been the object of abusive use or handling errors have been opened by an unlicensed staff member have been modified or taken apart Any damage inflicted on the product caused by force majeure e g fire etc or by inappropriate packaging when returning it to the sender normal wear and tear of the product and its accessories and disposables are not covered by the guarantee Y...
Страница 55: ...preserve battery performance long term storage of the recorder should be done at low temperature Transport temperature 10 C 14 F to 60 C 140 F Humidity 15 to 90 Recorder without auxiliary sensor Dimensions 85 mm 3 35 x 55 mm 2 16 x 16 mm 0 63 Weight 80g 2 8oz Power Lithium Polymer rechargeable battery Charging duration Between 3 and 4 hours for a complete recharge Autonomy full charge In recording...
Страница 56: ...Resonant magnetic field transducer Short 2 5ms magnetic pulses of 8kHz frequency and of very low energy are generated by the emitter probe of the sensor The signal received by the other probe is analysed in order to infer the distance d between them Measurement range 70mm 2 75 to 235mm 9 25 Resolution The numerical resolution on display is 0 1mm The resolution achieved in practical usage is linked...
Страница 57: ...r adults using the 8000AA Finger Clip Sensor in 70 to 100 range with 1SD 2 Sampling frequency 3Hz Conditioning 4 beat Average Pulse rate Measurement range 18 to 300bpm Accuracy for adults using the 8000AA Finger Clip Sensor no motion 3bpm Sampling frequency 3Hz Conditioning 4 beat Average Plethysmographic wave Sampling frequency 75Hz ...
Страница 58: ...compliant with the emission and immunity tests required by the standard EN 60601 1 2 2015 with the essential performance criterion listed above The table below shows all the tests and compliance levels Emissions test Conformity Emissions RF CISPR 11 Class B Harmonic Emissions CEI 61000 3 2 Not applicable Voltage fluctuations Flicker emissions CEI 61000 3 3 Not applicable Immunity test Conformity E...
Страница 59: ... time and with no prior notice changes or improvements to this document and or to the product accessories and or software this document describes Xpod and FlexiWrap are registered trademarks of NONIN Windows Windows Vista and Internet Explorer are registered trademarks of Microsoft Corporation The technology of the mandibular movement sensor by NOMICS is covered by an international patent For furt...