manualshive.com logo in svg
background image


4

3.3 Lubrication 

      Use motor oil or grease to lubricate all movable parts. 

3.4 Maintenance  of  battery:


Keep  all  the  screw  caps  on  each  cell  battery  dry  and  clean.  Each 

connecting terminal and cable terminal should be tightened and painted with clean grease. The 

exposed  connecting  terminal  and  connecting  rod  of  battery  should  be  covered  with  anti-slip 

insulated cover. 

3.5 Recharge the battery fully and carry out usual battery maintenance. 

Maintenance charge the battery every third month and check the fluid level. 


4    HOW TO CHARGE STORAGE BATTERY 


4.1 Charge storage battery when its voltage is less than 10 Volt. 

4.2 Please check the battery liquid before charging, if it is not enough, add some distilled water. 

4.3 The charging environment should be ventilated and far away from the fire. 

4.4 If the stacker not use for long time, charge it for not less than two hours every week. 

4.5 The voltage on the indicator should not be over 15 Volt when charging. 

4.6 Do not use the stacker when charging. 


5  CONTROL PANEL 


5.1 Urgent button 

When you press down this switch, it will switch off the power, and then  you turn it clockwise, it will 

switch on the power. 

5.2 Battery indicator 

It indicates the voltage of battery. When its voltage is less than 10 Volt, you should not use this stacker, 

you must charge it. 

5.3 Control stick 

This stick controls the forks to lower or lift. 

5.4 Charger socket 

Содержание SPM1516

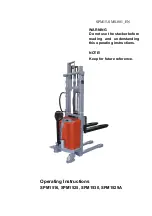
Страница 1: ...SPM15 SMS 001_EN Operating Instructions SPM1516 SPM1525 SPM1530 SPM1529A WARNING Do not use the stacker before reading and understanding this operating instructions NOTE Keep for future reference ...

Страница 2: ...for you to completely acquire and master the safety operation of the stacker Specifications of different types of the stackers are described in this Operation Instruction During operation and maintenance please apply the relevant parts for the type of the stacker All of the information reported herein is based on data available at the moment of printing We reserves the right to modify our own prod...

Страница 3: ...1440 4 4 Lift height h3 mm 1600 2500 3000 2900 4 5 Extended mast height h4 mm 1980 3020 3520 3420 4 9 Height of handle min max h14 mm 790 1156 790 1156 790 1156 790 1156 4 15 Fork height lowered h13 mm 85 85 85 85 4 19 Overall length L1 mm 1720 1570 1720 1580 1720 1580 1720 1580 4 20 Length to face of forks L2 mm 610 670 610 670 610 670 610 670 4 21 Overall width b1 mm 762 762 762 762 4 22 Fork di...

Страница 4: ...ibuted on the two forks do not use only one fork The center of gravity of goods should be in the center of two forks 2 11 Do not load over maximum capacity 2 12 Before using or charging it check cell liquid if not enough full it with distilled water 2 13 Charging should be in dry and ventilated location and far away from the fire 2 14 Keeping the forks in the lowest position if not using 2 15 At o...

Страница 5: ...e is less than 10 Volt 4 2 Please check the battery liquid before charging if it is not enough add some distilled water 4 3 The charging environment should be ventilated and far away from the fire 4 4 If the stacker not use for long time charge it for not less than two hours every week 4 5 The voltage on the indicator should not be over 15 Volt when charging 4 6 Do not use the stacker when chargin...

Страница 6: ...resulting from partial loading slanting to one side or over loading The fork was kept in the high position for long time with piston rod bared to arise in rusting and jamming of the rod The release valve of pump is not opened Replace with new one Keeping the fork in the lowest position if not using and pay more attention to lubricate the rod Check it if damaged replace with new one 5 Leaks Sealing...

Страница 7: ...6 7 Hydraulic Flow Diagram 8 Electric Wires Diagram 8 1 CIRCUIT DIAGRAM ...

Страница 8: ...7 8 2 CONNECTION DIAGRAM ...

Отзывы: