


}
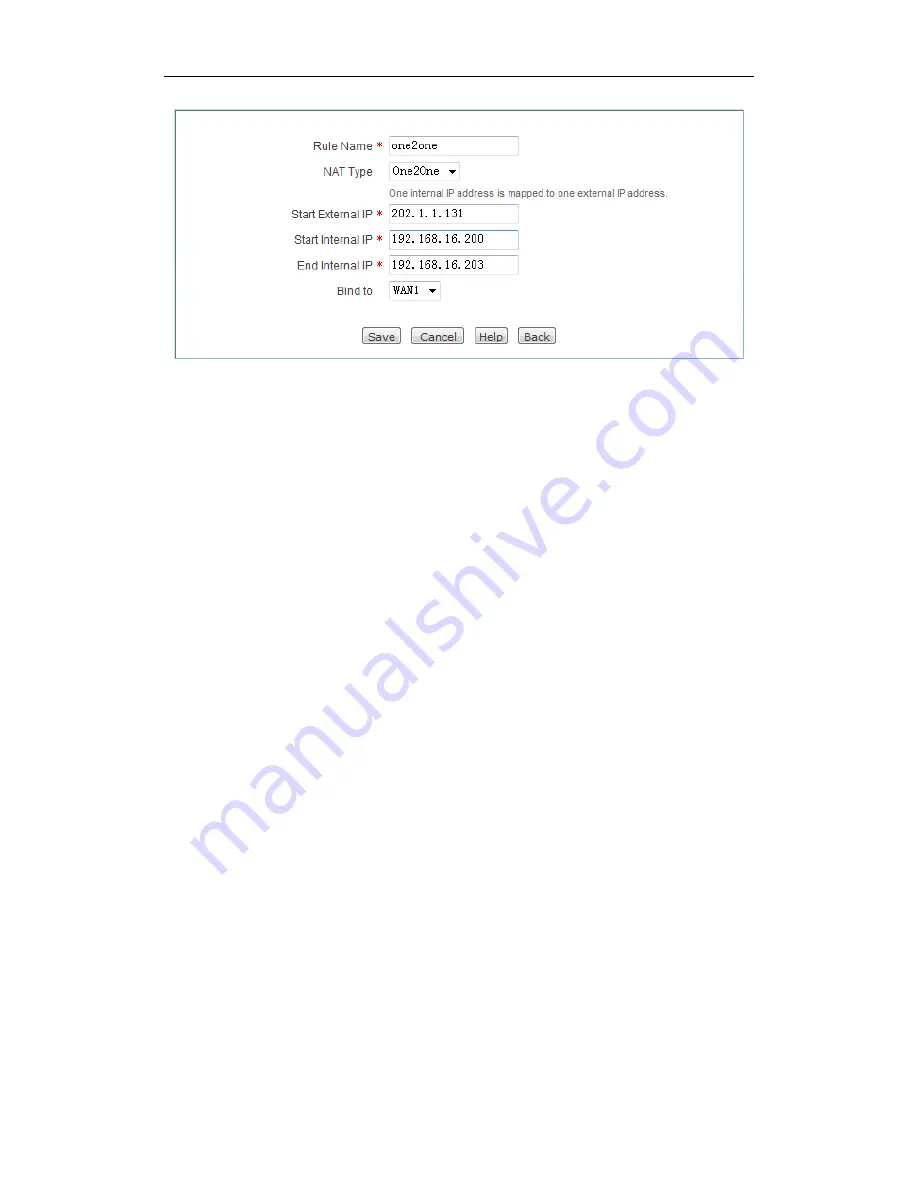
Figure 5-10 One2One NAT Rule Settings - Example
Step 3
Enter
202.1.1.131
in the
Start
External IP
text box, enter
192.168.16.200
in
the
Start Internal IP
text box, and enter
192.168.16.203
in the
End Internal
IP
text box.
Step 4
Select
WAN1
from the
Bind to
drop-down list.
Step 5
Click the
Save
button to save the settings.
Till now you have finished
configuring the NAT rule,
and then you can view its related configuration in
the
NAT Rule List
.
5.1.1.11.2 Example for Configuring EasyIP NAT Rule
(1) Requirements
In this example, an Internet cafe has a single Internet connection, and obtains eight
public IP addresses (from 218.1.21.0/29 to 218.1.21.7/29) from the ISP. Therein,
218.1.21.1/29 is used as the Internet connection
’s gateway IP address, 218.1.21.2/29
is used as the Device
’s WAN1 interface’s IP address. Note that 218.1.21.0/29 and
218.1.21.7/29 cannot be used as they are the subnet number and broadcast address
respectively.
The administrator want the hosts in the online game area (its address range is from
192.168.16.10/24 to 192.168.16.100/24) to use 218.1.21.3/29 to access the Internet.
To achieve this purpose, he should create an
EasyIP
NAT rule for them. The rule
’s
External IP Address
is 218.1.21.3,
Start Internal IP
is 192.168.16.10,
End Internal
IP
is 192.168.16.100, and
Bind to
is WAN1.
(2) Configuration Procedure
The configuration steps are as following:
Step 1
Go to the
Advanced > NAT & DMZ > NAT Rule
page, and click the
Add
button to go to the setup page.
Step 2
Enter the name of this NAT rule entry in the
Rule name
text box and select
EasyIP
from the
NAT Type
drop-down list, see the following figure.


