6
to
[●]
mark on the Hosing.
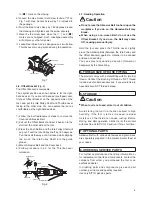
2) Loosen the Hex. Socket Set Screw found at "A" on
Fig. 7 with Hex. Socket Screw Key 1.5 included in
the package.
3) Twist the Rear Valve Ass'y by 180 degrees around
the Housing and tighten back the screw securely.
※
Never fix the screw back when the
[◯]
and
[●]
marks are not aligned. Such misaligned assembly
will not give you the full power.
※
Loose Rear Valve Ass'y is dangerous as it will allow
Throttle Lever moving around during the operation.
!"=>
!
"
Fig. 7
4-6. Offset Bracket
(Fig. 8)
The Offset Bracket is removable.
The original position as shown below is for the right-
handed user. If you are left-handed (southpaw) user,
first put Offset Bracket on the opposite side of the
tool, and put the Idle Pulley Shaft and Throttle Lever
facing to the other side. You can operate the tool as
comfortable as the right-handed does.
1) Follow the belt replacement steps to remove the
Cover and Abrasive Belt.
2) Pull out the Offset Bracket and put it back on to the
slot from the other side of the tool.
3) Press the Push Button and the Idle Pulley Shaft will
pop out. Twist the Idle Pulley shaft by 180 degrees.
Put it back all the way until it is locked while aligning
the pin on the Idle Pulley Shaft into the guide
groove.
4) Mount Abrasive Belt and the Cover back.
5) Follow procedure in 4-5. for the Throttle Lever
relocation.
?[
?
[
\
\
[\>
\
]]
Fig. 8
4-7. Sanding Operation
Caution
●
Do not press the Abrasive Belt too hard upon the
workpiece. If you do so, the Abrasive Belt may
break.
●
When using a non-woven Belt, do not use the
Offset Bracket. If you do so, the Belt may come
Off, causing personal injury.
Hold the tool and press the Throttle Lever. Lightly
press the Abrasive Belt (between the Idle Pulley and
the Offset Bracket) against a material to be sanded
and keep on sanding.
You can select any sanding direction (forward or
backward) by the Valve Ring.
5. THREAD SIZE OF HOSE FITTING
The product comes with a metal fitting with Rc (metric)
thread. Connect the Bushing R thread × NPT thread
included as standard accessories, if you would like to
have American NPT thread instead.
6. STORAGE
Caution
●
When tool is not used, store it out of children.
Avoid storing the tool in a location subject to high
humidity. If the tool is left as it is used, residual
moisture on the inside can cause rusting. Before
storing, and after operation, oil the tool at the air inlet
with machine oil ISO VG-10 and run it for a short time.
7. OPTIONAL PARTS
Abrasive Belt with various abrasives and grain sizes
are separately prepared in the market. Select them at
your needs.
8. ORDERING SERVICE PARTS
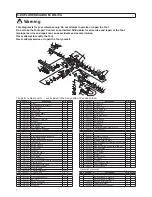
For further operational and handling information or
for replacement of parts and components, contact the
company from whom you purchased the tool or an
authorized dealer.
In ordering parts and components give each part
number, part name and quantity required.
Use only NITTO genuine parts.
Содержание Baby Belton BB-10A
Страница 9: ......


